

Getting started with watercolor painting
When just getting started learning how to use watercolors, it can be a little daunting knowing how to to create a painting. This watercolor painting tutorial gives you step by step painting instructions to help make watercolor painting easy.
Painting lemons in watercolor
We will be using lemons as our painting subject. Painting lemons is fun due to their bright colors, which can help you learn a good deal about color mixing!
I will share with you how to mix your colors and use water to your advantage to create soft edges. With that said let’s get started with the first step in this watercolor painting tutorial – creating a pencil sketch.
First I draw a pencil sketch of my painting
Here is my complete pencil sketch of the lemons and leaves. I do not draw out absolutely everything, but rather just the basic and most important elements. I think it is good to leave some things without a penciled in guideline. It leaves one to be able to be a little more free and experimental.


Starting the watercolor painting tutorial with the first spot of color
I start the watercolor painting tutorial, by adding watercolor on one of the central lemons in the painting. Then I mix a shadow color using cadmium yellow, cadmium red, alizarin crimson and ultramarine blue. After I mix my color, I load up my brush with water and a generous amount of watercolor paint.
Shadow of the lemon
I watercolored the entire left side of the lemon with my shadow color mixture of cadmium yellow, cadmium red, alizarin crimson and ultramarine blue to then mute the orange. However I made a slightly darker shadow color on the bottom part of the orange – I added a little more ultramarine blue to this area.


Add deeper shadow to the lemon
I added a deeper shadow on the bottom part of the left side of the lemon. To help make watercolor painting easy here, I moistened the area with a little bit of water so that it would take the color better.
Light areas of the lemon
Here, I then mix some cadmium yellow with a small amount of cadmium red to warm up the color. However, I make sure that the color I mix is very yellow and light. I then put a wash of this color over the right side of the lemon.


Transitional Color between Shadow and Light
I mix a lighter shadow color by mixing together cadmium yellow light and some cadmium red light to serve as a transitional color between the light part of the orange and the shadow area. Shadows are a big part of how to make our watercolor painting come to life.
To make the edge softer in our watercolor painting tutorial, I drag some water between the shadow area and the light area of the lemon.
Green Lemon Leaves
As you can see in the image here the edge between the shadow and light side of the lemon was made softer by putting water between the two edges.
I also added some green leaves by mixing together permanent green olive, pthalo green and ultramarine blue for the darker leaf area. Then I mixed permanent olive with cadmium yellow light for the lighter green area.
If you haven’t already – Grab my FREE Color Mixing Guide for help with color mixing techniques in your painting!


Another Leaf and Lemon
Here we add yet another leaf and lemon! For the lemon I created a shadow area by mixing cadmium yellow light, permanent carmine, and ultramarine blue.
Immediately after putting down my shadow color I mixed the lighter area by mixing together cadmium yellow light, cadmium red light and a small bit of ultramarine blue.
The dark leaf was created by mixing ultramarine blue with pthalo green, permanent carmine, and a little bit of ivory black.
Lightening and yellowing the Lemons
Next I give the lemons more color by adding more yellow. I mixed lemon yellow with water and put a wash over the right side of the lower lemon as well as the end of the upper lemon as seen in the image.


Dark Yellow Shadow
Then I work on the next Lemon towards the bottom part of our watercolor painting tutorial. I mixed cadmium yellow light with a small amount of sepia brown and ultramarine blue to create the shadow color you see in the image.
Also, I add some more leaves by mixing permanent olive green with cadmium yellow light. You can darken the green by adding a blue.
Wet in Wet
One very fun aspect to watercolor painting is that you can work wet in wet – literally! See the lemon on the bottom in the image. While the yellow shadow color was still wet I added in a reddish orange color.
This is a helpful watercolor painting technique as it helps to create smooth lines in your watercolor painting easily.


Spread out the Wet Color
As I just mentioned in the above watercolor painting technique of wet on wet. The red watercolor I apply I here I have applied onto wet watercolor. Because both colors were wet I was able to take that and spread the color out over the left side of the painting.
Medium Value in Lemon
Next I mix up a lighter value color that will serve as a transition between the light area of the lemon and the shadow.
I mixed together cadmium yellow light, small amount of cadmium red light and a small amount of ultramarine blue.


Adding in Light area of Lemon
Next we complete this lemon by adding some lemon yellow on the right side of the lemon. This creates the light area of the lemon.
Another leaf and Lemon
Next we add another leaf on the left side by mixing permanent green olive with cadmium yellow light.
Also, I add a bit of a lemon behind two leaves on the left. For this yellow I mix together cadmium yellow with sepia brown.


Darken the Leaf
I darken the leaf on the left side by mixing together pthalo green, sepia brown, and a little bit of ivory black.
Then I try to create a soft line with my watercolor painting technique, by putting water on the edge of the shadow area and the lighter part of the leaf.
Lighter leaf and dark Leaf
Then I add a lighter leaf on the left by mixing together permanent olive green and pthalo green – I use less color and more water to create a slightly ‘lighter’ color.
For the lighter left side of the leaf I mix together pthalo green and cadmium yellow light.


Shadow are of Lemon
Now I add yet another lemon towards the bottom area of the painting. I first mix up a darker color that will act as a shadow base – lemon yellow, little bit of pthalo green, and a little bit of cadmium red light. Once my color is mixed, I cover the right side with this color.
Creating deeper shadow in the watercolor painting tutorial
I then go ahead and mix up a deeper shadow color to put at the bottom part of the lemon.
To do so I mix up cadmium red light, cadmium yellow light, and a small bit of ultramarine blue. I go into it while the yellow I put on previously is still wet. That way a soft edge will be created.


Strong Warm Color
I mix together cadmium yellow light with a little bit of cadmium red light to create a bright yellow orange color that I add into the right lower part of my lemon.
Utilizing watercolor painting techniques here, I make sure that my color is going onto a slightly wet surface so that it will blend in well.
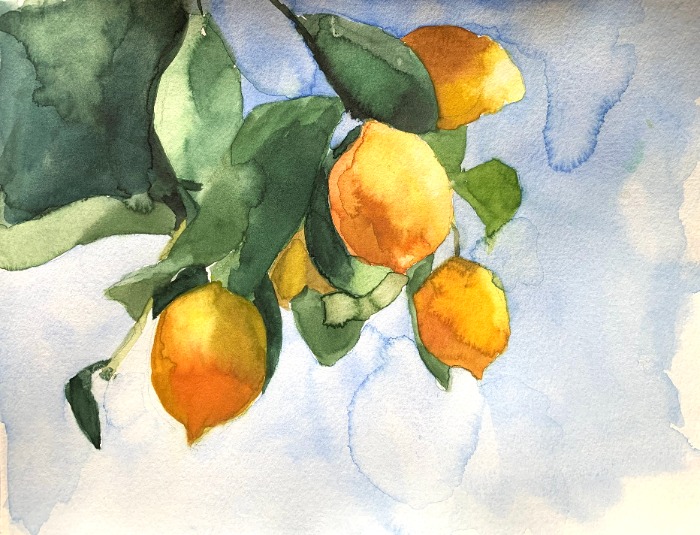
Paint in Dark Leaves
Now I add in some dark leaves in the upper right area of the painting. I mix together pthalo green, ultramarine blue, ivory black and sepia brown for the darkest part of the leaves.
Then for the lighter area in the upper right area I mix together pthalo green, olive green and a little bit of ultramarine blue. Be sure to put down these colors when the area is still wet so that you can create some soft edges.


Blue Sky!
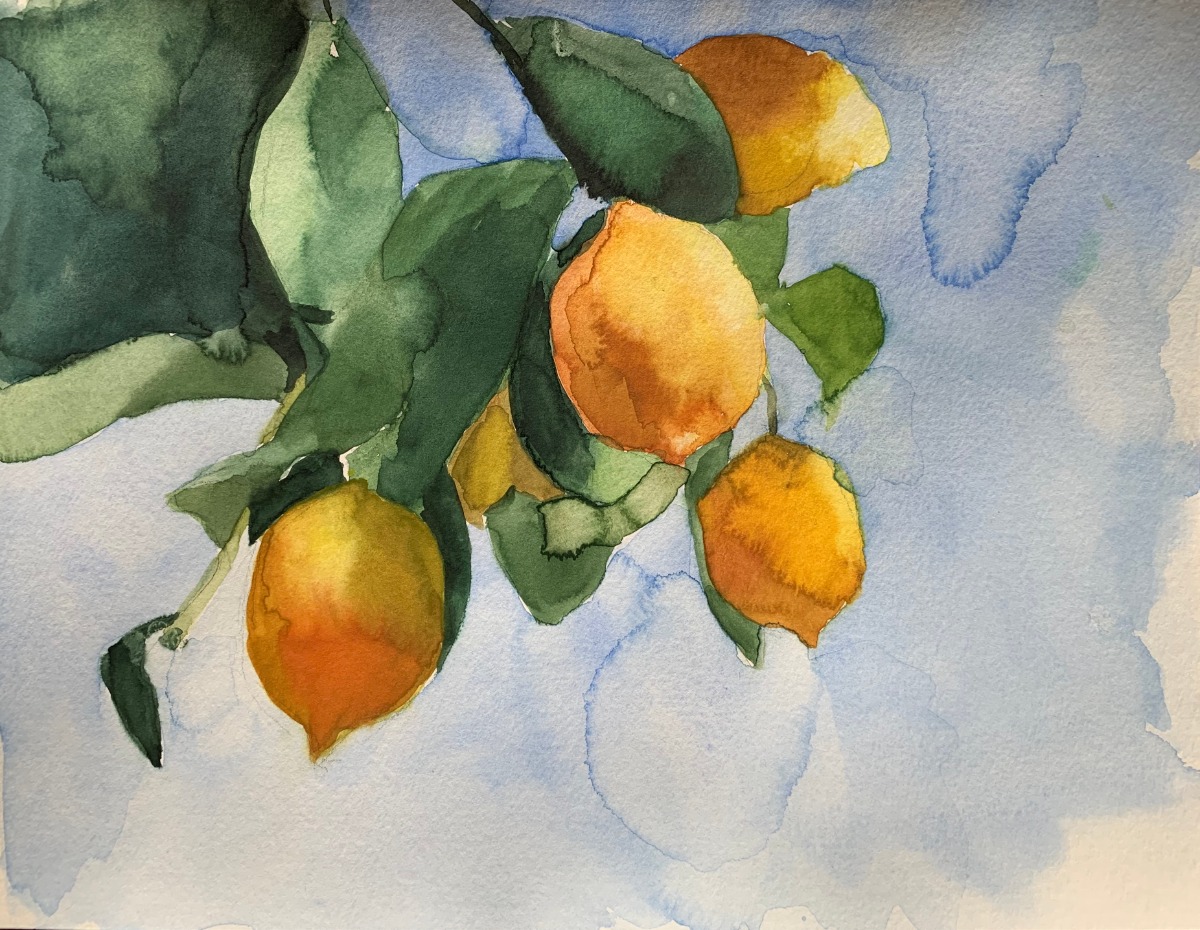
Lastly, I add in a blue sky. I grab a large brush and a lot of water and carefully brush ultramarine blue across the sky area. Making sure that I am careful not to paint the blue over the lemons or leaves. Then I try to make the upper part of the sky darker than the lower part.
Completing the watercolor painting tutorial
With the background covered with ultramarine blue, our watercolor painting tutorial is now complete. Using the watercolor painting techniques in this article, you can now apply the lessons learned to your next watercolor painting subject!
Further resources
Get more watercolor Insights with these 11 watercolor painting tips
Materials Used in the Tutorial:
Schmincke Watercolor Painting Set
This is a more expensive watercolor painting set but it makes beautiful colors and is what I used for the above tutorial. If you are looking for something a little less expensive, here is my list of the best watercolor painting sets.

Canson Watercolor XL Pad
Here is a very affordable watercolor pad. The same paper used for the above tutorial.


5 thoughts on “Watercolor Painting Tutorial – Step by Step Painting Lemons”
So lovely! I can´t sketch things so wonder if I could buy a template with your sketch? Of course only for training and personal use. Hard to follow the tutorial without the lemons. Thank´s for showing step by step and writing what you do.
Love your paintings and that you share how to do different techniques and using different materials.
Wonder if you could share your template of the lemons so that I can learn irl? Of course I don´t going
to sell it, just want to learn your terrific step by step tutorial. I´m no read and look-person I have to
try on papers.
HI Marie! Apologies for my delayed reply here. I do not have a template available with this tutorial. However, I will keep in mind making that available for future tutorials – I can see how that would be helpful.
How can I help me use my color pencils better . I have learned a lot from artiste on tv 20.3 Create Channel.
Now Create has Changed the times on tv Art shows n I do not like that.
Thsnks 🎨
Rita Hellmann
Colored pencils! Thank you for the idea, I will create some tutorials on colored pencils for this blog in the future. I am sorry to hear about the times changing for the create channel!