

Edges in art and painting are some of the most important aspects in an artist’s work. It may not seem obvious at first, but edges are what help to create seamless transitions in a painting. They are what bring depth, softness, hardness and everything in between. If all edges in a painting are the same, the result could be rather dull.
In this article, you’ll learn what edges are and how to use different types of edges to create beautiful transitions in your own work!
What are edges in art?
Edges basically are the hard and soft areas you will see in a painting – they are most clearly seen at color and value transitions. So, when a strong dark color is up against a soft light color the edges will probably be hard and stark. However, when one soft color meets another soft color of equal value then the transition will be a soft edge.
What creates different edges in a painting?
Transitions of Color
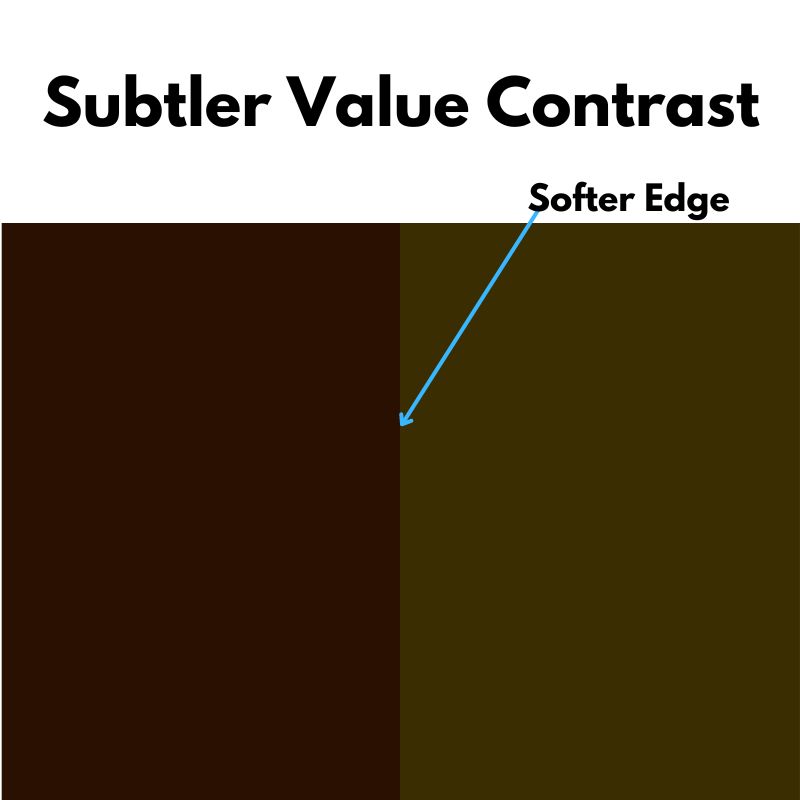
Where there is a strong color change the edge will be harder, and where there is a subtler color change the edges will be softer.
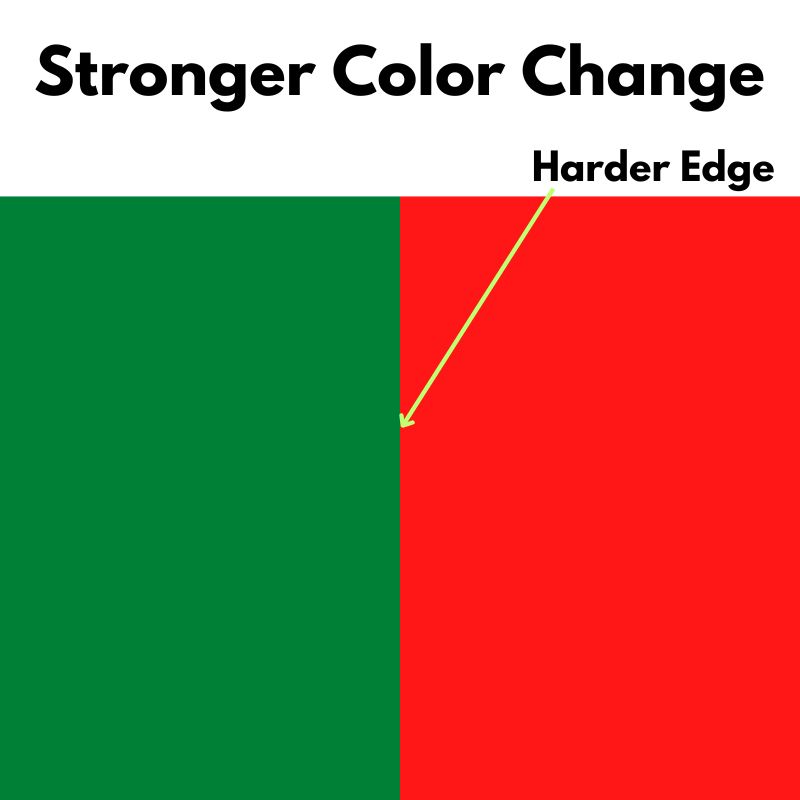
For example, if green turns into red – then the edge that you see between the two colors is probably a hard one. This makes sense as green and red are complementary colors and therefore completely opposite of one another.

However, when you place two similar colors next to one another, the transition is much softer between the two colors. For example, if a reddish orange transitions into a red, then the edge will be much softer.

If a blue transitions into a purple, the edge will probably be considered a ‘medium’ type of edge. Blue and purple are different colors but much more similar and closer together on the color wheel than green and red are.
Transitions of Value
Where there is a stark value change the edge in the painting will be harder. In contrast, where there is a more minor value change the edges in the painting will be softer.
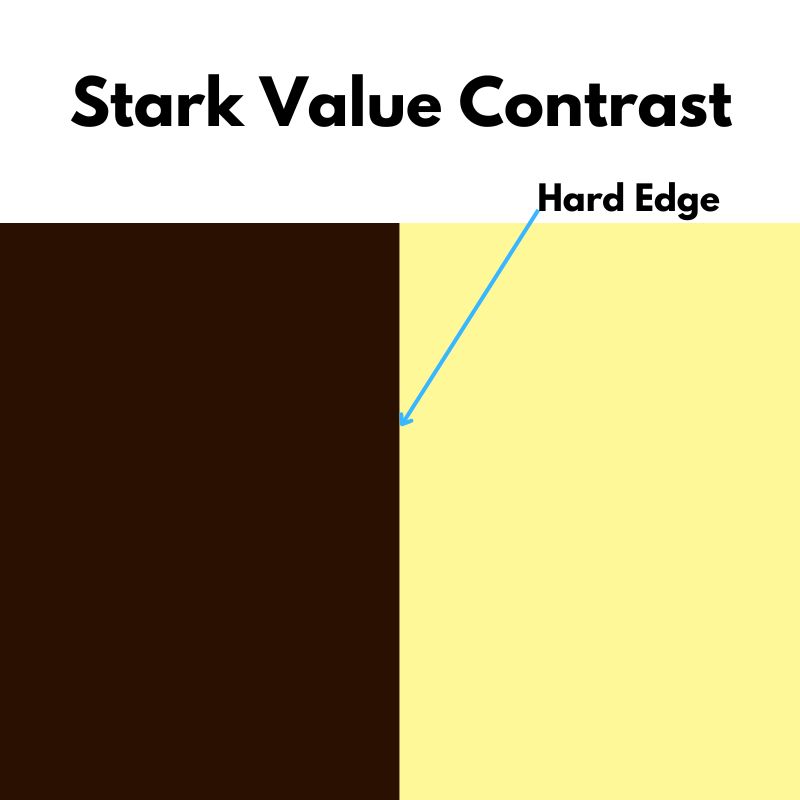
If a bright and light area of a painting meets a dark color, the edge between the two will be very hard. On the other hand, if two similar value shades meet, the edge between them will be quite soft. There are innumerable different edges in art that can come out of the varying degrees of values in a painting.
Examples of different types of edges
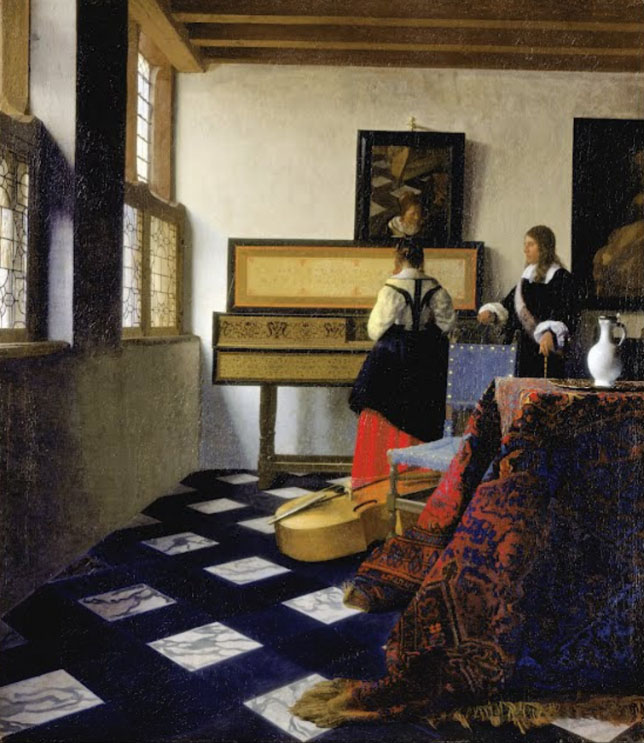
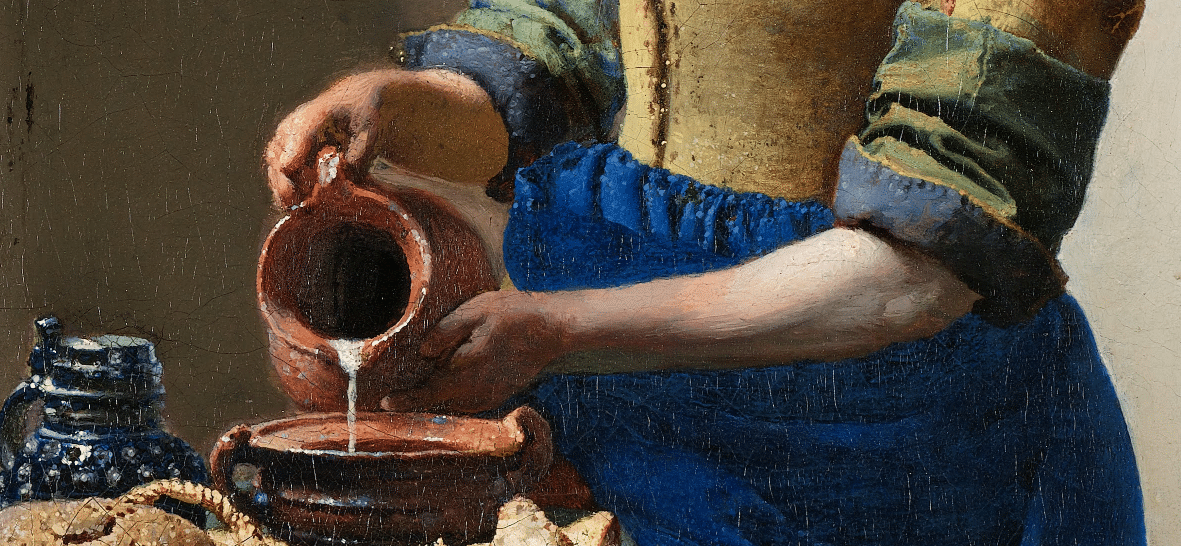
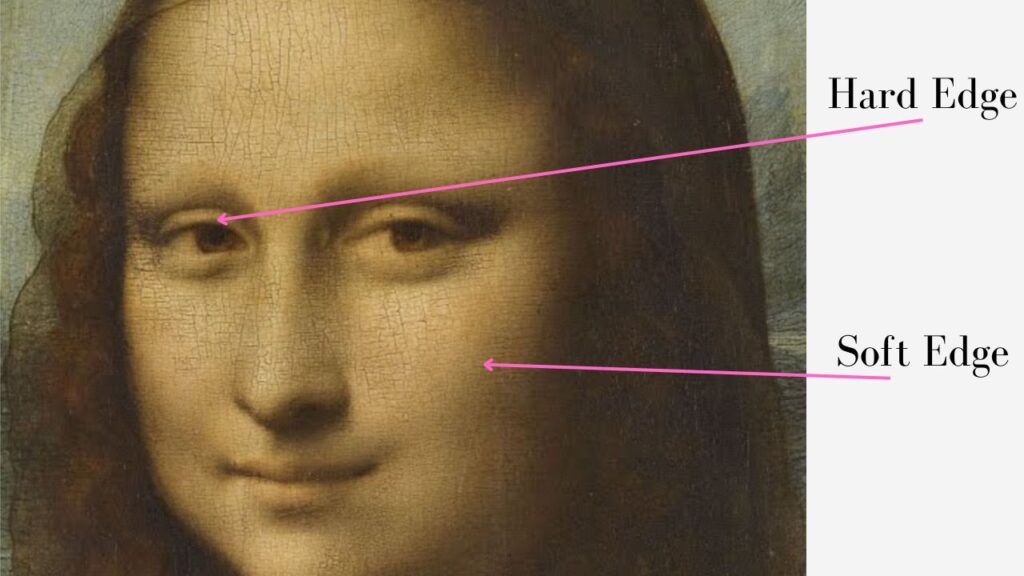
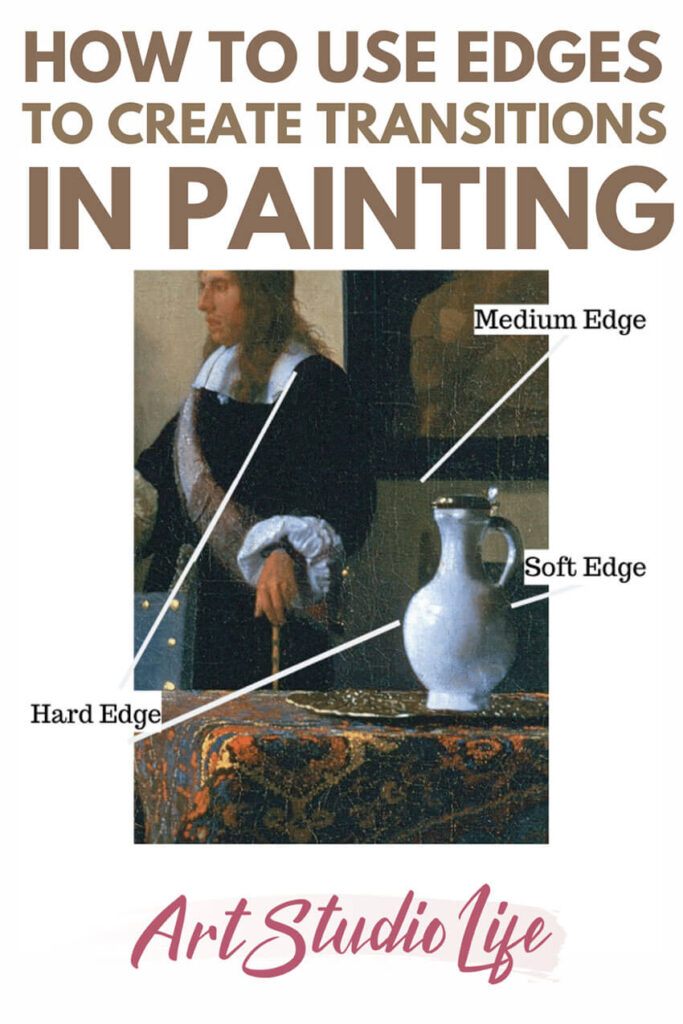
To demonstrate the different types of edges, we’ll be looking close-up at a detail in Vermeer’s ‘A Lady at the Virginal with a Gentleman‘. As it is a great example of utilizing edges in painting. If you roam around the piece you will notice all sorts of different edges that fall into every part of the spectrum. So, let’s take a look first at the hard edges found in the piece.
Hard Edges
On the left side of the jug you will see a very hard edge because of the value differences between where the jug ends and the background begins. The left side of the jug is the brightest area of the painting, while the background is much darker in value. Therefore, a hard edge in the painting is created.
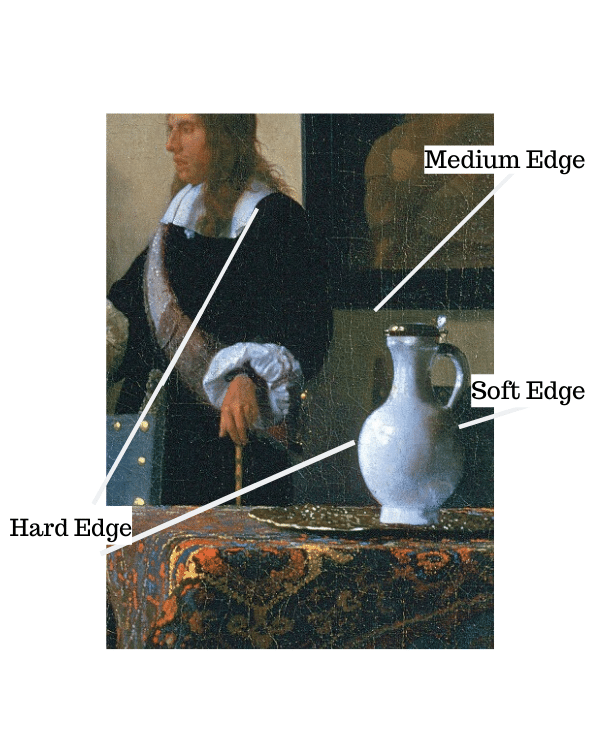
The same can be said of the area where the man’s white collar ends and his black shirt starts, as another hard edge is created here. Also, in the background you will see where the frame meets the wall is between a soft edge and a hard edge. The value differences between these two areas are not as strong as the hard edged areas. Also, the color differences between the two areas help to create the edge in addition to the value difference.
Soft edges
On the right side of the jug you will see the lovely soft edge of the jug. The colors are very similar between where the jug ends and the ‘bluish’ background begins. Also, their values are nearly the same. Because they are so similar, the soft edge here is incredibly soft and nearly imperceptible.
Lost and found edges in painting
Just as illustrated above with the hard and soft edges, some of these edges can also be called and referred to as lost and found edges in painting.
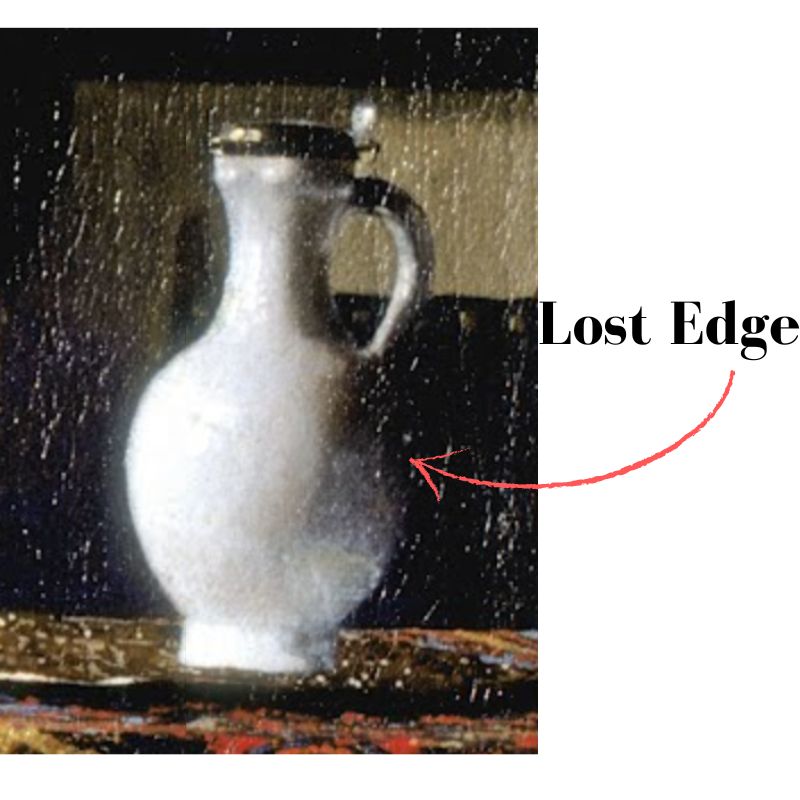
Take for example the very soft edge of the right side of the jug. The transition between the edge of the jug to the background is nearly nonexistent – that is you can barely tell where the edge of the jug stops and the background starts. Thus, moments like these can be referred to as a lost edges in painting. As your eye moves down the right side of the jug further towards the base, you will notice the lost edges reappear again. This is an example of a found edge. It was a lost edge but reappeared again.
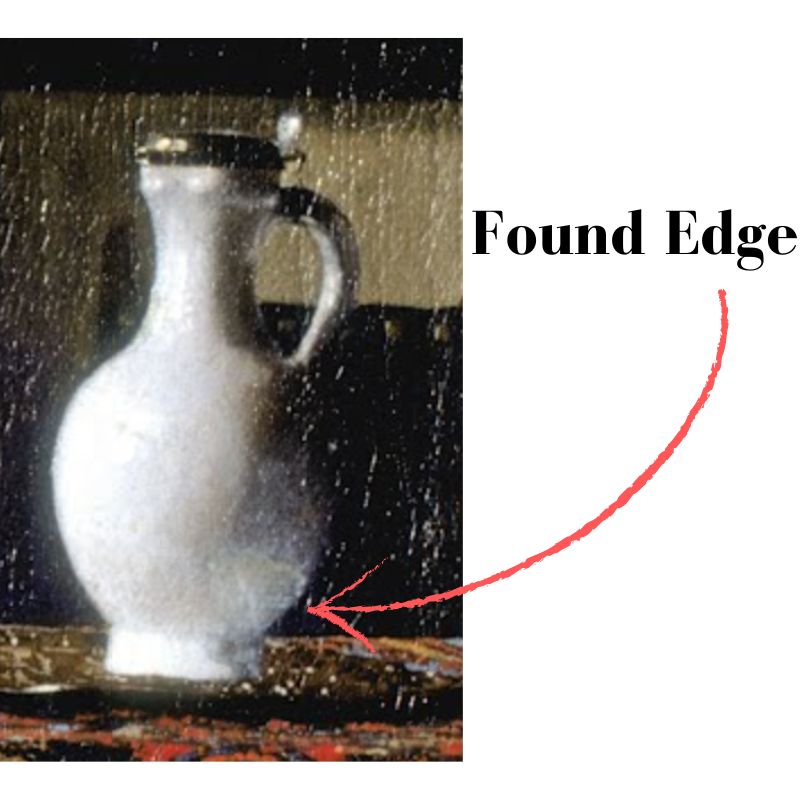
When incorporating lost edges and found edges into your painting, it is a complete delight for the viewer. It leads your eye in and out of different areas of the painting, experiencing the transitions between one color to the next. As you paint, try to find these subtle transitions of where disappearing and reappearing edges meet. Learning how to incorporate edges in painting, is among the top tips that will help make a painting more realistic.
How to create a sense of space using edges in your art
Edges in art are incredibly important when it comes to creating a sense of space in your painting. When wanting to create deep space and have your eye expand far back toward the horizon you must have soft edges where the land and sky meet.
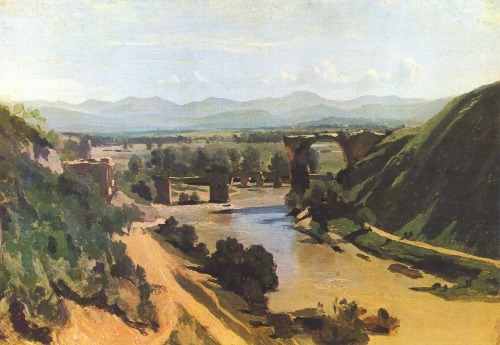
As you can see above in Corot’s ‘Bridge at Narni’ the edges between the mountains and the sky are very soft – they are the softest edges in the entire painting save for the clouds. Compare that to the foreground of the painting where we see sharp edges in the river where the water meets the dark green trees.
Hard edges move forward/ Soft edges recede
A rule of thumb is that sharp edges come forward, while soft edges recede back in space. If you want something to feel like it is in front, then create a strong value and or color difference. In landscape painting, this would typically occur at the foreground of the painting. If you want something to recede in space, then create a subtle color and or value difference.
Sharp edges and focal points
As our eyes go towards sharp edges first, sharp edges are used to create focal points in a painting. Take for example Jean-Simeon Chardin’s ‘Still Life With A Bottle, Glass, and Loaf’. Your eye probably immediately looked at the edge where the loaf of bread is set against the dark bottle. The loaf is very light in value while the bottle is dark. Therefore the edge between the two is quite stark and our eyes notice it first!
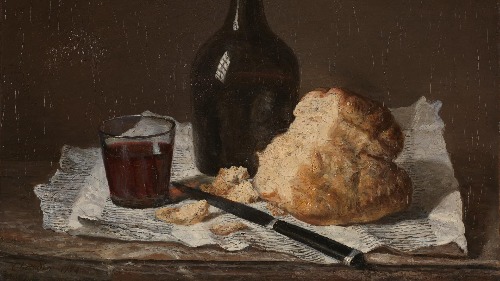
After looking at the bread and bottle edge, your eye then proceeds to go to the next sharpest area of the painting, until reaching the softest edge. This is a sign of a good painting – as your eye is led around the piece.
How to paint edges video tutorial
How to put it into practice
Look around you and try to pick out the hardest and softest edge areas – and all the rest in between. Practice being able to identify clear edges right away. Then, bring all that you learned in this article to your painting. Doing this will add a completely new dimension to your work. The best part in learning about edges in art and painting, is that it is a never ending process. There is always more to be discovered.
I hope this article was helpful to you! How to paint fog and mist is a great way to practice soft edges and lost edges being found again. Other articles like, how to paint a still life and seascape painting tips for beginners, give practical application advice and opportunities to practice different types of edges in art and your painting. If you have any questions or comments I would love to hear from you in the comments section below!


26 thoughts on “All About Edges in Art and Painting and How to Use Them”
Thank you so much. After reading this I can look around my “world” and see the hard and soft edges. How helpful. Sometimes soft edges occur simply because the colors are close. Sometimes they occur because the distance is so great from where I am.
Thats wonderful! Am so glad to hear that this article helped to see edges more, thanks for sharing.
Elizabeth,
On your recommendation (and others) I bought Schmid’s book “Alla Prima II”. In the first chapter he lists the 4 elements of a painting – color, value,drawing and …edges. I know about the first three – but never appreciated the importance of edges. Very helpful to see your practical examples and advice. thanks.
Jim
Thanks for sharing Jim – you are very welcome! Wonderful you have Schmid’s All Prima book. There are a number of gems in there. Very glad to hear that you are learning more and more about edges – paintings start changing and developing a lot when incorporating them.
Another marvelous, informative article. I don’t understand how you do it, but I’m glad you do. Much thanks.
Bill
Thank you for your kind words, I appreciate it! Am glad this article was helpful.
This is a good and timely topic for me, Elisabeth. Thank you for sharing your understanding of the importance of edges. I especially liked your time-lapse demo, which showed the amount of care and effort you put into getting your edges just right.
I’m working on a big painting now, and it will benefit greatly from this lesson.
Thanks again.
Am very glad to hear that the information here and demonstration was helpful. Thank you for sharing that. Edges make such an enormous difference and add great complexity and depth to a work. Glad you will be delving into them with your large painting.
Thank you, Elizabeth! I can’t wait to use these concepts in my abstracts!
Anne G
Hi Anne, That is wonderful! Glad to hear that.
Thank you for the refresher it was extra timely as I have returned to teaching Industrial Technology Metals at a nearby School. I have also volunteered to talk to the art students about my Landscape Paintings. I have taken the liberty of borrowing and condensing some of your work to show them in a slide show as well as taking in some of my art. I am enjoying the senior students, but my age is hampering what I do, as I am usually exhausted at the end of the day, I am showing my 75 years. I have had to reschedule the painting workshop in Binnaway until I can fit it in. The School at Coolah are having trouble getting a teacher for the senior students hopefully they find someone.
regards Warren
Hi Warren! Am so glad this was a good refresher. You must have a very busy schedule with now also teaching Industrial Technology Metals as well as also teaching painting. That is wonderful that you are able to use some of my work to help teach – glad to hear it is helpful. Hope you are able to find some time to rest as well in between and work on some of your own painting!🎨
I can imagine that it was necessary to reschedule the Binnaway workshop with everything that is going on.
Kind regards to you Warren!
Elisabeth
תודה רבה אליזבת יקרה
בבקשה 🙂
As I sit here I am now looking around finding the soft, medium and hard edges. You have the wonderful ability to explain things we see so that we can actually recognize what we are seeing. Thank you for opening my eyes to edges. It will help me tremendously
Hi Shawn, Thank you for your kind words – am very glad that this was helpful for you!
אליזבת יקרה
תודה רבה על הצגת הנושא ,ההדרכה והבהרות המועילות
יום נפלא
רותי כהן
רותי יקרה,
כמובן! זה העונג שלי – אני כל כך שמח שהמידע הזה עזר לך. מאחל לך יום נפלא.
אליזבת
אליזבת יקרה
תודה רבה על ההבהרות המועילות
יום נפלא
רותי כהן
Opened my eyes to a whole new way of seeing edges in paintings as well as real life.
Hello Beth – so glad to h ear that. Thanks for sharing!
So, so happy to read that. Edges is something I do instinctively, never put words on it and often wondered should I or I could but?….your explanation is so clear, wonderful guide. Going back to work with a precious guiding. Thank you so much.
Hello Masti, Glad to hear that this guide to edges was helpful for you! Edges are really amazing and really fun to work with in a painting.
Pingback: 5 Realism Painting Tips - Art Studio Life
That’s a whole world..the world of edges….and who knew!!!😃
Yes! There always seems to be more and more to see and learn when it comes to edges – an endless fascinating world!