Painting a portrait can sometimes feel intimidating when approaching the portrait as a whole… but what if we could break it down a little bit? That’s why I wanted to focus in on how to paint a nose and demonstrate how you can break down a particular portion of a portrait painting. By doing so, it can help you to gain some understanding of how to paint a portrait in a more bite sized format.
As you go through this nose painting tutorial and learn how to approach the process of painting a nose. It can help you to gain some understanding of how to paint a portrait in a more bite sized format. Since the principles involved are the same!
How to paint a nose (video guide)
Watch how to paint a nose in action in the video tutorial directly below. Then scroll down the article to see step by step process images, with color mixing instructional guides for painting skin tones.
Nose painting reference image
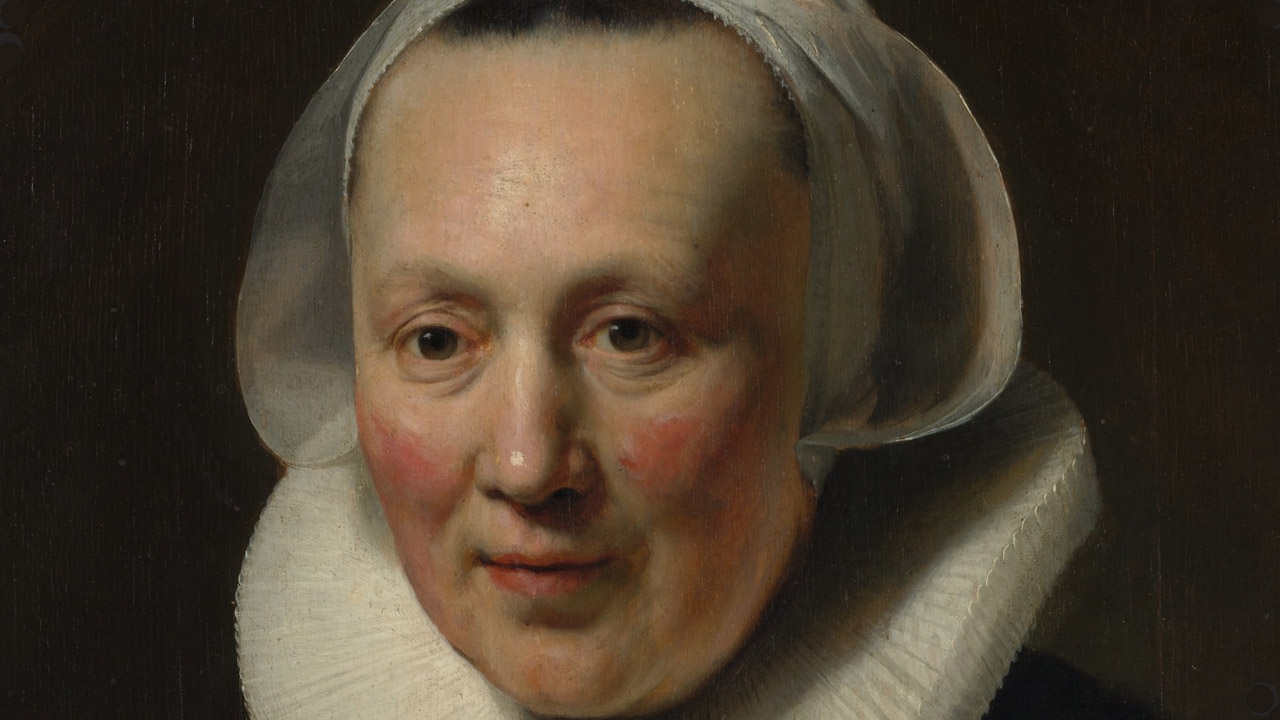
I did a little copy from one of Rembrandt’s self portrait paintings to create this how to paint a nose tutorial. Reference the image below to see the painting I deconstruct and study from. Follow along and learn some important principles in portrait painting!

How to paint a nose for beginners
The first thing I do before mixing any colors is to sketch out the nose I will paint. Sketching out your painting is very helpful as it gives you an idea of what you will be painting and where it will be placed on your canvas. This sketch does not need to be perfect as you will be adjusting it throughout the process of the painting.
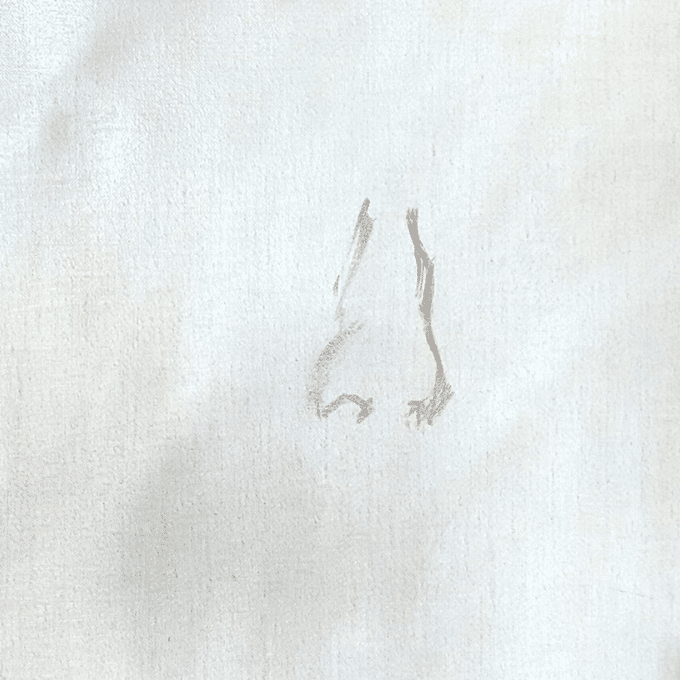
How to mix your first three color values
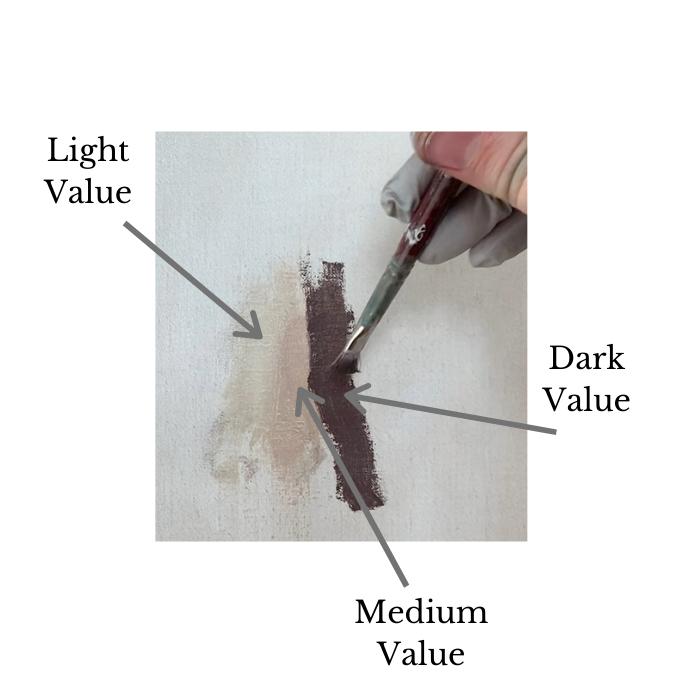
No matter what you paint it is to your benefit to start your painting with a strong sense of light and dark. Therefore, I commence my painting with three main values – dark, medium and light.
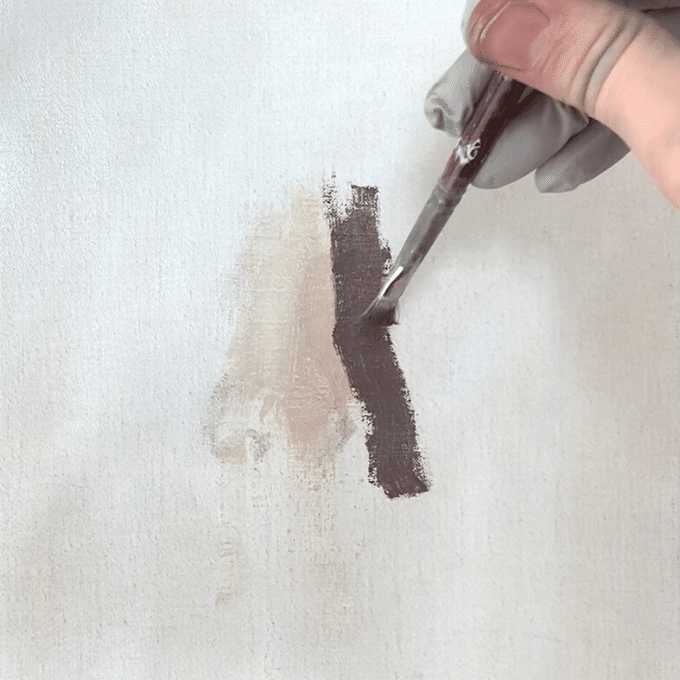
Doing this ensures that your painting will have a strong sense of light throughout the process of your painting. Notice in the image below that all of these values are next to each other. This creates a “convergence of light and dark values”. Meaning that you paint an area that has all three values meeting and coming together in one place!
Color mixing chart demonstration
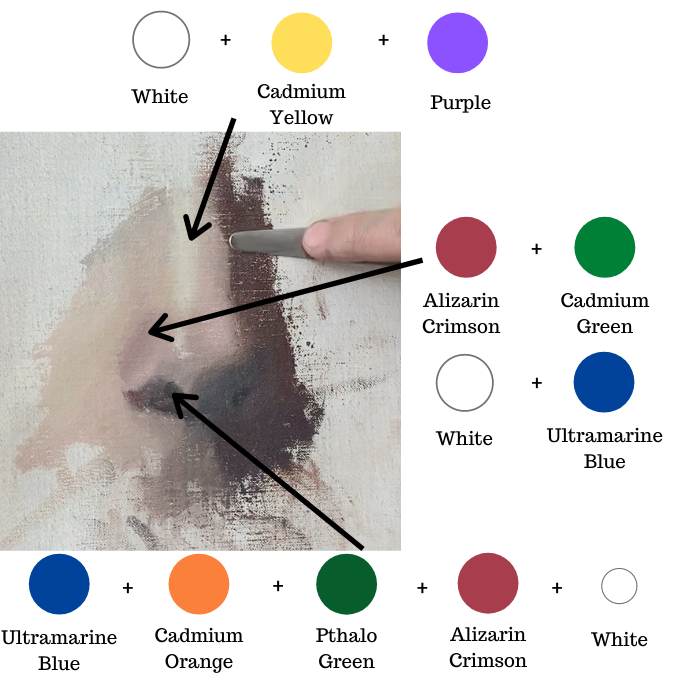
So, how are these light, medium and dark value colors created? It is important to always think of value first when mixing colors. Take a look at the color chart below to see the colors we want to create for the nose painting.
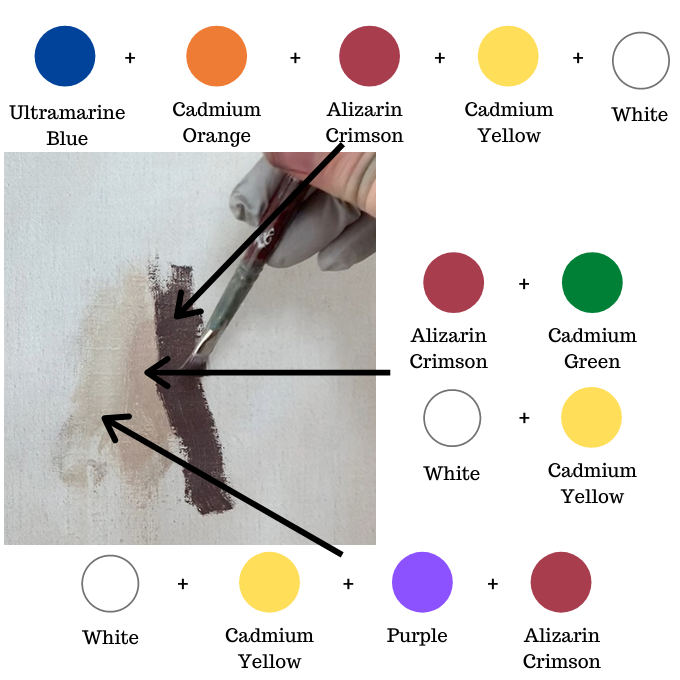
On the upper part of the color chart above you can see that I start to mix the dark value by grabbing ultramarine blue. I do this because it is a darker color in value to start out with. The blue is then muted by mixing in a little cadmium orange, along with some dark Alizarin crimson, in order to make the color warmer in temperature and slightly purple. A small amount of cadmium yellow is added to mute the purple a little bit (since yellow is the complementary color of purple). Lastly, a small amount of white is added to the color to lighten it just slightly.
Creating edges in a nose painting
Edges in painting, generally play a crucial role within a painting. However, they play an enormous role in portrait painting and when painting noses 🙂 There are so many subtle things that happen in a portrait painting and edges allow us to show those subtleties.
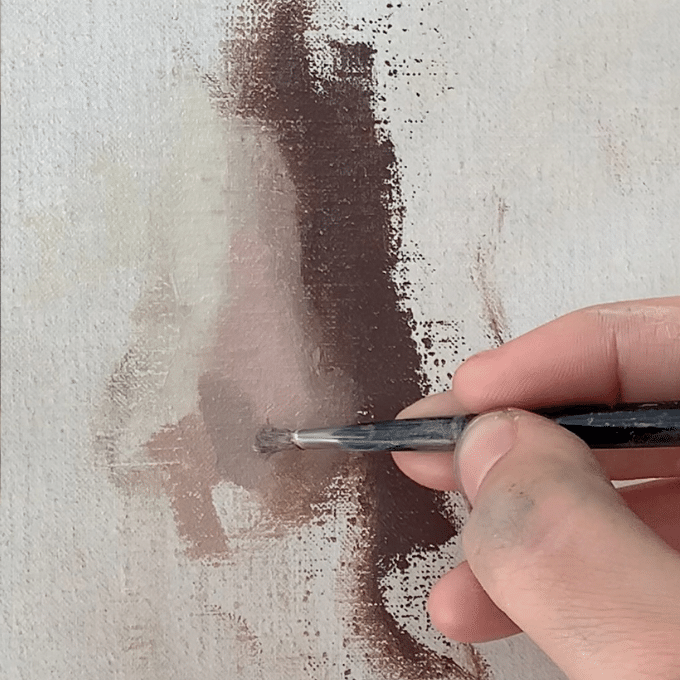
In the image below you can get an idea of some of the edges that are present at this stage of the painting. It is important to pay attention to edges at every stage – but especially in the beginning.
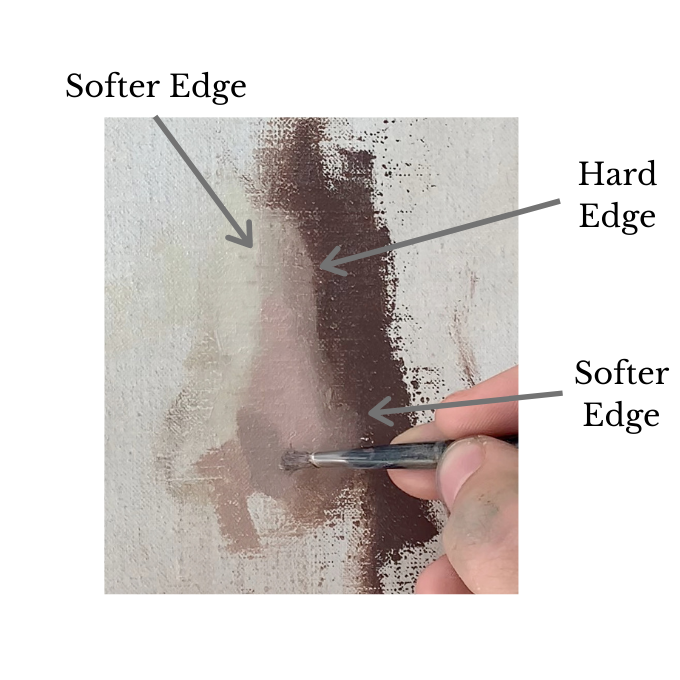
The more similar the values the softer the edges will be. Likewise the more different or contrasting the edges the harder/ sharper the edges will be.
Arranging multiple spots of color
How and where you arrange the spots of color within your painting, is important for how it will eventually turn out! As the painter Charles Hawthorne put it “Let color make form, do not make form and color it”. So what does that mean… let’s take a look.
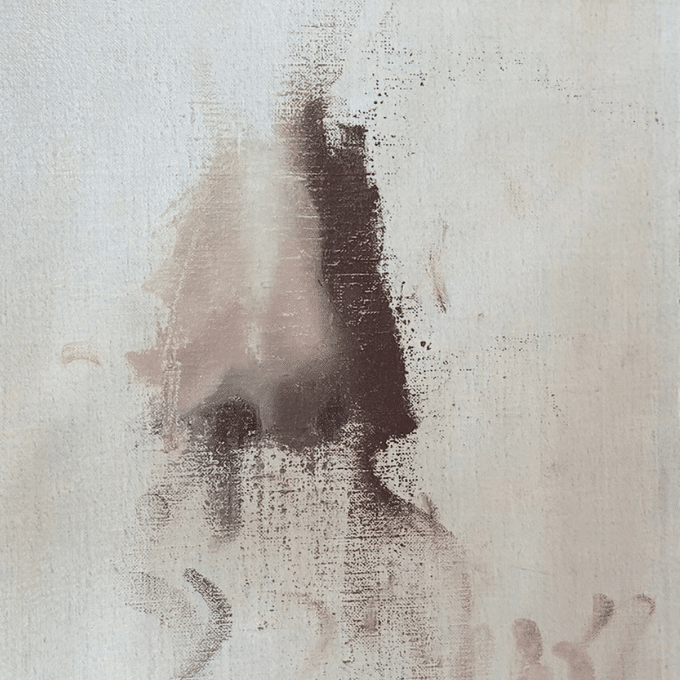
It is the arrangement of your color spots that will make a nose painting feel 3 dimensional and convincing. Concern yourself much more with mixing up the colors and values you see than trying to create a nose. If you pay attention to just painting the color spots you see – everything else will fall into place.
How to paint a realistic nose by creating volume
There are numerous factors that help us to create volume in a painting. Edges play a big role. Softer edges will make an area feel further back in space while sharper edges will make an area come forward.
So, as we work here on how to paint a nose that has a sense of volume. I make sure that the lower right side of the nose has a soft edge and disappears into the background shadow area. Then in contrast, the left lower side of the nose has a sharper edge where the light highlight is. These two very different kinds of edges help to create a convincing sense of space.
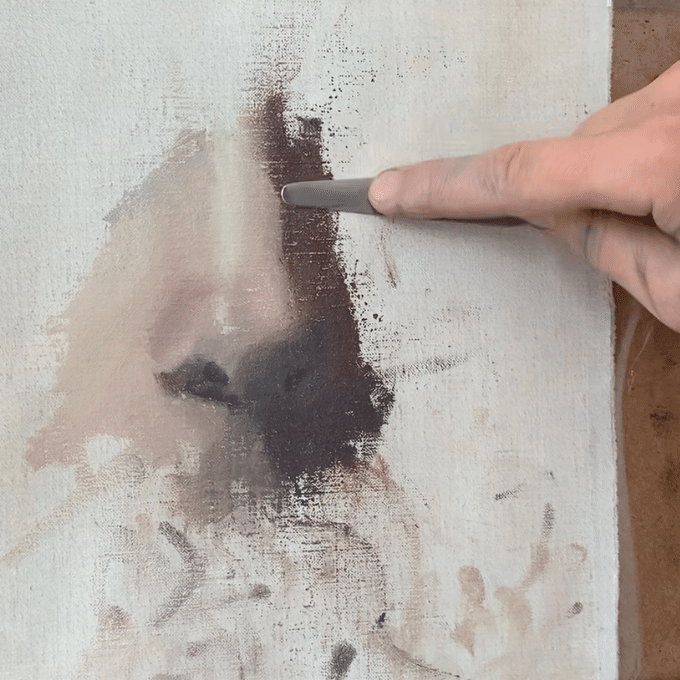
Below you can see the color mixtures involved in getting some of the colors at this stage of the painting. Some of the mixtures can be similar throughout the process of the painting. You will be surprised how many different colors you can get by simply varying the amounts of certain colors you use. So, experiment with mixing in different amounts and eventually you will get the color you want!
How to paint beyond the nose
Eventually you will want to move beyond just painting the nose! Even though I highlight how to paint a nose in this tutorial, it is important to not think of it as a separate part of the rest of the face. Try to think of the nose (and every other facial feature) as a piece that belongs to a whole. When painting a portrait your goal will be to make everything feel like it fits and works together well.
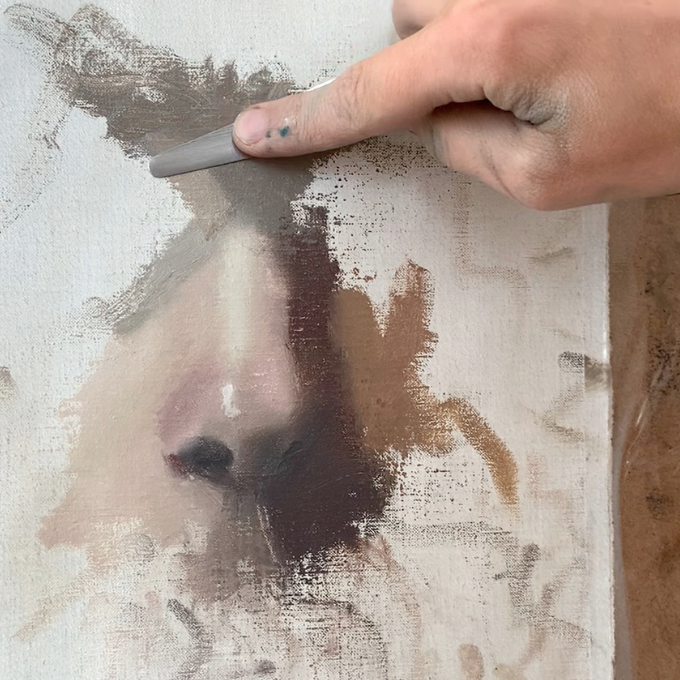
If we were to continue to create a full portrait painting. We would continue to paint the rest of the face, by placing the next color spots right where we ended the nose. It is important to not leave a gap and start painting the rest of the portrait in a different area. You will not be able to establish a good color relationship between the two different areas this way, if you think of them and/or work on them, separately.
Our color choices are influenced by the colors we place them next to. So, if you don’t continue your painting directly where you completed your nose then your painting will turn out less cohesive.
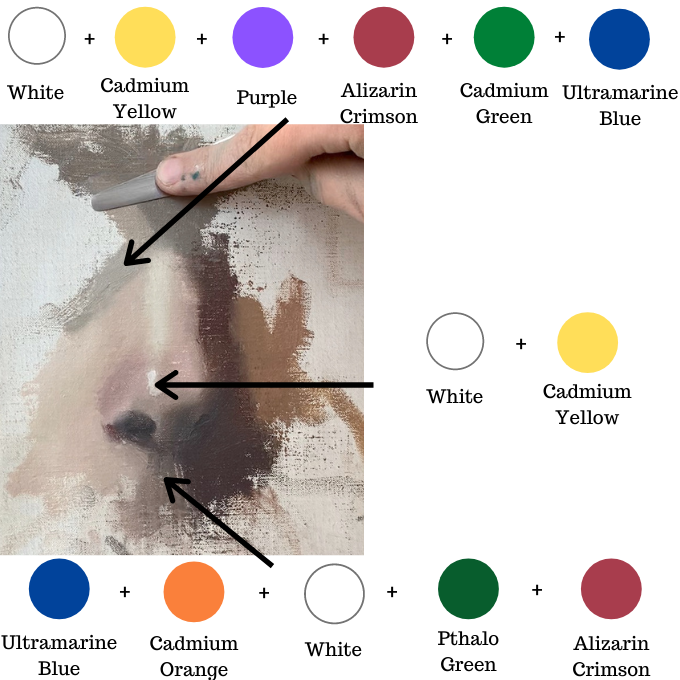
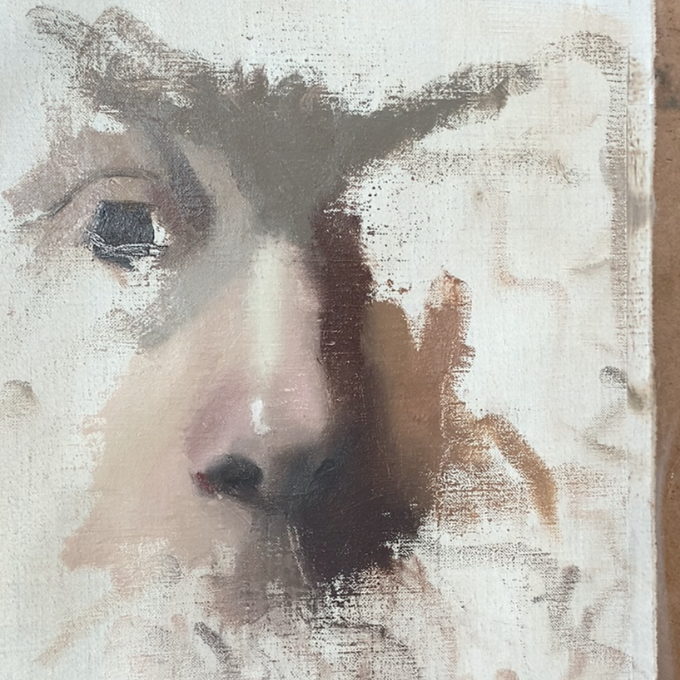
Speaking of color, above is a color chart showing some of the mixtures at this stage of the painting. Including the colors involved in mixing up a transition color at the top part of the nose. This area eventually leads to the eye seen in the image below.
Now Over to You! What’s next?
I suggest you do some bite sized portrait painting studies to practice painting a nose yourself! You can use a mirror to paint your own nose, or choose a master painting like I did. I highly recommend looking at Google arts and culture, to view some high resolution reference paintings that you can use to create studies from. I guarantee you will learn something!
Have you tried painting a nose with success? What have you struggled with… Scroll down a bit and let me know in the comments below!
Want to remember this? Save How to Paint a Nose to your favorite Pinterest board!



11 thoughts on “How to Paint a Nose (Portrait Painting Tips) with Charts for Mixing Colors”
אליזבת יקרה
קראתי שוה את ההדרכה לציור אף
אני בדיוק מציירת אף לפי אור וצל ,וההדרכה שלך מועילה מאוד
ואיכותית
תודה רבה
רותי כהן
Another wonderfull tutorial
If you haven’t already, try Elisabeth’s on line course.
Through Elisabeth verbalising the process as well as the clear reasoning during her demos, revealing each decision making behind each action, it helped me understand some fundamental aspects that may seem small and incremental aspects of painting, but they carry great importance and can actually stand between a good result and a disappointing one.
Thank you so much Elisabeth.
Hi Florentina – I am just now getting caught up on comments here – so sorry for not seeing yours here sooner! Thank you so much for your kind review here 🙂
I had seriously painted “nose- less” portraits of grandchildren because I could not get it right! Today I started with the nose and your guide. Thank you!
That is so great Janet! Thank you for sharing! 🙂
Great tutorial ! Has certainly enlightened me on the use of colours and shading. Thank you.
Happy to hear that Sybil! Thank you for sharing 🙂
This is an awesome tutorial Elizabeth. Thank you. I never realized how many colours are in a nose. You are certainly a master of mixing colours. Louise McIntosh
Good to hear from you Louise! Glad that you enjoyed the tutorial! Yes it is quite fascinating how many colors are needed for painting the nose and the rest of a portrait. It keeps color mixing interesting! 😉
אליזבת שלום רב
שמחת י לקבל את ההדגמה. מעולה
ממחישה מעשית איך לעשות
אני אוהבת את הדרך שאת מציגה את הרעיון ויישום
אשמח לקבל עוד הדגמות
את נפלאה
בהערכה וידידות
רותי כהן
תודה רבה ששיתפת את רותי אני מאוד מעריך את זה! אני תמיד כל כך שמח לשמוע שההפגנות וההוראות מועילות. אני בהחלט אעשה עוד הדגמות. בקרוב עוד יגיע 🙂 שוב תודה רותי על דבריך הטובים