Mounting canvas to board is an essential process for preparing a painting surface properly. In the video below, I show the best and easiest way to do it! Scroll below the video for supplies list and additional written instructions.
Supplies Needed for Mounting Canvas to Board
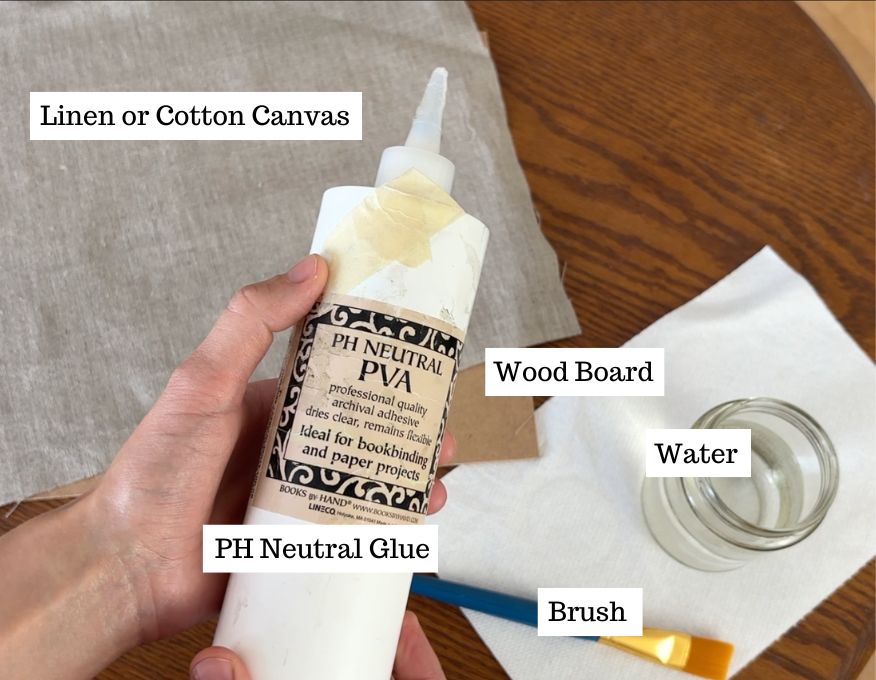
Mounting canvas to board requires just simple materials that you may already have in your studio. However, it is very important that you do use the proper materials:
- Acid free glue – this is very important as it will help your artwork to be more archival and prevent any yellowing from happening
- Wood board or panel for painting
- Linen canvas slightly larger than size of board (primed or unprimed)
- Brush for spreading glue
- Jar of water
- Not pictured: Box Cutter
- Not pictured: Cutting mat or surface

You can use either primed or unprimed canvas for this process. When using unprimed canvas you will just need to prime your surface before you start painting.
Applying Acid Free Glue to Board
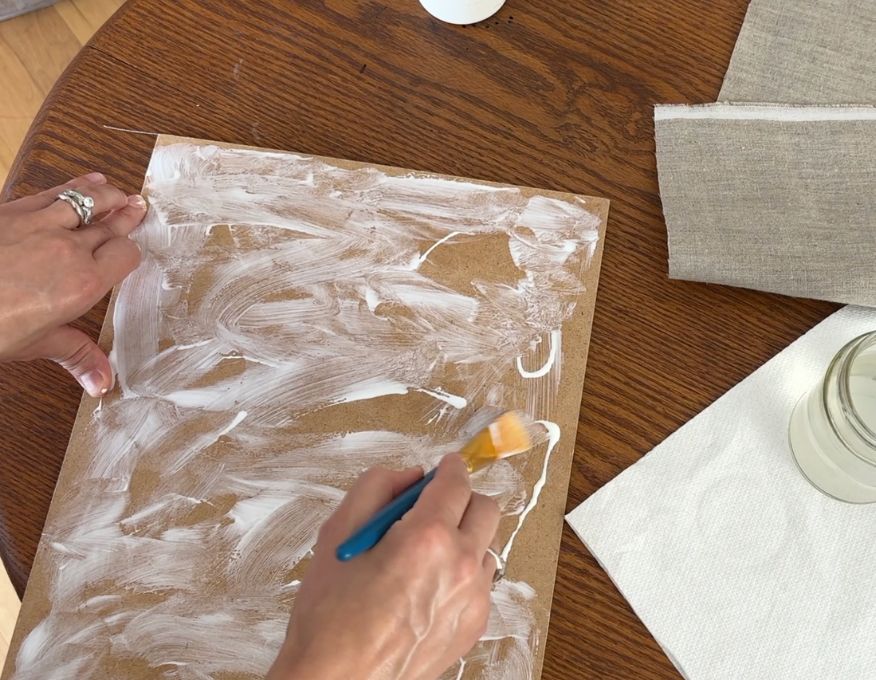
Working quickly, drizzle glue over the entire board. Attempt to cover the surface evenly and reach the corners and edges. The goal is to have the glue even spread out over the entire board. This will result in the best surface to mount your canvas on. However, don’t spend too much time on this step as the glue will become dry and gummy quickly.

Spread Glue Across Board
Dip your brush into a very small amount of water and brush the glue evenly over the entire board.

Mounting Canvas on Board
Lay the canvas over the glued side of the board. Make sure that the entire surface is covered. Use your hands to glide and press down on the board from all directions. This will ensure that the canvas adheres tightly to the board.

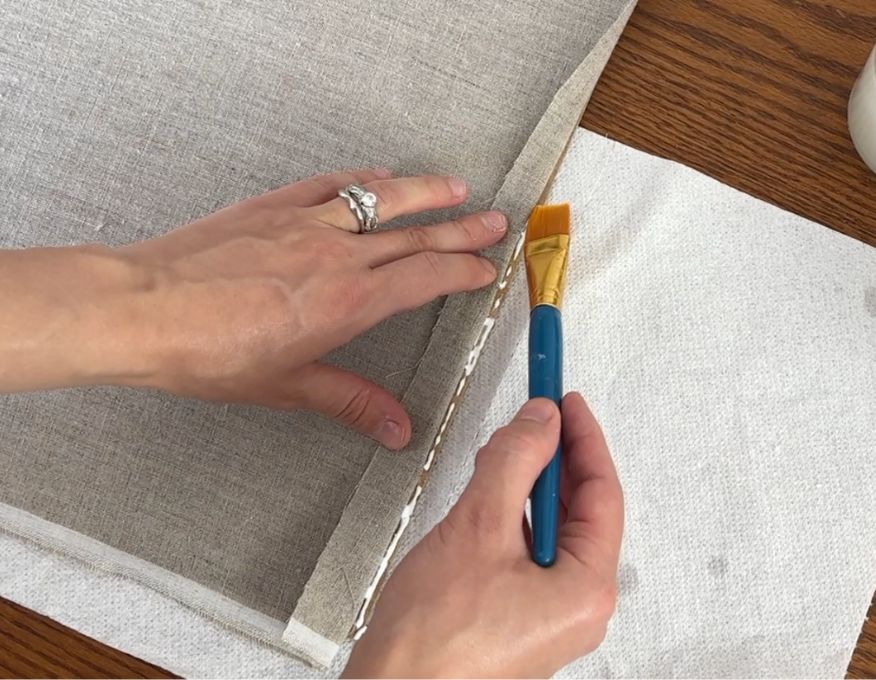
Apply Glue to Edges
It is inevitable that some edges will need some more glue. It is important that the corners or edges of the board do not have any loose fabric.
Once you are done gluing, allow your mounted canvas to dry completely. Depending on if your glue dries clear or not, you will be able to easily tell when it is ready for the next step.

Cut Remaining Canvas
When the mounted canvas is done drying, grab a box cutter. It is important that your box cutter is as sharp as possible. Press the blade right next to the edge of your board and press down and start cutting the linen from the edge of the board. Try to make as clean an edge as possible.
Repeat this step for all sides of the canvas until you are done. If you have any fraying happening, then use the acid free glue to lay them down. You will be able to make a very clean and professional edge.

Ready for Gessoing and Priming
Your mounted canvas is now ready to start gessoing the surface to prepare it for painting!

This process is a great way to create a professional painting surface. It also allows you to more easily frame your work. You can apply this to both primed and unprimed canvas. Be sure to watch the video for a more detailed explanation of the process.
Love to hear about your own process of mounting canvas, scroll down and leave a comment for me below!
Want to remember this? Save How to Mount Canvas to your favorite Pinterest board!


10 thoughts on “Mounting Canvas onto Board: How to Mount Your Own Canvas”
Hello Elizabeth: I really enjoyed the video on placing linen on a hard surface. I have a piece of metal that I thought of covering. Would it work on that surface? Also, can one put more than one layer of linen on a given surface? Thank you.
Hi Yolanda, So glad that you enjoyed that video! Good questions. I have never mounted linen to aluminum panel but you should be able to do it. However, I think you might want to sand the side that you intend to glue and attach the linen to – this will help the linen to stick better. This would just be a little sanding (perhaps wear a mask while doing so) and then wiping any any dust with a damp cloth. You can and still should use ph neutral PVA glue to attach the linen. I personally wouldn’t put more than one layer of linen. You could experiment to see if you like the surface that way or not. However if your desire is to have a thicker linen then I would look into a heavier weight of linen instead of doubling. I hope that helps!
Do you ever have trouble with the board’s warping?
Can you do large boards your way? (eg: 24×36”?)
What is the board called that you use?
Hi Anne, That is a great question. A board will warp less when mounting canvas to board versus gessoing directly onto the board. You most certainly can use this method for larger boards – I have done it and it works well. However, if mounting canvas to a larger size then I would recommend gessoing an x on the back of the board – from one corner to the next – this will ensure that no buckling happens. If it is especially large and your board is on the thinner side it might be good to create a cradled support on the back as well. The necessity of this will depend on the thickness of your board and materials etc. But you might consider marking the back of a board with gesso with sizes 16 x 20 in and up.
The exact board that I use here is a 9 x 12 in richeson hardboard. This particular one isn’t as sturdy as Ampersand museum series panel – which I recommend the most!
Thanks for this demonstration. It’s very helpful.
You are very welcome! Glad to hear that 🙂
Hello Elisabeth,
that is a very good method and save space.
So far I did the same method with non-woven wallpaper, (180gr/m2)
Is that also suitable For greater formats?
Hello Chris, yes! Mounted canvas does save space compared to stretched canvas. Haven’t ever tried painting on non-woven wallpaper – but it is definitely possible as long as the surface is prepared if you are working with oils. It might be a little trickier to use with larger formats as the wallpaper could more easily buckle with a larger surface area. Canvas might be easier to mount for a larger format. The only thing to keep in mind with mounting larger paintings onto board is shipping – if you don’t have to worry about ever needing to ship your large mounted painting anywhere then its not an issue. Otherwise, if its a large painting that might need to be transported long distances then it being ‘rollable’ is very very handy!
I’ve been painting on 6×6 and 5×7 canvas boards. Preparing for a fall outside Christmas market. But huge problem getting these littles framed. Too thick for picture frames. Too thin for floating frames. Extremely hard to find inexpensive but good looking frames. Custom is waaaay expensive. PS, don’t put them behind glass. Will damage with contact.
I love those sizes. One place to look for small sized frames are thrift stores – sometimes you can find very nice ones.