

When we think of watercolors we usually think of using a watercolor pan set or using watercolor paints from tubes. However, there are other less traditional items that can be used in lieu of real watercolors. Instant coffee is one of them and is where this painting with coffee tutorial comes in!
Real watercolors certainly have other ingredients in them such as binders (gum arabic) and fillers, but the main ingredients are just pigment and water. In this case, instant coffee would be the pigment (a sepia color) and then a cup of water would be added to the mix. Then voila! You have yourself some watercolor paint just using items found in your kitchen.
Painting with coffee materials list

- Instant coffee
- Watercolor brush (you can use just one or have 1 larger one and 1 smaller one for some variation)
- watercolor paper
- Small plate or saucer to use as a palette
- Cup to hold water
- Pencil for sketching
Choosing your subject & painting surface prep
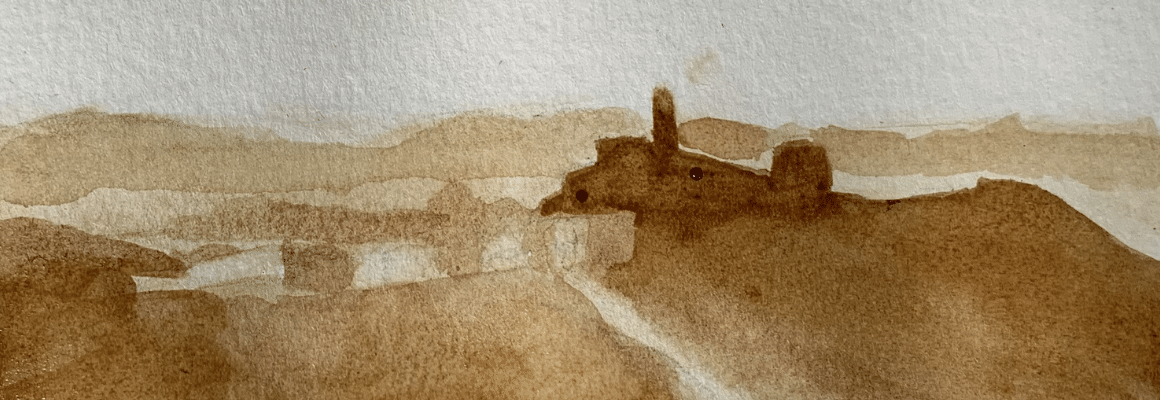
For my painting I took some inspiration from Corot and will create a watercolor landscape painting based off o his paintings! You can create something from a real life landscape that is close to where you live, look at another painting for inspiration or do something that is completely from your own imagination. It is most important to paint something that inspires and excites you.
Create the boundary for your coffee painting
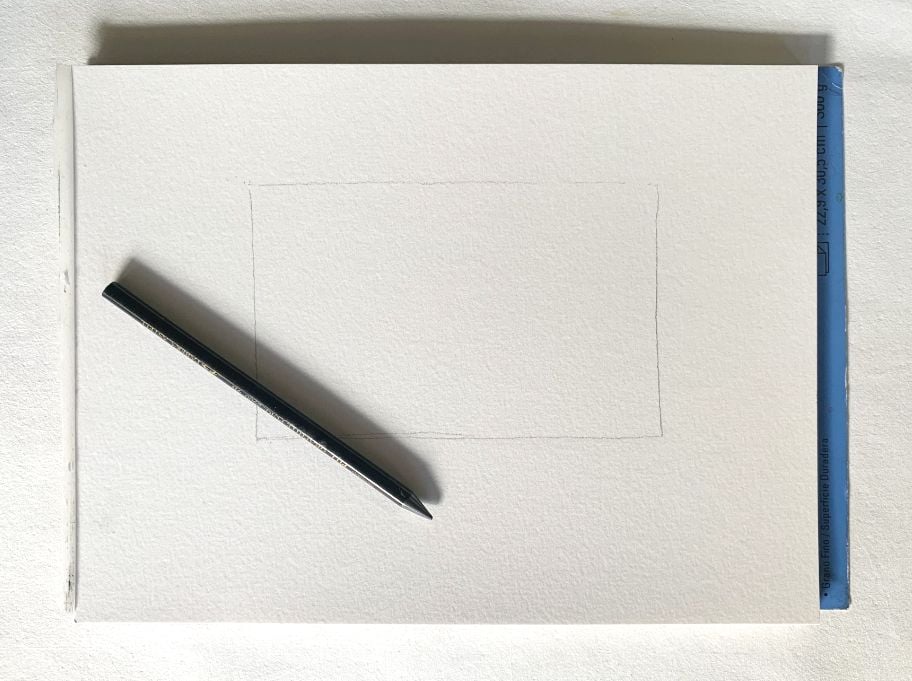
Unless you want to paint your watercolor all the way to the edge of your paper you can create your own boundary with a pencil. I did not want my watercolor to be as large as the size of my paper so I created a rectangle in the size and shape that I wanted the painting to be.
Sketch out your coffee watercolor painting
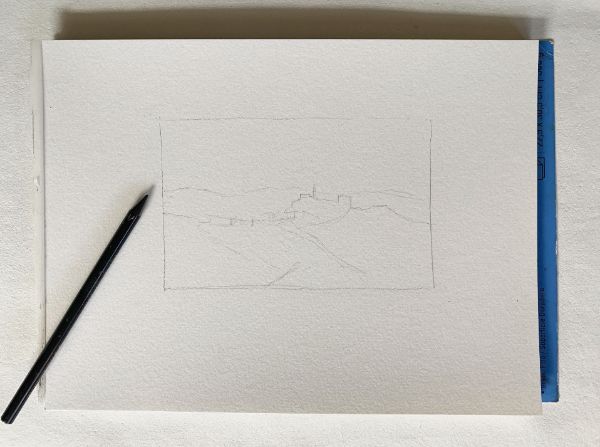
Lightly sketch out what you want to paint on your sheet of watercolor paper. Be sure not to make your drawing too dark as you don’t want it to show through too much in your watercolor painting. Rather you want to see the pencil lines just enough to know where and what to paint.
Apply a layer of water over surface of coffee painting
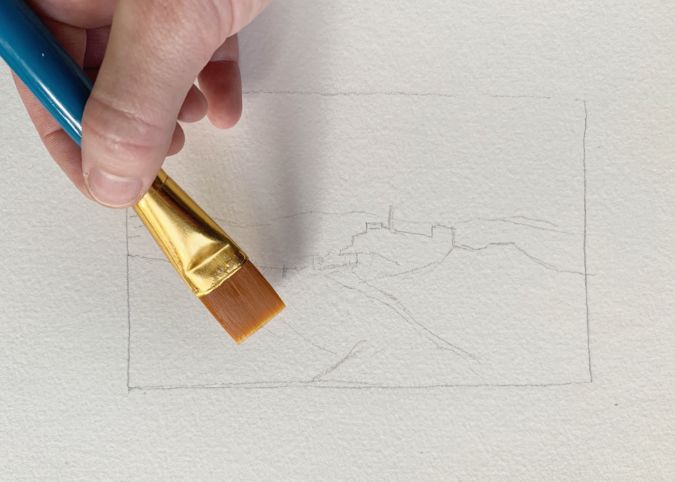
With your pencil sketch now done, apply a thin layer of water to your watercolor paper. A layer of thin water helps for the paint to smoothly glide on the surface. It also helps to create soft edges in your watercolor coffee painting.
Just beware not to apply too much water. You do not want to cause your paper to buckle. Apply just enough for your paper to be a little wet for when you start painting with coffee.
How to make coffee watercolor paint

Preparation
It is helpful to place some coffee grounds inside an espresso cup dish or teacup dish. This allows you to grab some of the grains but also mix it with a little bit of water on the outer rim area of the plate. You can also have some areas of the rim be used for lighter values and other areas for darker values.
Creating your coffee paint
To create the coffee watercolor paint you will need to dip your watercolor brush into your cup of water and then mix it with some of the coffee grounds. You will only need a small amount of coffee grounds to create some watercolor paint. As already mentioned, the rim area of your dish is a perfect place for diluting the grains! If you need to darken the color, then simply add more instant coffee grains to your paint.
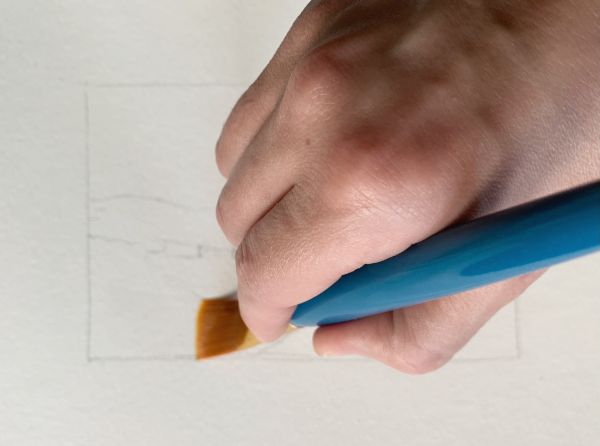
Begin painting with coffee
Start with creating a medium coffee paint value
Now the coffee watercolor painting process can start in earnest! After mixing equal amounts of water and coffee together you will have a medium value color that is perfect for starting off with. Apply the color right away to start painting your watercolor landscape.
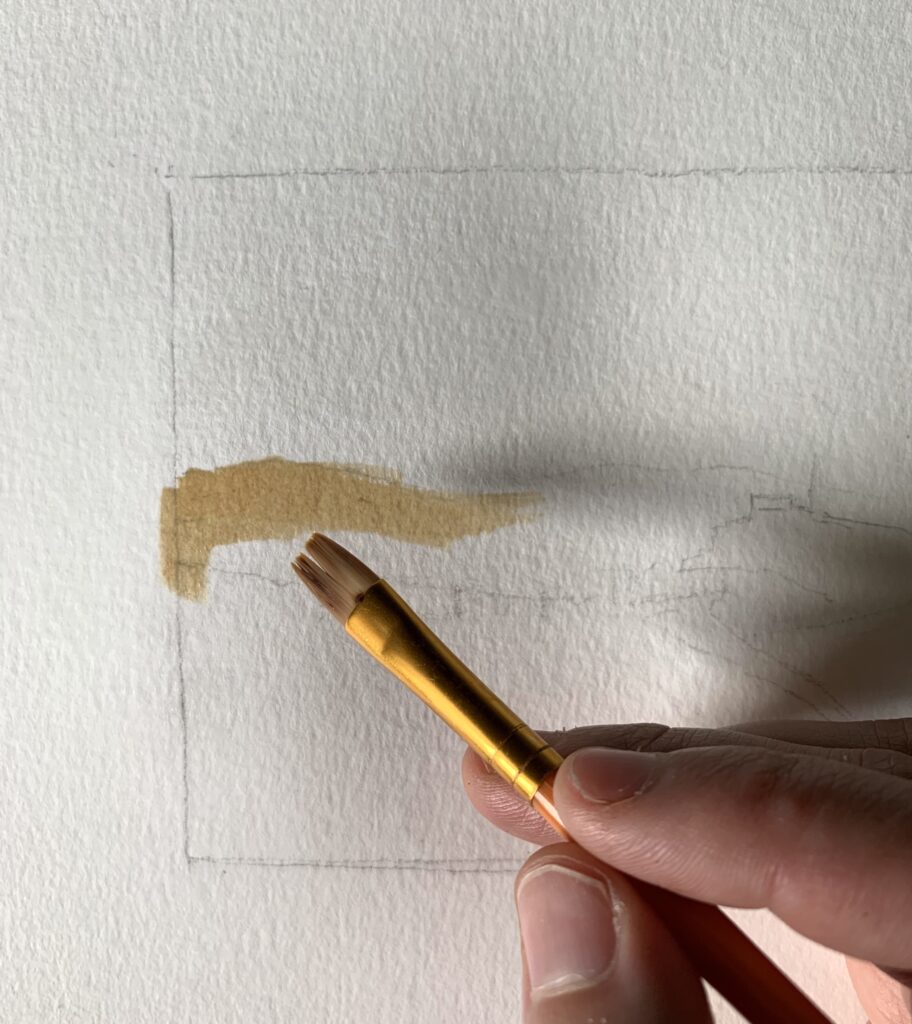
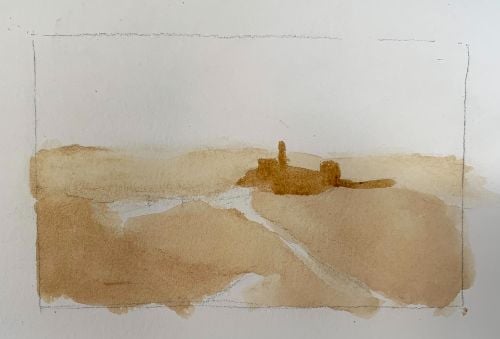
Painting the landscape’s background
In my watercolor coffee landscape I first start by painting the light background part of my painting. I do not yet paint the sky, but leave that part for later.
It is best to work from light to dark when working with a watercolor type of medium such as coffee! Doing this makes it easier to avoid making something too dark.
Apply dampened cloth to fix any mistakes in coffee painting
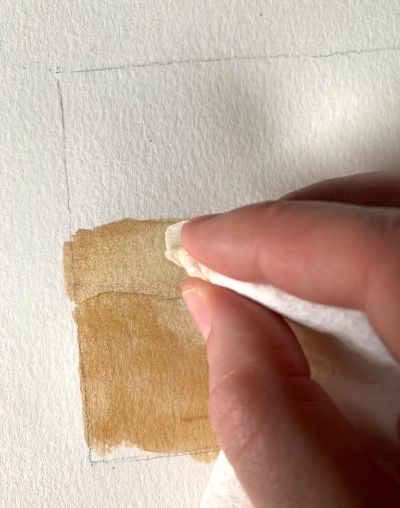
I decided that a section of the painting was a little bit too dark so I dipped a paper towel in some water and then patted it on a darker area to lift some of the color off of the paper. If you accidentally apply too much coffee watercolor paint to an area do not fear as you will easily be able to remedy the situation by simply applying a dampened paper towel to the area.
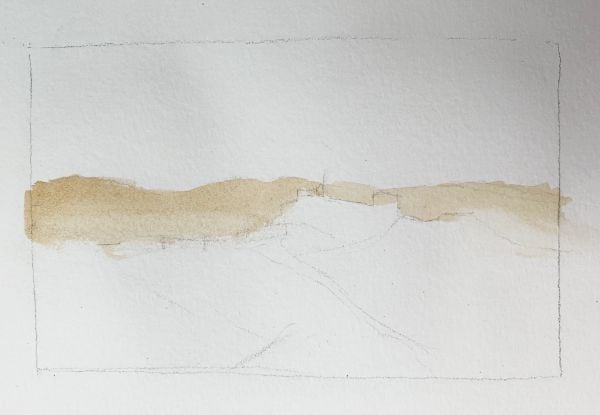
Paint in the rest of the landscape foreground with coffee watercolor paint

I grab more paint with my brush by mixing water with the instant coffee and work at painting the rest of the foreground of the watercolor landscape. The areas that are very light or very dark in value are left white.
I leave the lighter areas just as they are without any paint to make sure that they will be light enough for later on in the painting process. If you have areas that need to remain lighter make sure not to cover those areas with too much coffee watercolor paint.
Now you can see how having a light sketch on your watercolor painting helps you to be aware of which areas should be lighter and which should be darker.
Painting in a darker value with the coffee paint
The darkest part of my painting is the building/ castle that is off in the distance. To get the color to be darker I simply mix more coffee grains with water. If I need the color to be even darker I just mix more coffee grains with my paint, and if it is too dark I lighten it with some water.
When applying the color I carefully pay attention to my already sketched out drawing from before and make sure not to paint outside of my sketched out pencil lines.
Layering darker shadows on the watercolor landscape
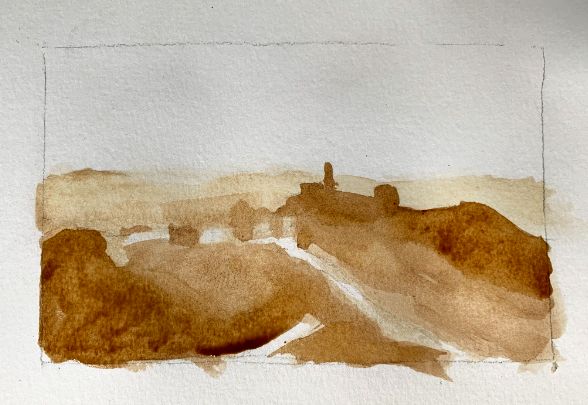
In keeping with working from light to dark with this coffee watercolor medium I layer on more darker value areas to my painting. I darken the foreground area on the left side of the landscape – doing this helps the foreground to feel like it is in front. One important landscape painting tip to remember: is that lighter colors make areas recede back in space while darker colors make areas come forward in space.
In addition, I also paint in darker shadow areas along the mid left section of the painting that help create a sense of light light and shape the row of buildings that are there. The hill area on the right side of the painting is also made darker. There is a clear sense of light now with the simplified tonal values in the painting.
Darkening the coffee watercolor paint
As already mentioned before, it is best to start out lighter when working with coffee watercolor paint as it is much easier to make something darker than it is to make it lighter. Here is a great example! The castle sitting atop the hill was too light in value so decided to darken the color by mixing more coffee with my paint. It was not a problem at all to darken it, but had it been too dark it would have been more difficult to lighten it.
I also further darkened the hill area on the right side of the painting. In addition, I mixed a light value to test out for the sky to make sure that it was light enough of a value!
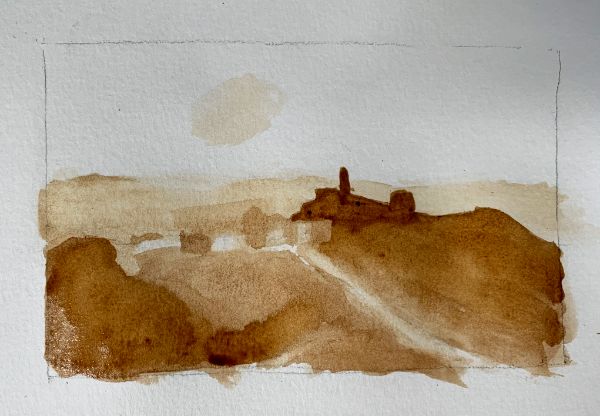
Painting the sky for coffee watercolor landscape
I mix up a much lighter value color to paint the sky with. To create light value coffee watercolor I mix a lot of water with a very small amount of coffee and simply spread it as evenly as possible onto my paper.
Softening edges in the coffee painting
In addition, I also softened some edges in the foreground part of the painting. Since the darker areas on the left foreground part of the painting had sharp edges I applied some water to the edges to help create a smooth transition.
If you need to soften up some of your edges – dip your brush into some water and then apply it to the desired area. Doing this will help to loosen up the paint.
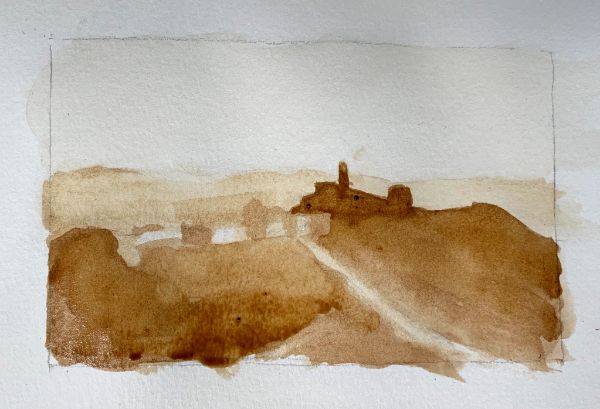
Finishing our painting with coffee landscape
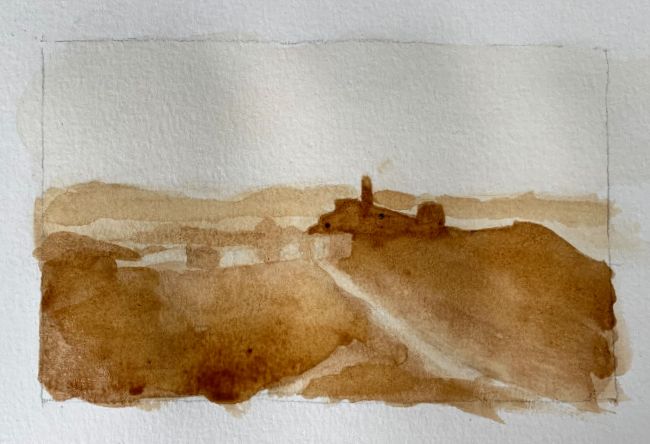
Now the coffee watercolor landscape painting is almost done! To finish it up I darken a few more areas. First off, I darken the hill area that is far off in the background. However, I still keep it light enough to make it feel like it is far off in the distance.
In addition, I also add some darker shadow areas to the buildings that are to the left of the dark castle. I darken the area in the front center area of the painting as well.
Try painting with coffee yourself
I hope you do try out painting with coffee. It is a very fun medium to use – not to mention very cost effective. And there is the added perk of the painting smelling good in the end – you will discover to no surprise that is smells like coffee! What could be better than good smelling coffee watercolor paint 🙂


8 thoughts on “Painting with Coffee – Watercolor Landscape Tutorial”
What a nice idea, it will become my new hobby. I thought it would work even with green tea, but that did’nt go.
I made it a little mor permanent with fixativ.
I am glad you enjoyed it! That is a good idea to use fixative to help it to be more permanent.
So beautiful, thank you for sharing….I love the simplicity.
Thank you! You are so welcome!
You can paint with M&M’s too, and of course food coloring. Different spices in the kitchen, ground to a fine powder in a mortar and pestle or dissolved in droplet or two of water, can be used for different earth colors. Pastel hues can be made with Elmer’s Glue.
Very cool! Yeah it seems endless as far as items one can make pigments with! Makes sense – as that is what people did before art stores existed.
Is coffee fugitive? I don’t suppose anyone has done an experiment of leaving such a painting in sunlight for a few months?
Unfortunately a coffee painting will not be very permanent! But it is a fun medium to just have fun with.