
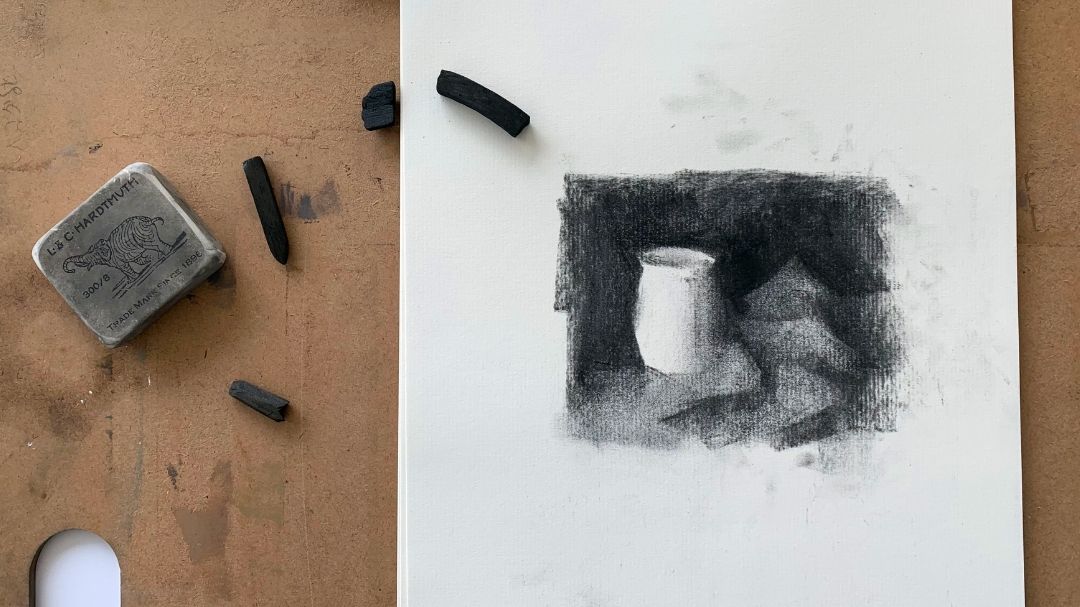

A thumbnail sketch is a small quick drawing that can help you to plan out a, larger painting or drawing. They are especially useful for understanding the main light and dark values in your composition.
A thumbnail drawing is only about 2 – 3 inches in size, which makes it easy to be able to simplify. So that before starting to work on a larger scale piece. You can get an understanding of the big picture tonal values of the subject you are drawing.
Here’s a video guide to help demonstrate the process of creating a thumbnail drawing – then keep reading for full written tutorial with process steps and images below!
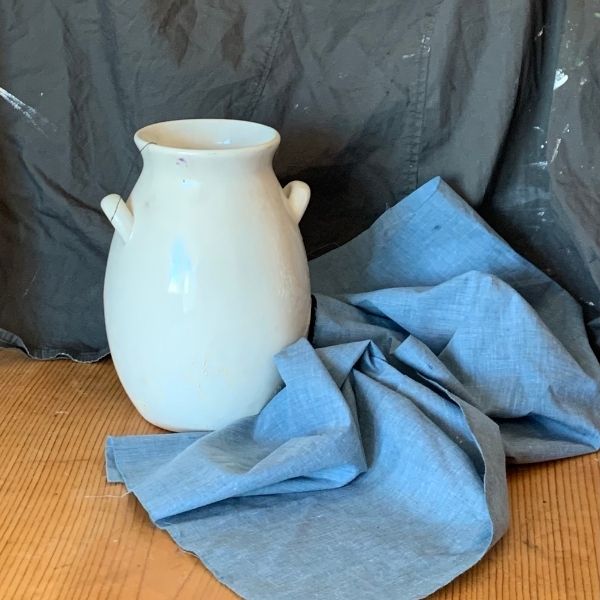
Thumbnail Sketch Reference
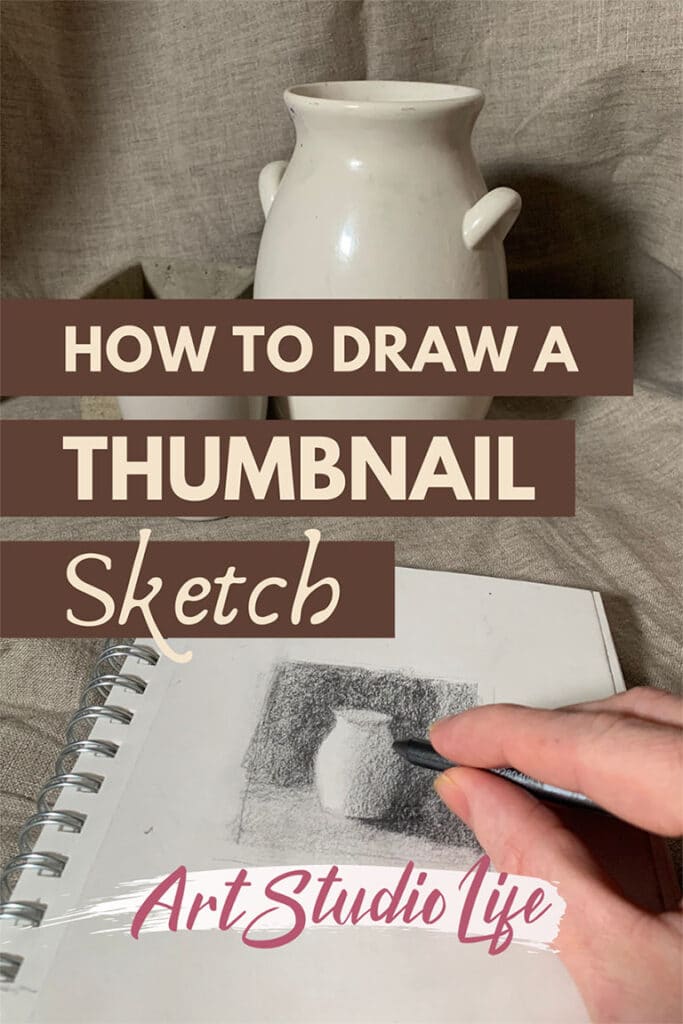
If you would like to follow along with the exact reference I used for the thumbnail sketch in this article. You can find that below. I did the thumbnail by creating this still life setup and observing it in real life – not the photograph. However, the image gives you a starting point to work from 🙂
How to Draw a Thumbnail Sketch
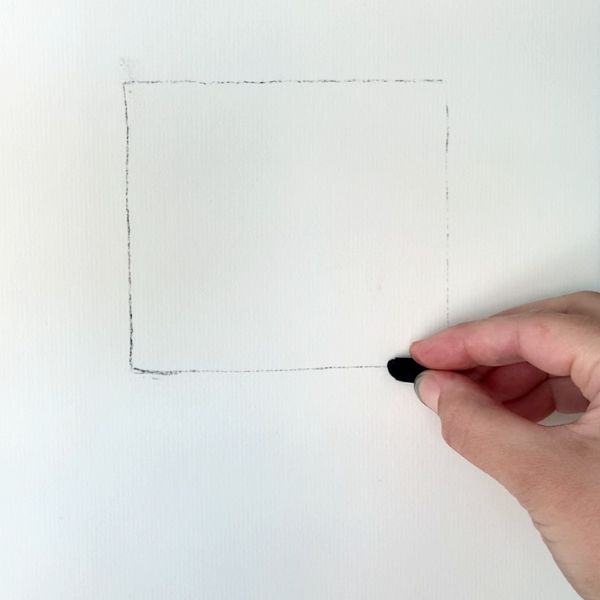
It is best to begin a thumbnail sketch by first drawing a square (or rectangle) that you will create your thumbnail drawing inside of. Ideally this frame should be about 2 x 2 – 3 x 3 inches. Having a border for your drawing helps create a clear composition and allows you to see where everything fits in easier.
I recommend to keep your thumbnail drawing small. This drawing is NOT meant to be a beautiful detailed drawing. Rather, the purpose of a thumbnail sketch is to help you simplify and see the big light and dark value shapes. So, it is a study that will help you later on when you work on a larger painting.
Begin Your Sketch with Clear Value Structure
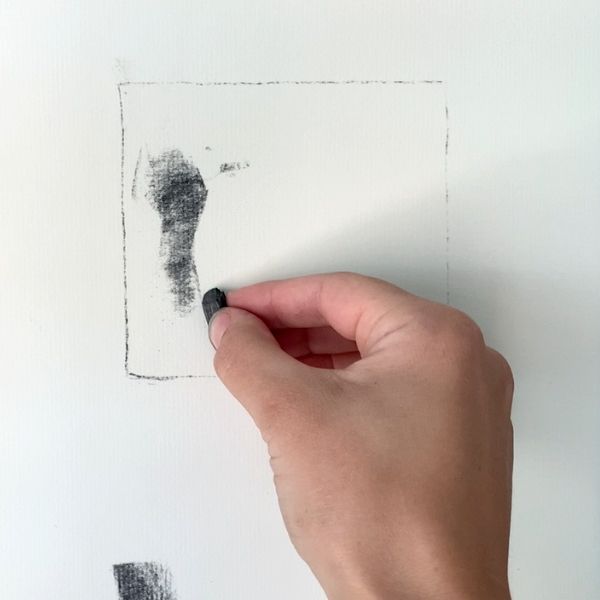
Your thumbnail drawing should take you about 5 – 10 minutes. So, don’t overthink where and how to start your drawing! As already mentioned it isn’t meant to be a polished beautiful drawing.
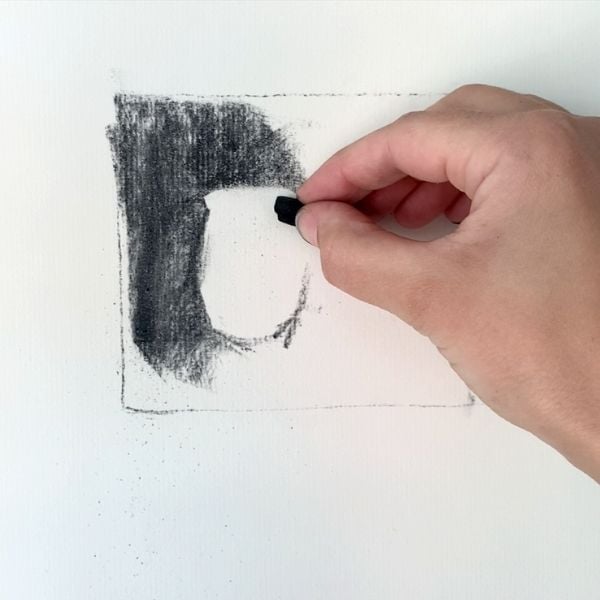
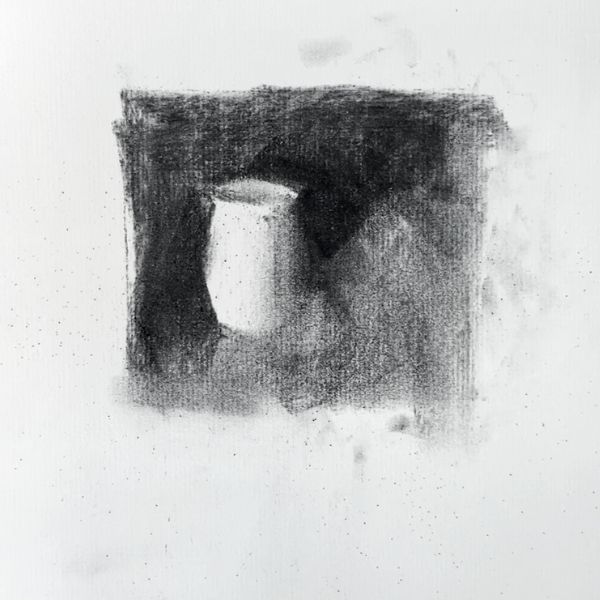
That said, I personally find it helpful to start by drawing a dark area that is next to a lighter area as shown in the image above. Here I am drawing the dark background area that also marks out the silhouette of the light vase. So, now I have two values – a light and a dark value.
Creating Shadow Areas
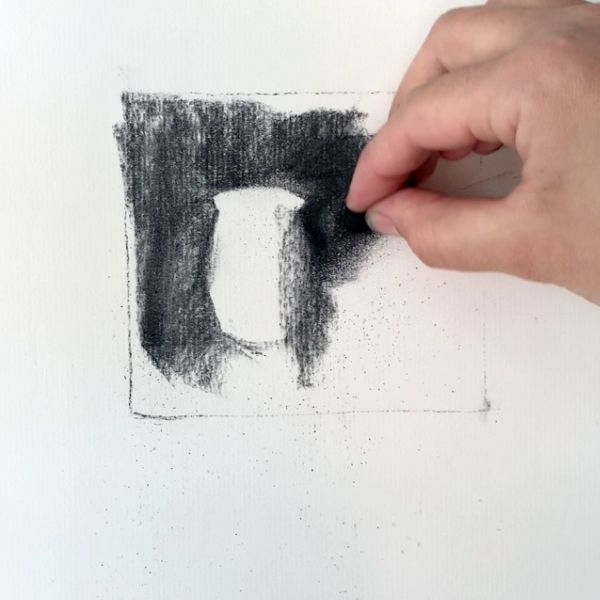
In my still life you can see that the right side of the jug is in shadow – but it is not as dark as the background. To designate this shadow area I simply soften the edge between the jug and the background using my finger as seen in the image below.
At the moment there are now three values in this drawing – a light, dark and now a medium value. With the medium value acting as the shadow area on the side of the jug.
Continue to Simplify
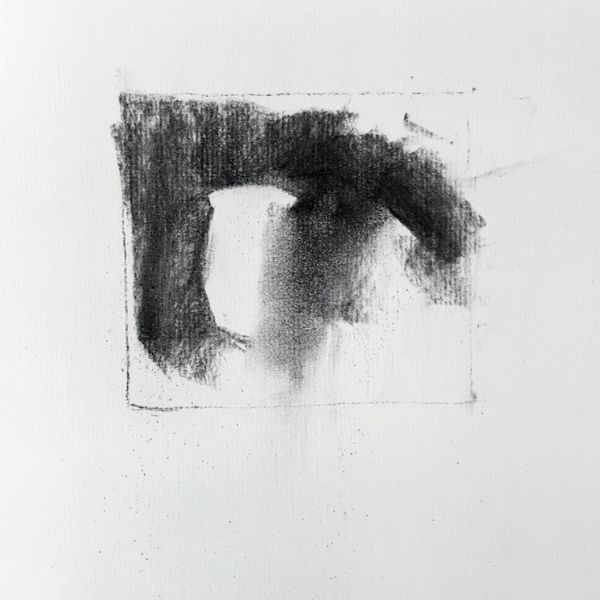
Always remember to keep your thumbnail drawing as simple as possible. In this next stage I find more of the darker value areas and draw out the shadow shapes. Even though some of the darker shadow areas are slightly lighter than some of the other dark areas. I still make them the same level of ‘dark’.
I am not trying to draw every single shade of value I see because I am simplifying. The purpose of a thumbnail sketch is to group together values. So to be able to see the big picture and not get distracted by subtle value changes.
Try not to be too concerned about having it look like anything. If it helps, tell yourself that you won’t show your drawing to anyone! This frees you up to really be able to study your subject and get the most out of this exercise 🙂
Block in the Rest of Thumbnail Sketch
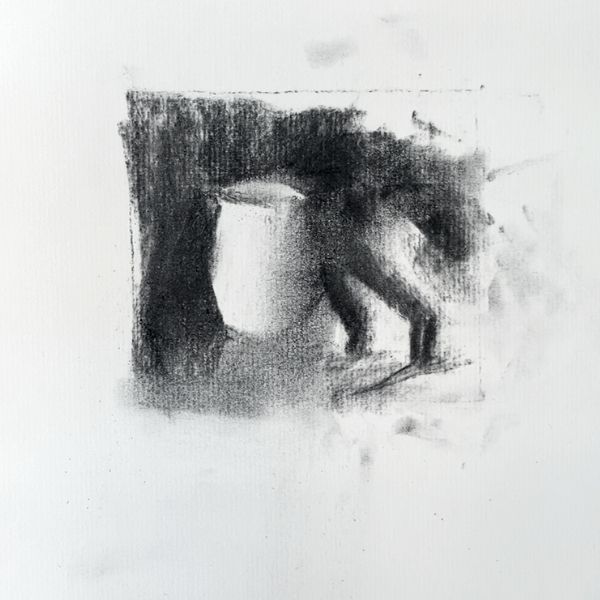
In this next stage of the thumbnail sketch I block in the rest of the values. I do this by shading in the medium value area, so that the white of the page is covered. I use my finger to smudge the area so that the charcoal is distributed more or less evenly. Don’t worry if you make an area lighter in value that it needs to be. You can adjust that in the next step.
Finishing up the Thumbnail Drawing
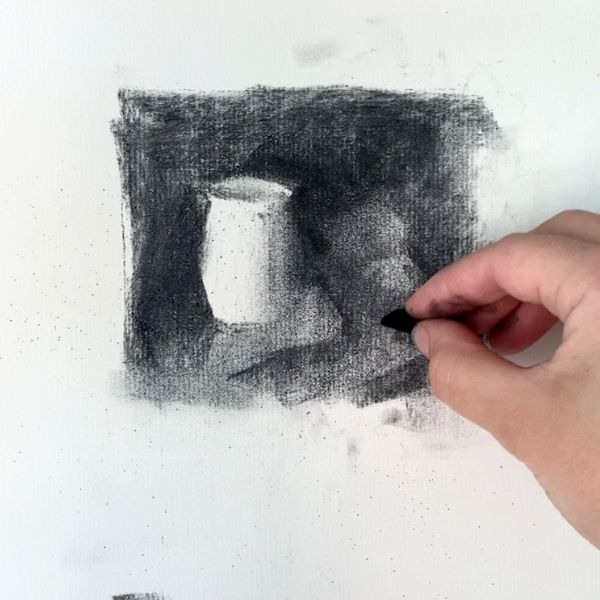
Now we are in the final stage of the thumbnail drawing. There is just a little bit left to do before calling it done! I darken the areas that became too light in value in the previous step. So, I create dark shadow shapes in the fabric portion of the still life. However, I still keep the thumbnail drawing very simplified and create clear simple light and dark values.

Now it is Your Turn…!
Doing a small thumbnail sketch is an excellent way to understand your subject before starting a painting. It allows you to figure out the main light and dark values before working in color. Light and dark values are much easier to figure out first in black and white before color!
When you first start a painting after completing a thumbnail drawing. You will already have a clear idea of the main values. This way, you will be set up to create a realistic sense of light in your painting from the start!
Want to remember this? Save How to Draw a Thumbnail Sketch to your favorite Pinterest board!


4 thoughts on “The Purpose of a Thumbnail Sketch and How to Easily Draw Your Own”
Selv om jeg har malt mye i mitt 83 årige liv. Har bare malt det jeg så. Her er det mye å ta tak i. Og jeg leser og forstår betydningen av det du skriver. Dette er med å beriker mitt liv. Vi blir aldri for gamle så lenge vi er friske.Tusen takk for berikende lesestoff som jeg også vil ta med i malingen.
Thank you for sharing! I completely agree, that we can always keep learning no matter what stage we are at in our art and life. So glad these materials will be helpful for you!
Great video of the thumbnail sketch! so useful and something I rarely do! Always jumping straight into oils!
Hello Michelle – Happy to hear that the video was helpful 🙂 It is something that can be incredibly useful!