
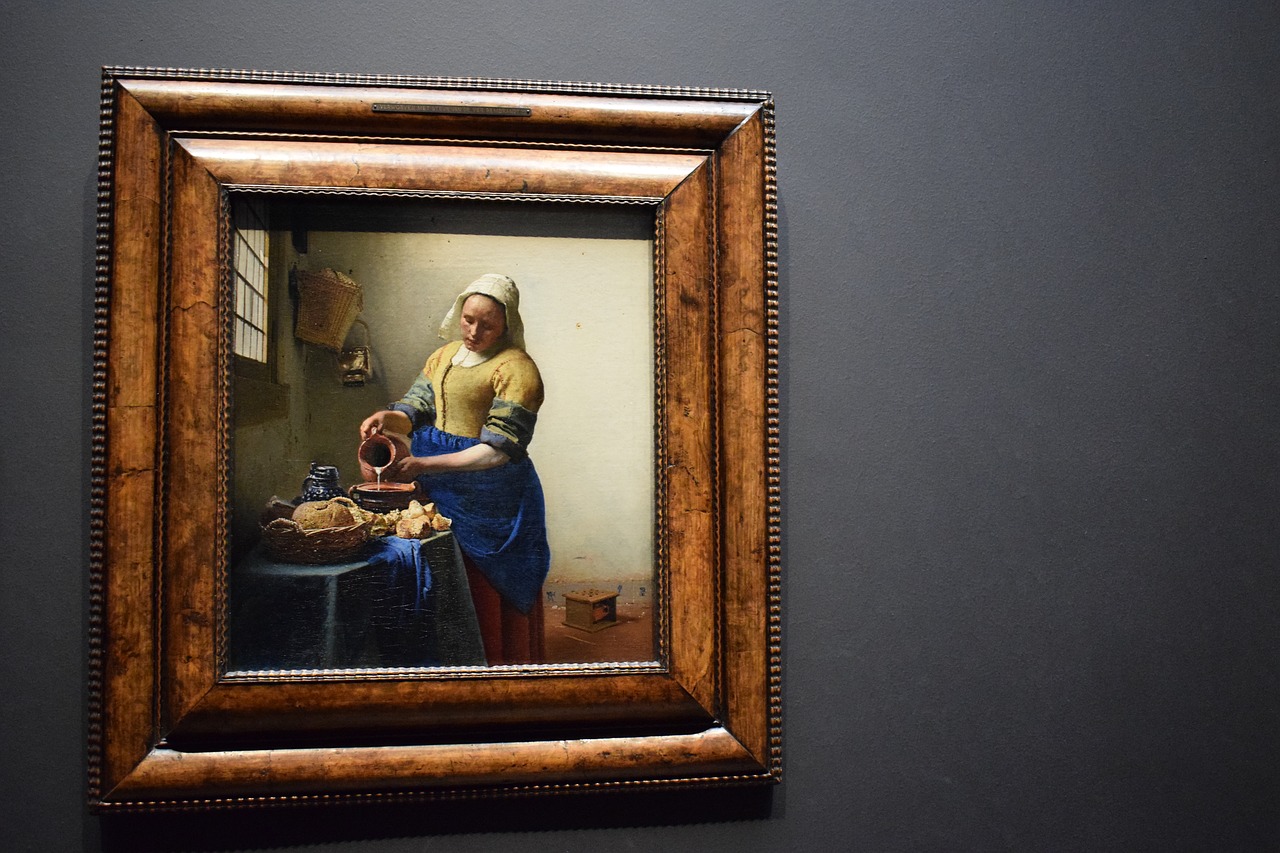

Johannes Vermeer, who’s now celebrated for his masterful paintings and meticulous techniques—lived a life of rather quiet obscurity during the Dutch Golden Age. In fact, during his lifetime (in the 17th century), he was known only in his hometown of Delft, and even then, he struggled to achieve widespread recognition.
For more than two centuries after his death, Vermeer’s name faded into near-complete obscurity—until French art critic Théophile Thoré-Bürger brought him back into the public eye in the late 19th century. Thoré-Bürger’s admiration sparked renewed interest in Vermeer’s small but extraordinary body of work.
Today, Vermeer is hailed as a master of light and subtle narrative, with refined painting techniques that often surpass even Rembrandt’s in both reverence and market value. But beyond their beauty and price, what draws artists and scholars alike is the remarkable craftsmanship behind Vermeer’s painting techniques, which lie beneath his calm, glowing surfaces.
The Foundation of Vermeer’s Painting Techniques: Surface and Ground
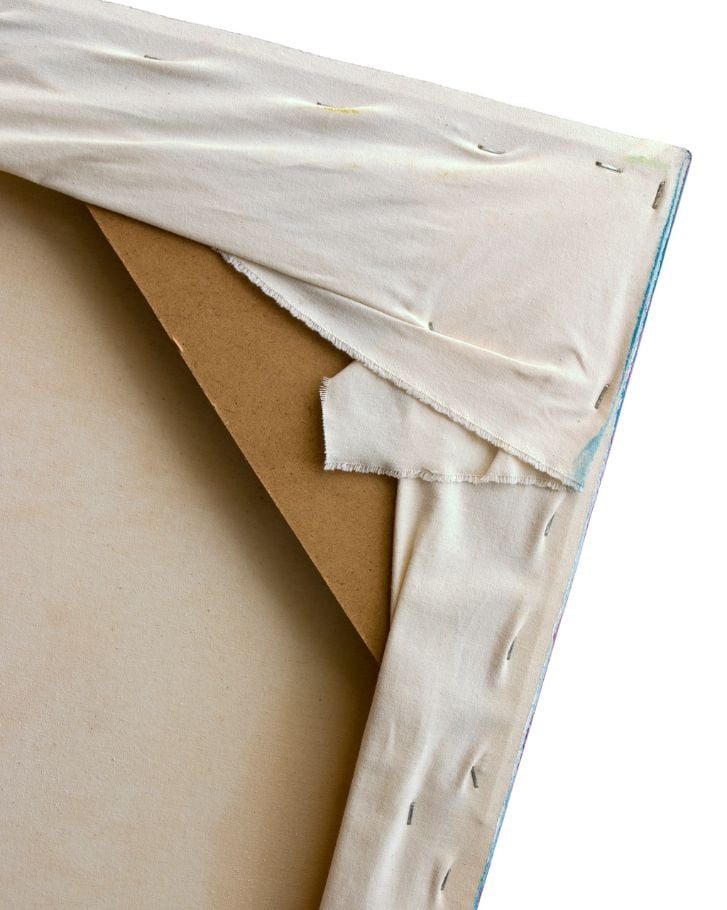
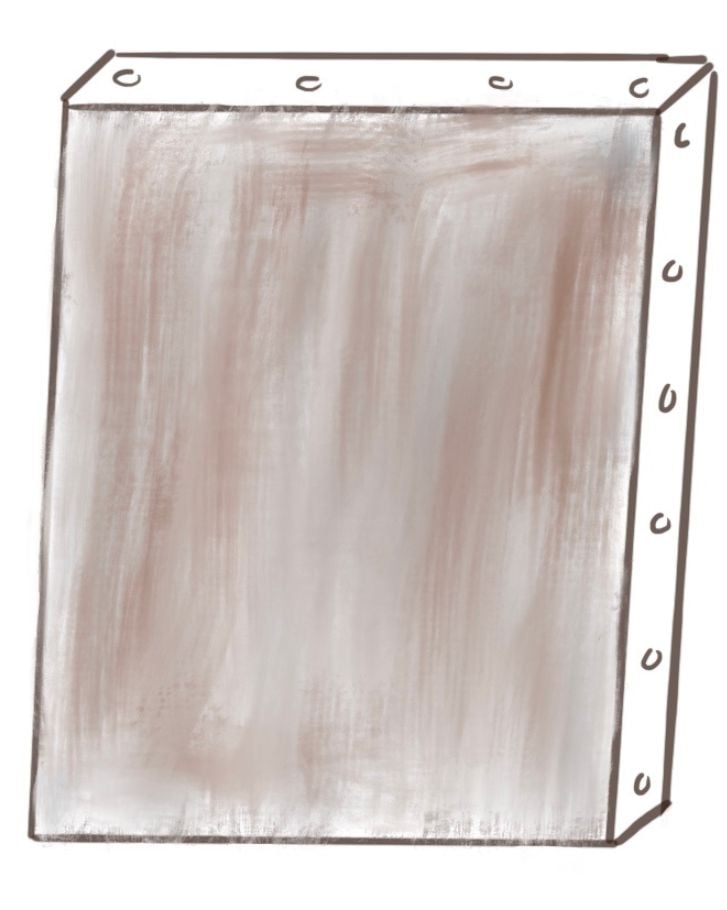
Vermeer primarily painted on canvas, a choice that marked a departure from the wood panels favored by many of his Dutch contemporaries. His canvases were typically prepared with a warm grey or beige ground—a mid-tone base layer that helped unify the composition and subtly influenced the color harmony of the final painting. This choice of ground color created a balanced foundation, allowing both dark and light passages to emerge with clarity. The mid-tone ground also played an important optical role, making it easier for Vermeer to judge values early in the painting process and helping to establish the overall mood of the work from the very beginning.
Vermeer’s Underpainting Techniques and Composition Process
Before applying color, Vermeer would carefully map out his compositions through a monochrome underpainting, sometimes called a “grisaille” or dead layer. This early layer allowed him to establish value relationships—the relative lightness and darkness of forms—without the added complexity of color.
It also gave him the freedom to make changes, and indeed, modern imaging techniques have revealed that he often repositioned figures and objects, rethinking his arrangements as he worked. These discoveries highlight Vermeer’s deep commitment to composition and suggest that his scenes, while appearing effortless, were in fact the result of deliberate planning and revision. This underpainting stage provided a strong structural backbone for the translucent layers that would follow.
Vermeer’s Method of Painting in Sections
Unlike many contemporaries who painted rapidly and broadly, Vermeer’s painting techniques were careful, sectional, and highly deliberate. He typically focused on small areas at a time, finishing each portion before moving on to the next. This method not only suited his temperament but was likely influenced by the nature of the pigments he used—many of which were rare, expensive, and prepared by hand. Paint tubes didn’t exist in Vermeer’s time, so they had to grind new pigments every day. Therefore, working in sections allowed him to be economical with the paint he used.
Of course, we cannot be absolutely certain of this fact. There is also some evidence to suggest that he painted quickly and broadly on his first layers and then was more refined in his top final layer of the painting. Though working in sections would help him to maintain control over wetness and blending, ensuring that each passage achieved the precise effect he intended.
Vermeer’s Painting Palette: Simple Yet Rich
Though his paintings appear rich and full of subtle hues, Vermeer worked with a surprisingly limited palette. His pigments included:
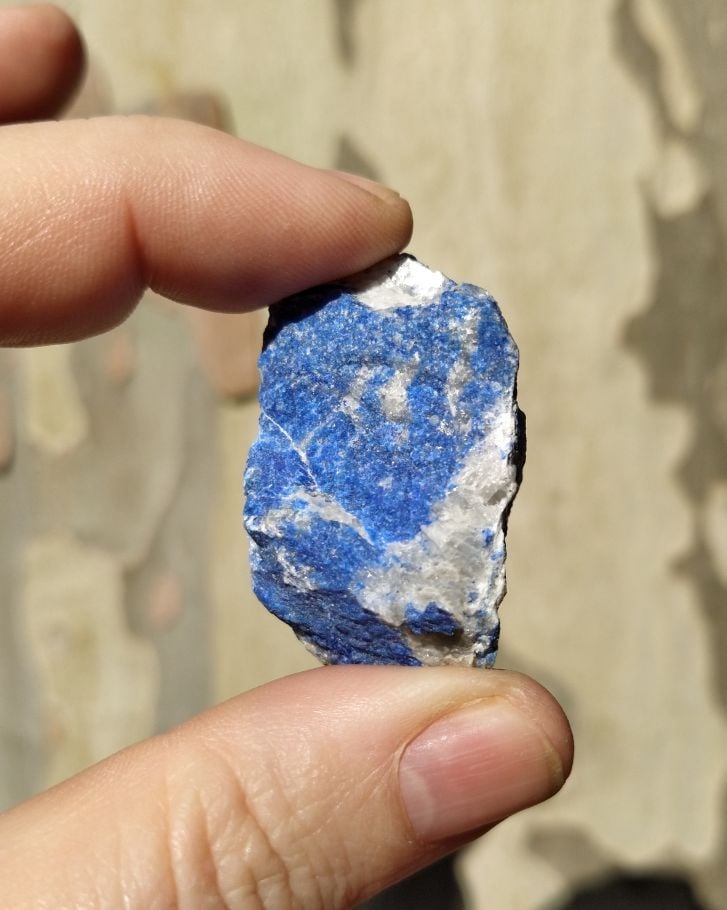
- natural ultramarine (made from the semi-precious stone lapis lazuli)
- lead-tin yellow
- red lake
- vermilion
- green earth
- bone black
- lead white
Ultramarine, in particular, appears often and boldly in his work—even in underlayers—despite being one of the most expensive pigments of his time. This suggests that Vermeer chose color not just for descriptive accuracy but for its visual and atmospheric power. He often layered transparent glazes over opaque passages to achieve glowing effects.
How Vermeer Created Light Effects: Soft Edges, Scumbling and Glazing
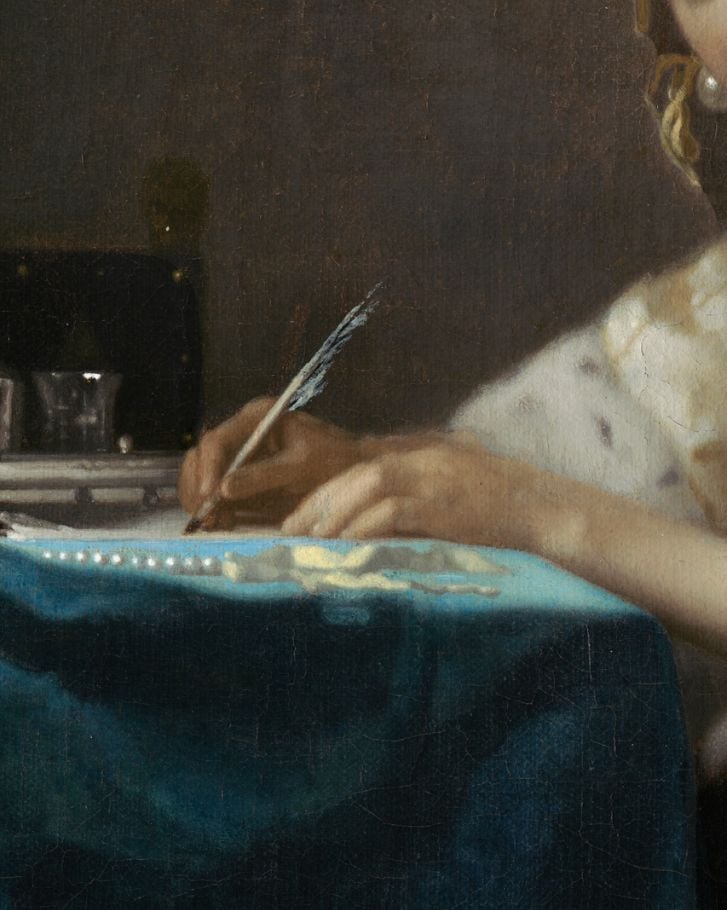
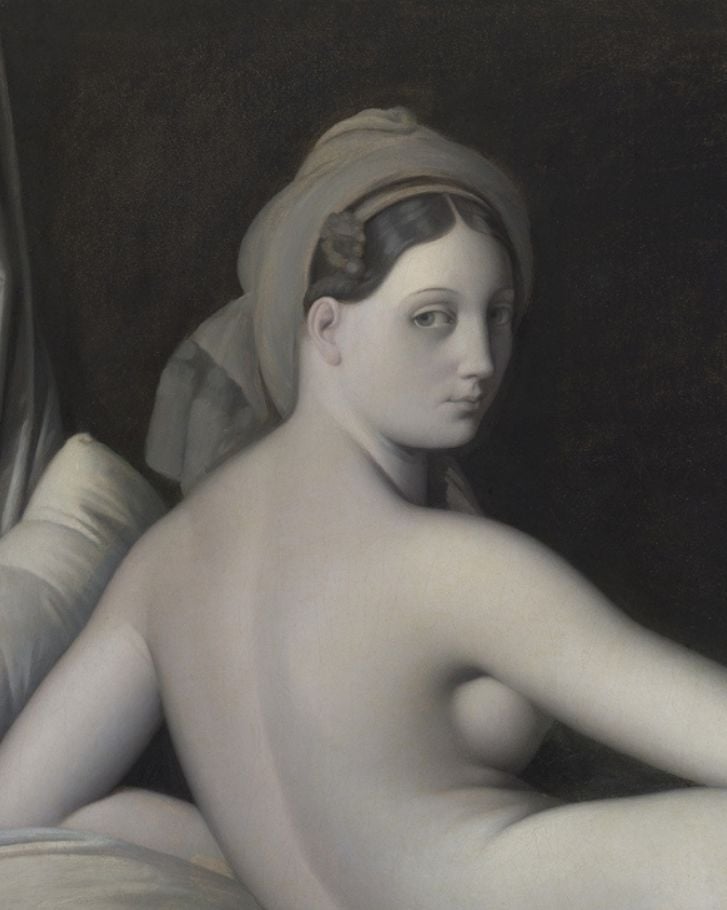
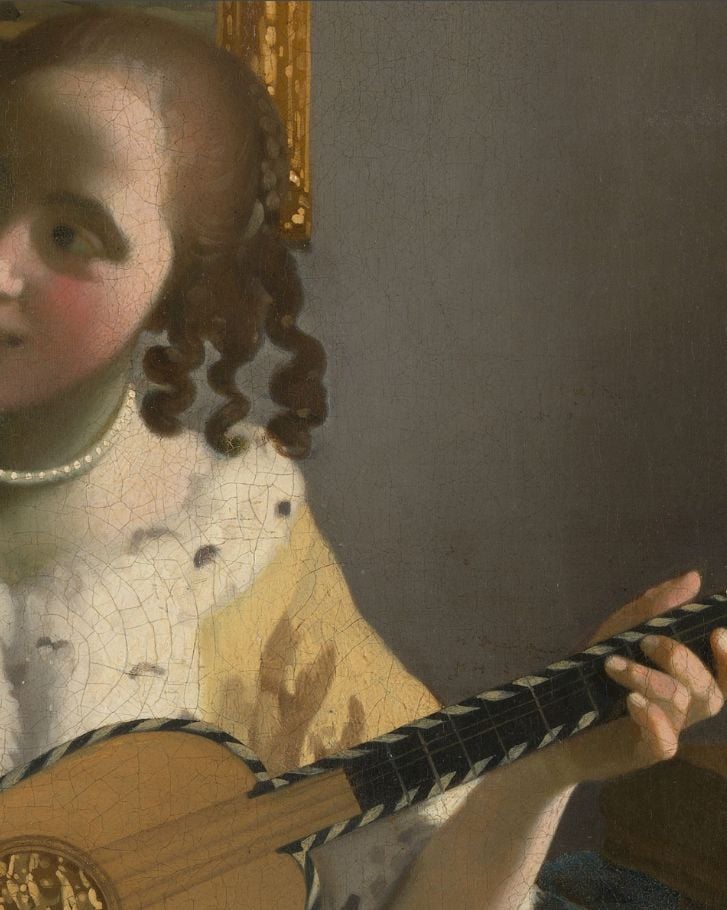
Vermeer’s handling of light is one of the most distinctive and studied aspects of his technique. He had a masterful ability to capture the soft diffusion of daylight entering a quiet room. To achieve these effects, he used a combination of scumbling and glazing—two techniques that manipulate how light interacts with the surface of the paint. Scumbling involves brushing a thin, dry layer of lighter paint over a darker, dried layer, creating a soft haze that mimics the way light wraps around form. In his depictions of skin, for example, Vermeer would often use thick white highlights, midtones built from delicate scumbles, and warm glazes in the shadows. The result is a luminous and lifelike rendering of flesh that feels incredibly lifelike in its subtlety.
Optical Debate: Did Vermeer’s Painting Techniques Involve a Camera Obscura?
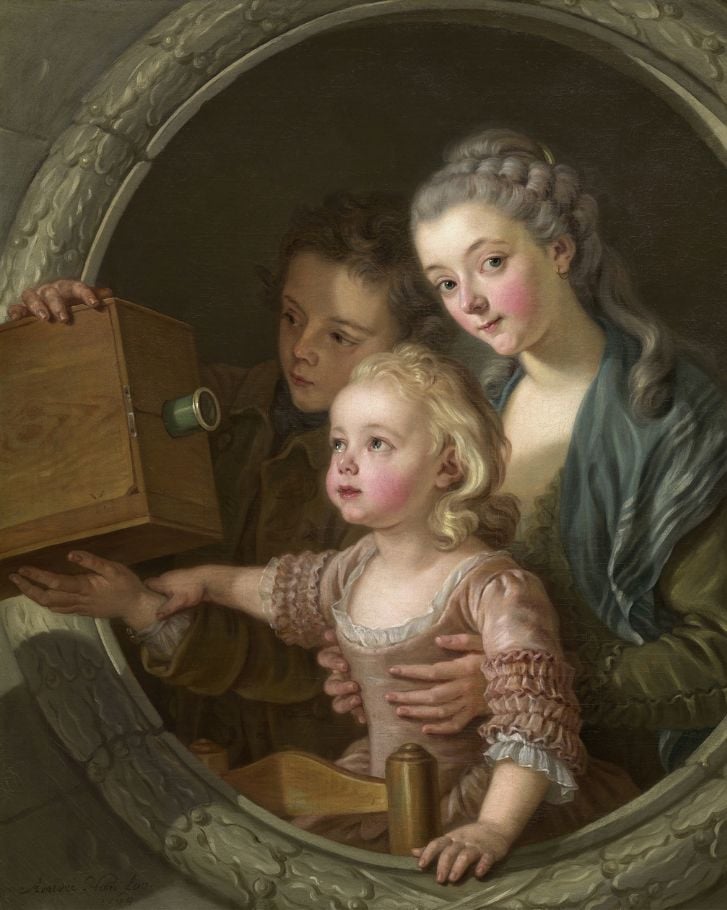
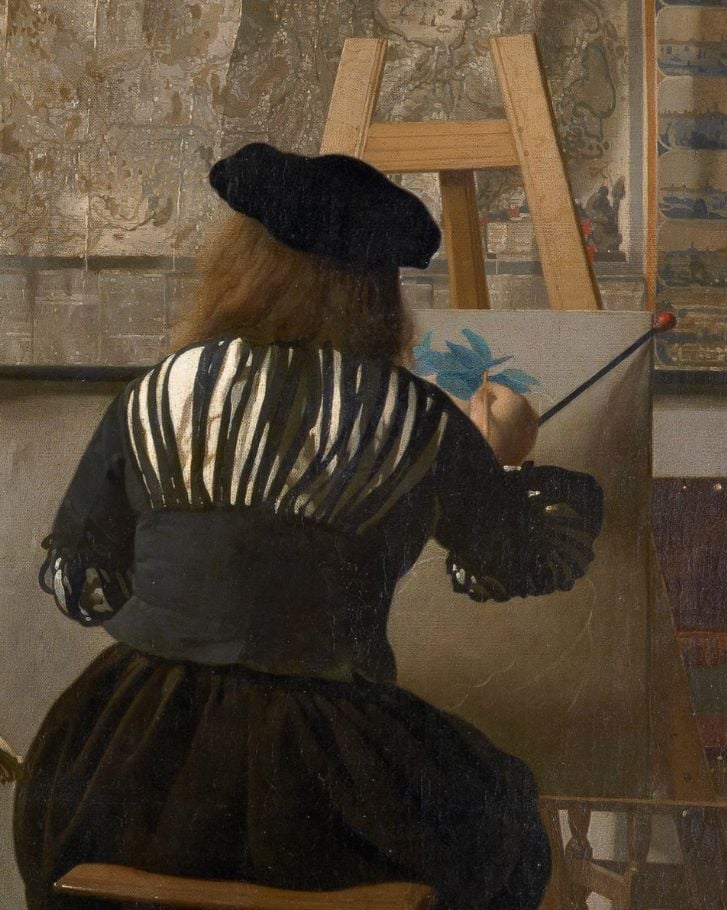
One of the most debated aspects of Vermeer’s process is whether he used optical tools such as the camera obscura. Which is a device that projects a scene onto a flat surface using a lens and mirrors. Personally, I do not believe that Vermeer used the camera obscura to paint directly from as some believe (like Tim from “Tim’s Vermeer and David Hockney). However, I do think that he had access to a camera obscura and used it to study his scenes with. Whether or not Vermeer used such a device remains uncertain, but what’s clear is that his work possesses an extraordinary sensitivity to how light behaves—and how the human eye perceives it.
How You Can Apply Vermeer’s Techniques in Your Own Work
Though Vermeer’s mastery can feel out of reach, Vermeer’s painting techniques offer valuable lessons for painters at every level. Start by preparing your surface thoughtfully—try using a toned ground to help unify your values and colors. Before jumping into color, sketch your composition and block in the value structure with a monochrome underpainting. Make sure you have lots of clarity on the light and dark values in your subject. Limit your palette to focus on harmony rather than variety. Also, explore techniques like scumbling and glazing to create light-filled transitions and depth. Above all, take the time to observe your subject as Vermeer did—with patience, clarity, and deep curiosity.
Want to Go Deeper with Color?
Vermeer’s color harmony didn’t come from having more colors—it came from understanding how color works. Download my free Color Mixing Guide to learn how to simplify your palette and create luminous, cohesive paintings like the masters. You’ll get clear principles, practical tips, and the confidence to mix any color you see.
Want to remember this? Save these Vermeer Painting Techniques to your favorite Pinterest board!


15 thoughts on “Vermeer’s Painting Techniques: A Masterclass in Light, Color and Stillness”
Thanks for sharing your views Elisabeth. I have only just started painting and our first project was to paint “The girl with the pearl earring.” I learnt so much from painting this portrait and really enjoyed reading your article.
That portrait holds so many incredible lessons – glad that you enjoyed that project! And happy to hear that you enjoyed this article – thank you for sharing that 🙏
Thanks Elizabeth, that was a fascinating and inspiring read!
Cam C
So glad to hear that!
maybe Vermeer didn’t use a camera obscure but I ‘think’ he did. How can one pose such a long time in the same position? How did he paint his own back?
I read the book of David Hockney and in my opinion, he knows what he talking abouting , what strucks me is the details in some of the examples (Jan Van Eyck, Caravaggio, Ingres).
Seems to me it is impossible to paint such details without a device that helps.
I admire Vermeer’s works, I liked very much yours explanations, I now thinking to try master a copy
So glad to hear that Valentin that you are wanting to try a master copy! They are incredible learning opportunities…
Thankyou Elizabeth for this article that was very informative and encouraging. It supports the value in slowing down and being thoughtful and careful in proceeding. I have often, perhaps incorrectly, thought accomplished artists have the skill to work quickly , knowing exactly the next step or brush stroke or colour mix to use.
Knowing that many were not celebrated in their own time, perhaps suggests a quiet and humble diligence to developing and just enjoying the experience. I like that approach .
So glad this was helpful and encouraging. Yes, I think you are absolutely right. I think keeping ones focus on the process and moving forward with humble diligence is really the way to go…
Thank you for this. You give a wonderful history here and have reminded all painters that appreciation for art may come far later than hoped—even for the greats. The impressionists are a collective example of the market catching up later. Your explanation of scumbling is easy to follow and helpful. A similar explanation of Vermeer’s approach to glazing would be interesting as well.
As someone who enjoys painting, but struggles with drawing/sketching, the camera obscura seems a great solution to putting the basic outline on paper. Painting from the entire image seems too limiting though. Are there any ‘greats’ who were known to use the camera obscura for the entirety of the painting?
So glad you enjoyed this – thank you for sharing! That is a good idea – would like to put together information on Vermeer’s approach to glazing in a future article. I agree that painting from the entire image in a camera obscura would be too limiting which is part of the reason why I don’t think any of the old masters worked from it in such a way. I definitely think artists learned to see more keenly and specific with it as a form of visual study. But as far as creating paintings directly from a camera obscura – this would be incredibly limiting and the astonishing level of Vermeer would not be possible with working in such a way.
Vermeer is my favourite artist. I have painted the Milkmaid and the Love Letter in oils and pastel pencils. Thank you for your informative read.
That is wonderful! I am glad this was an informative and helpful read. Thank you for sharing!
You are mistaken with the assertion that artists would work on one area at a time. No one does that. The whole painting has to come together with all of the parts developed. If you work on one area at a time. The painting will look like more than one person painted it.
Back in Vermeer’s time they were limited with the type of materials they had available to them. Certain paints dried faster than others and if they did not work in a particular way it would have negative effects on their painting. Research done by art historians clearly has evidence that many worked on certain areas at a time. Also, looking at some unfinished paintings from the past shows this plainly as well. Now today we paint everything together at once – this is very true. Our materials allow it – this is how I paint for the most part. However this is not always been the case throughout the history of painting.