


The allure of painting a night sky has been with us ever since the invention of painting. Nature in general has mesmerized artists from the start but there is so much we do not know about the sky and galaxy above us. That therefore, it represents a mystery that has beautiful shifts in light and color combinations. It is almost too beautiful to try to paint!
We can see a preoccupation with painting the night sky throughout the history of art – from realistic depictions to the more abstract. In this article you will find a collection of paintings showcasing various different approaches to help make painting a night sky easy.
You will also find step by step instructions on how to paint a night sky at the bottom of this article. Including color mixing tips and techniques for painting stars into your night sky painting.
How to Paint a Night Sky: Tips & Insights
Flight into Egypt by Adam Elsheimer

This oil on copper painting by Adam Elsheimer is thought to be the very first rendering of the night sky in Renaissance art. This painting depicts Joseph, Mary and Jesus seeking refuge from possible persecution by Herod.
Insights into painting a night sky
The night sky in this painting feels like a natural night sky because the artist balanced the values in the painting so that we could feel the darkness of the sky. In the painting, the landscape and trees are very dark in value. Although the sky is also dark, the landscape is even darker. As a result, the light from the moon creates a glow in the night sky painting.
In addition, we can see the bright stars that are in the dark areas of the sky away from the moon. The viewer is able to see the figures in the landscape because they are lit up in the foreground and are much brighter in contrast to the dark landscape.
One important thing we learn from this painting, is that one must work with dark values a lot when learning how to paint a night sky. While also bringing in light values to the areas of the painting where the stars or moon are painted in.
Frederic Edwin Church – The Meteor of 1860
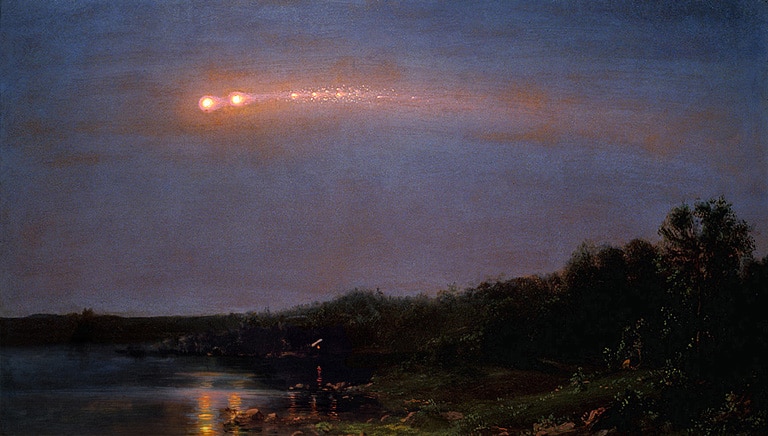
The American landscape painter Frederic Edwin Church (of the Hudson River School) painted what he saw in the sky in 1860. What he saw was a ‘spectacular string of fireball meteors cross the Catskill evening sky, an extremely rare earth grazing meteor procession (Nasa.gov)’.
Walt Whitman even wrote a few words about the event in his poem year of meteors 1859 -1860 ‘ “… strange huge meteor procession, dazzling and clear, shooting over our heads”.
Night Sky Painting Insights
This painting is able to make that meteor crossing the sky look so bright and brilliant all because of how he used value and muted colors.
He made sure that the brightest part of the painting would be the meteor itself. Everything else in the painting would be darker so that there would be no ‘competition’ of focus.
In addition to the meteor being the brightest part of the night sky painting, it is also made up of the most saturated colors. Every other area of the painting is made up of more muted colors – which helps for the meteor to stand out even more. Because when a bright saturated color is placed in the middle of muted colors it will inevitably stand out.
Painting a night sky isn’t always just about being able to balance dark values and creating bright areas for stars to shine. Rather, how to paint a night sky is also about balancing muted and saturated colors. You must make sure that you are leading viewers eyes to the bright stars in the sky. If you have bright colors in other areas of your painting – that will detract from your starry sky.
Starry Night by Jean Francois Millet

Van Gogh may very well have been influenced by this painting by Jean Francois Millet when he created his own Starry Night painting. He would have been able to view it in Paris between 1873 – 1875. His admiration of Millet’s work is well known. Fun to think of what paintings inspired some of the most famous creations!
Millet painted this night sky painting shortly after moving to Barbizon – an artist colony south of Paris. It is one of his few paintings that is exclusively a landscape.
Looking at the Starry Night soft edges and varying tonal values
This piece has a wonderful atmospheric quality to it. The artist created a lot of soft edges which help to make the bushes and trees that are silhouetted against the sky to feel like they are further off in the distance.
As well, like the other paintings already mentioned. Millet uses value in such a way so that the painted stars do light up in the sky.
However, he does not just make a dark sky color and then fill it in with bright white dots. Notice how the sky color and tonal value changes as we move from the horizon line to the top of the painting.
At the horizon line we can see a small bit of light. As our eye gradually moves up to the top of the painting the sky grows increasingly darker in value. It also becomes deeper and darker blue in color. As a result we can really experience the night sky painting glow!
Tips on painting stars in a night sky
When painting a night sky, have the sky transition gradually from a very dark upper sky color, to a lighter sky closer to the horizon. Then as you start painting stars into your darker sky color, you do not want to paint all of your stars the same color. Likewise, as you can see in Millet’s painting above, you want to have a variety of different sizes and values of painted stars as well.
Some stars will be larger, brighter and closer, while others will be lighter smaller and further away. You will need to mix some muted white color, that you will use to paint some stars that are smaller and further away. Then use a brighter white color for painting stars that are larger and should appear closer to the viewer.
Unknown Artist – Landscape with Clerks Studying Astronomy and Geometry
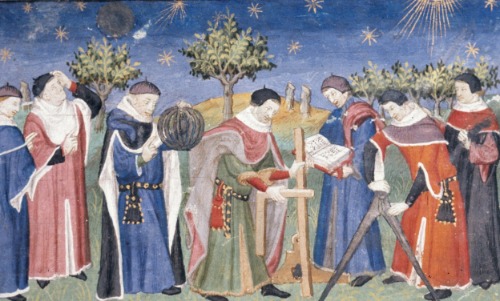
Here is a work by an unknown artist. It could very well have been done by multiple unknown artists! It is a very different piece in comparison to the other night sky paintings shown in this article as it is not as naturalistic.
Night Sky Painting Insights
Like many paintings from the earlier part of the Renaissance, this piece uses more symbolism than naturalistic effects.
For example, the stars that we see in the sky have a more illustrative quality with their rays of light. We do not feel the strong effect of a bright star in a dark sky as we do in the Starry Night painting by Millet. As this painting does not use dark and light values to the same effect.
It is a great example of a different kind of night sky painting! One that is more symbolic. For the time that this painting was created in, it truly was a symbol of its time. As the Renaissance marked a time, when scholars looked at the sky through less fearful eyes and they began to openly explore. As a result, there was a surge of discovery in the Sciences and Arts.
How to Paint a Night Sky: Painting Tutorial
So I have shared some night sky paintings and given some insights into how they were painted. Now, I will show you how to paint a night sky with step by step instructions. So that you will be able to paint a night sky for yourself!
First, sketch out your painting of a night sky
Before you get into putting down the color for your painting of a night sky, you want to sketch out the painting on your canvas. Get detailed instructions on how to do this in the how to sketch out your painting article.
Sketching out your painting helps you to know where to put your horizon line and what your landscape will look like. It is not meant to be a detailed drawing but rather a way to figure out your general composition. Doing this step, will also help to make your night sky painting easy to see how things will generally fit in the space.
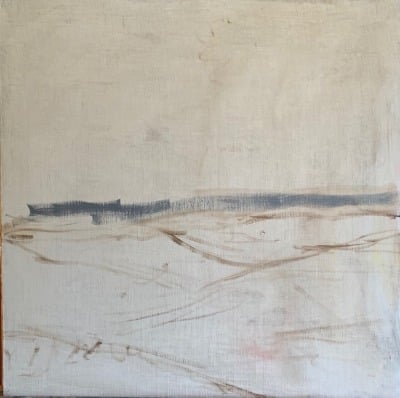
Begin to add color to paint the night sky
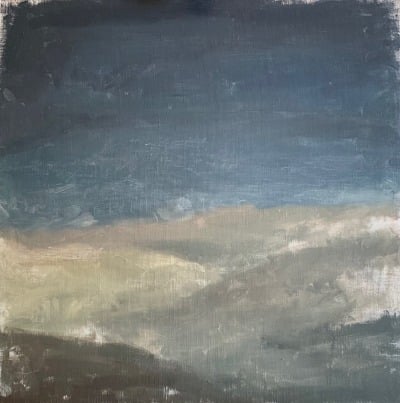
Next, start to paint in the sky. As a rule of thumb make the uppermost part of the sky darker and the lower part of the sky that touches the land a little lighter.
The reason for this is because you want the top part of the sky to appear closer to the viewer – as that is how it is in real life. The lower part of the sky, that is closest to the horizon, is further away from the viewer. So in making it lighter, it will help the lower horizon appear further away.
I also started to paint the land area by mixing together yellow ochre and dioxazine purple (purple helps to mute yellow). To lighten the color up, I mix white in as well.
Colors mixed for the night sky
For the uppermost part of the sky I mixed together ultramarine blue and cadmium orange. The cadmium orange muted the blue so that it would not be too bright. In addition, I also mixed in a little bit of burnt umber.
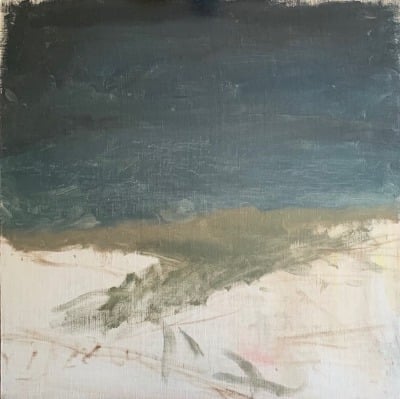
Painting in the rest of the night sky’s landscape
Land area by horizon line = Lighter
Before returning back to the sky, I paint in the rest of the landscape area. Just like the night sky, you also need to think of how to create a sense of space when you paint in your landscape. The land area closer to the horizon line is lighter in value. Which as we learned earlier, making it lighter helps to make an area appear further away.
Land area closer to bottom of painting = Darker
Land area closer to the front (closer to the bottom part of the painting) needs to be darker. This will help the area feel closer to the viewer.
Colors mixed for the landscape areas
For the colors of the land area I mixed together yellow ochre and dioxazine purple. In the areas that are lighter I mixed in some white. Additionally, I also mixed in alizarin crimson for areas that are warmer and slightly reddish.
For the land area that is at the front (bottom part) of the painting I mixed some ultramarine blue and burnt umber in with the yellow ochre/ dioxazine purple mixture.
Darken the night sky to add more contrast
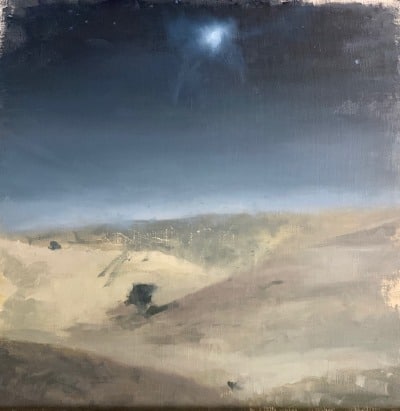
Now I work at reinforcing the sky by mixing more paint and making the top part of the sky even darker and the horizon area of the sky lighter. This helps to bring more contrast and create a greater sense of space within the sky.
In addition, I add a very large star at the top center of the painting. It is very bright and stands out because the surrounding sky area is dark. So, the strong contrast between the very dark sky and the bright star make it stand out!
Colors mixed for the darker sky portion
In an effort to make the sky even darker I mixed dioxazine purple into my sky – often a night sky can have a purple hint to them. However before adding purple to my sky I muted it with cadmium yellow as well as a little bit of pthalo green. I also painted in some ultramarine blue that was mixed with burnt umber.
How to paint stars in the night sky painting
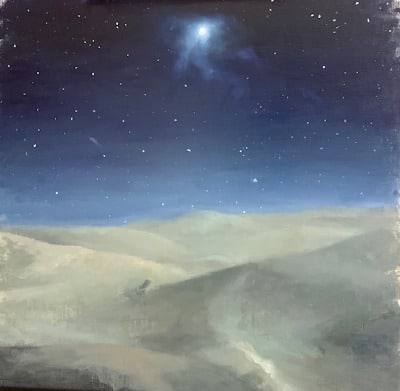
The painting is now complete! I deepened the sky by making the top part of the sky darker in value. But I also made sure that the sky gradually became lighter as it came closer to the horizon line.
Painting stars with varying size and color
When painting in stars it is important to not just paint white dots everywhere. Some stars are larger and brighter while others are more dim and further away. So, varying the size and brightness is really important. You want to create a sense of space by painting in that spacial variation stars create.
Colors mixed for painting stars
For the stars I mute white a little bit with a small amount of ultramarine blue and cadmium yellow (a very small amount!). In the stars that are brighter I mute them much less and use more white. For some parts of the big bright star I used pure white.
As I paint the sky gradually lighter when moving closer to the horizon line I lighten my color with white. However, I also mute the color a little more by mixing in cadmium orange. Often when adding white to a color it makes it brighter than it needs to be!
Painting a Night Sky final thoughts: Importance of color value & imagination
The most important element in painting a night sky is value. If you are able to create a dark sky and paint in bright stars then you are well on your way! It is very difficult to paint a night sky from observation for obvious reasons – you cannot see your painting while you work.
Therefore it is best to observe a night sky with your eyes and take mental notes. Also, looking at paintings of night time skies can be extremely helpful – like the paintings I showed in this article. Always take advantage of the resources that are at your fingertips!
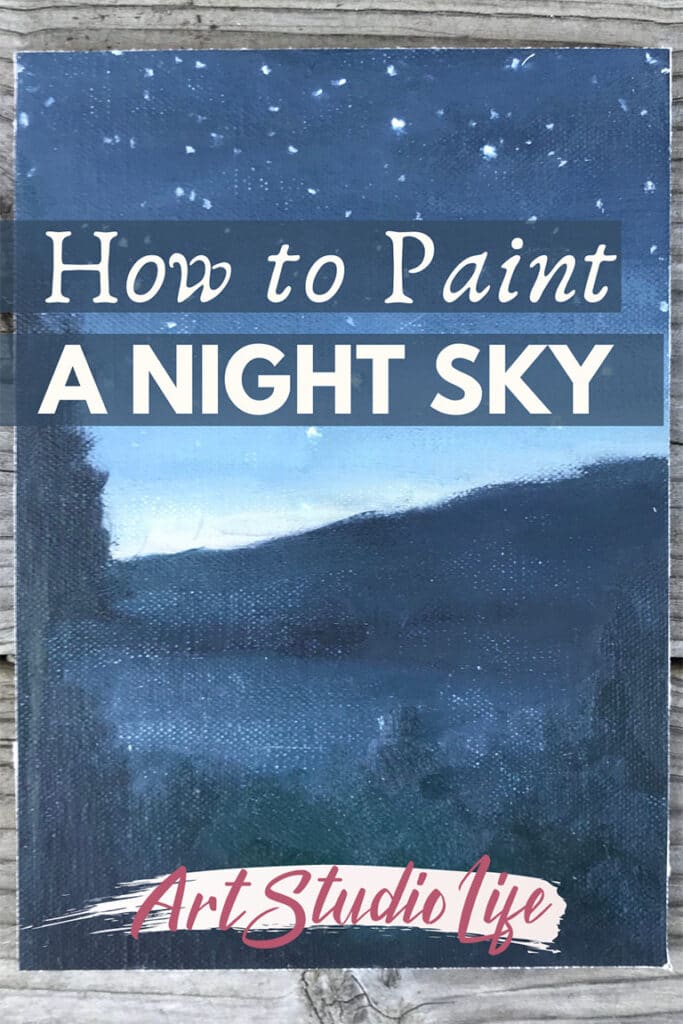
Want to remember this? Save How to Paint a Night Sky to your favorite Pinterest board!


14 thoughts on “How to Paint a Night Sky Tips & Night Sky Painting Tutorial”
I looked and I looked but can’t find the Color Mixing Guide. Would appreciate a link to recover. Thank you for all the great information you provide. Can I help in your effort?
Hi Chuck! I just sent you an e-mail with the color mixing guide attached, so you should have it now 🙂
Elizabeth, as a self taught artist (20+years) I look for and appreciate all the help I can get! Your blog point in fact, organization superb knowledge shared A+. Thanks!
Have you ever tried tp paint night sky with the northern lights aflicker?
Glad you are enjoying this blog! Thank you! Have never tried painting the northern lights – a good idea to try in the future! 🙂
I have never seen the Northern lights. in spite of having stayed up in a lounge chair all night waiting. It is on my bucket list . Would love to see paintings
Seeing the northern lights is definitely on my bucket list too! 🙂
very very informative learned a lot thank you
Glad to hear that, thank you!
Thanks for this article Elisabeth. Night skies are a tricky business. This was very helpful. Dave M 😎🇦🇺
You are welcome Dave, Glad to hear that the article was helpful! Yes, night skies are indeed tricky – but fun to delve into. Happy Painting!
I am a self thougt artist living in Norway. And i am learning a lot from you – thank you very much!
So glad to hear that! Thank you for visiting the website.
אליזבת ערב טוב
תודה רבה על ההסברים וההדגמות
ההסבר ברור ונעים לשמיעה. הדוגמות מעשיות ונותנת השראה לצייר
נותן הבנה בשימוש צבעים ושימוש במכחולים
השונים
תודה
בהערכה
רותי
שלום רותי, שמח לשמוע את זה! תודה שקראת, אני מעריך את זה.