

Drawing flowers can make for such great subject matter as so many flowers have such clear, structural shapes to them. How to draw flowers becomes so much easier, as you learn how to break down what you see into these shapes of light and dark values.
In this step by step flower drawing tutorial I will show you how to approach drawing flowers. As well as demonstrate fundamental techniques that will apply to other aspects of your artwork. A note for those who love to paint, learning how to create drawing studies like these, can help your painting immensely… So let’s get started flower drawing!
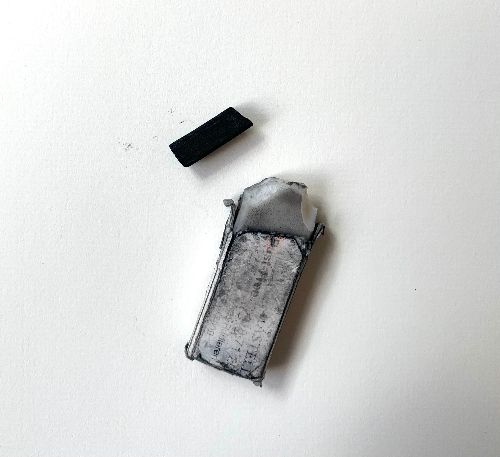
Materials used for this Flower Drawing
You can use any drawing materials you have on hand to create a flower drawing. I personally recommend vine charcoal, an eraser and some charcoal paper! These are all inexpensive and easy to find materials. However, a simple pencil, paper and eraser will work as well!
How to Draw Flowers Step 1!
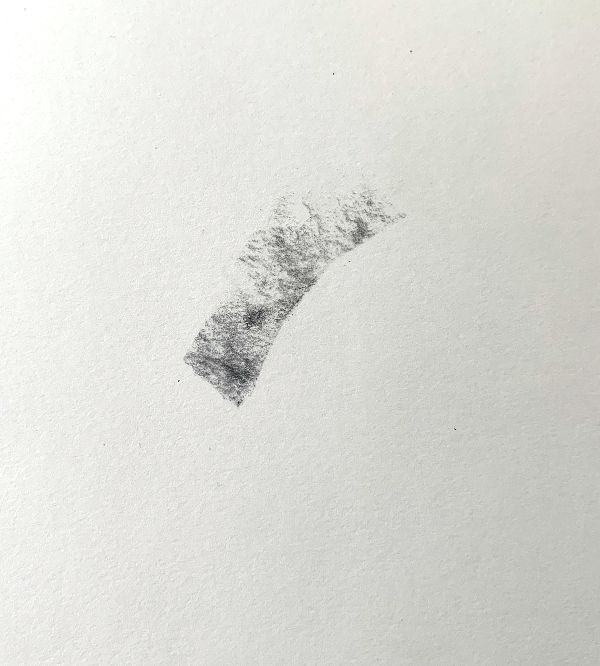
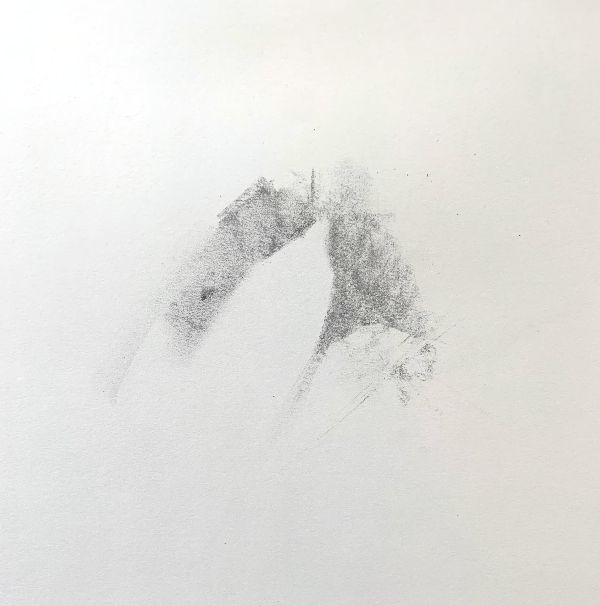
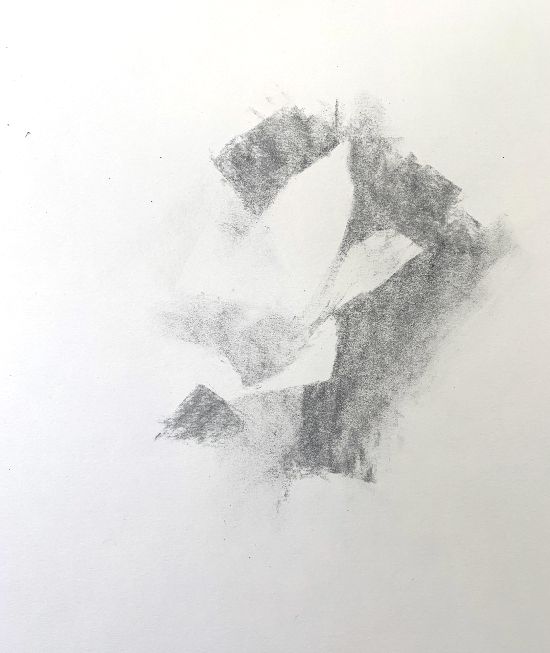
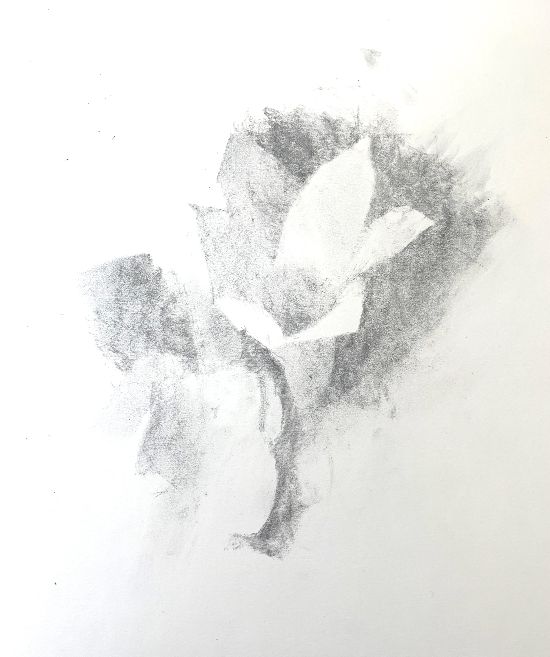
It’s important when learning how to draw flowers, that you start off your drawing with a clear sense of light. Therefore we will carefully observe light and dark edges next to one another. The best way to start a flower drawing is to find a clear dark area next to a light area.
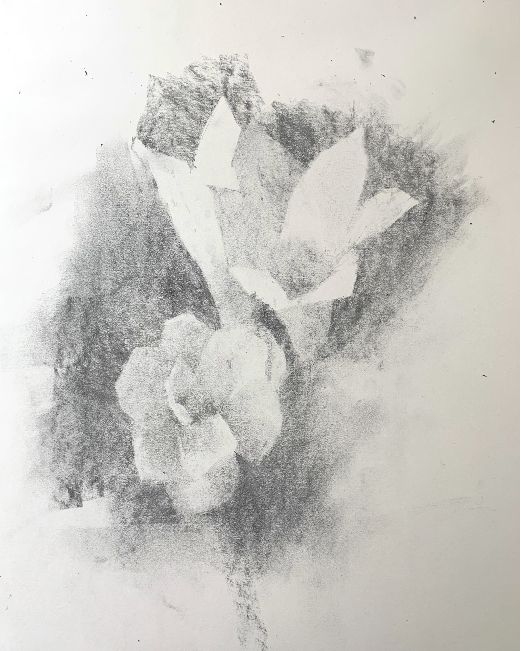
In this step by step flower drawing, the darkest area happened to be the background against the very light value area of the lily petal. So, I created a dark mark that helps form the edge of the lily petal as seen in the image above.
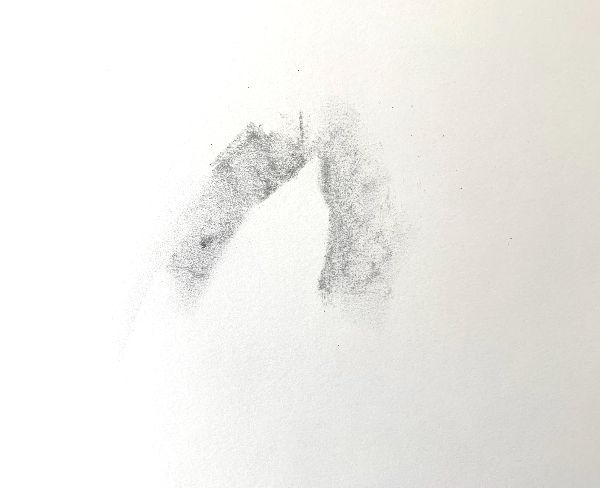
With the other side of the petal drawn here you can now see the outline of the petal in greater clarity. The contrast between the dark background and the light value of the petal is what helps to make petal stand out.
I use the same method of outlining the edge of the petal by simply drawing the dark value of the background to form the other petals. This is simple to do since the background is clearly darker than the petals. You can now see how the clear shape of the flowers can really help when working in a tonal manner.
Use the same method of outlining the edge of the petal by simply drawing the dark value of the background to form the other petals. This is simple to do since the background is clearly darker than the petals. In the image below you can now see how the clear and structured shape of the flowers can help when working in a tonal manner.
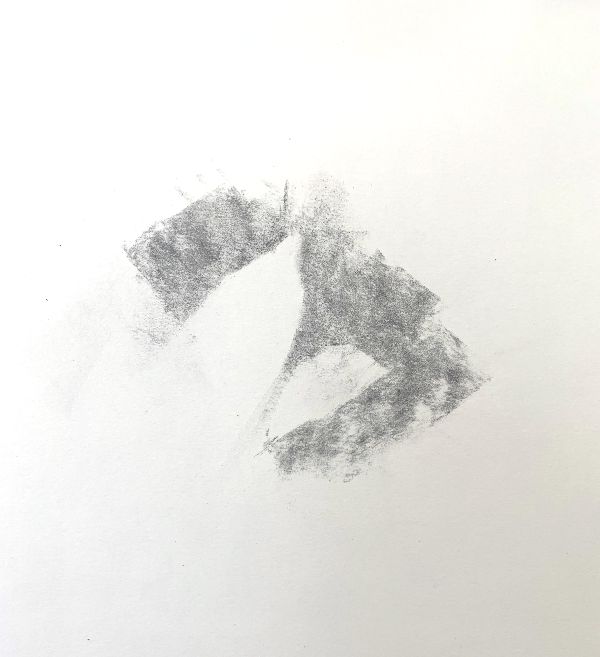
In the image below another petal is added by finding the silhouette shape of the flower.
Find Clear Light and Dark Value Shapes
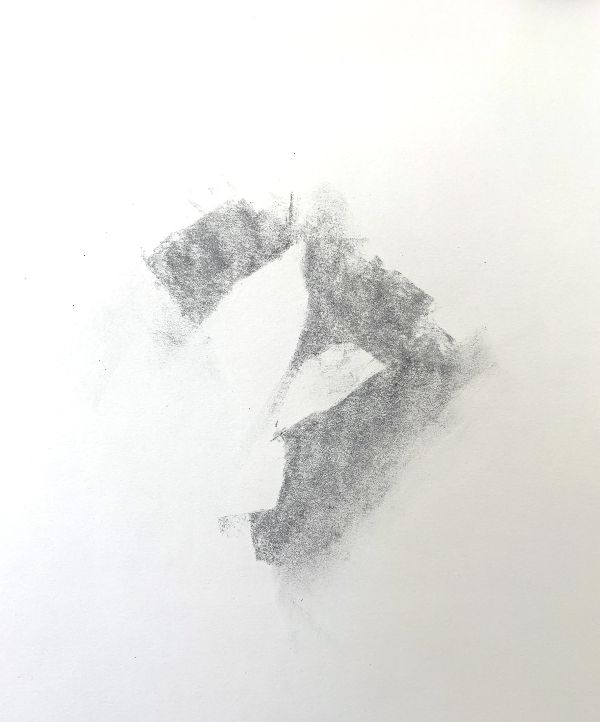
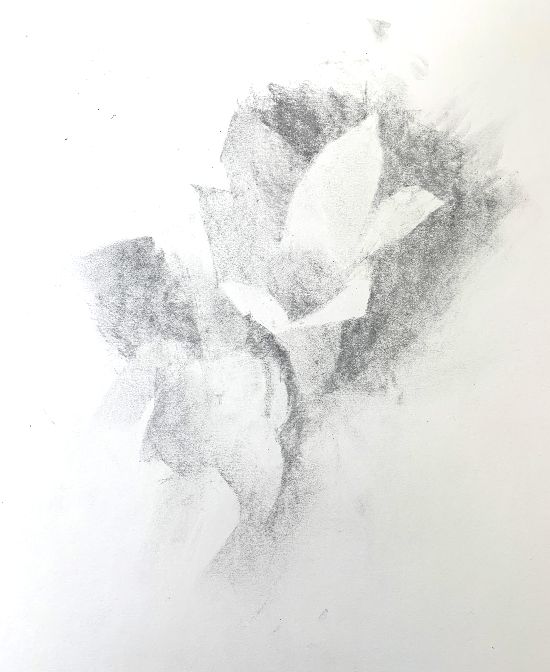
How to draw flowers with clear values… Well, up until now we worked with just 2 values to draw our flowers with – a very light value and very dark value. Now, it is time for us to incorporate a medium value as well. In order to have a sense of light it is absolutely necessary to have at least three values – a light, medium and dark value.
The beauty of drawing flowers is that most of them already have distinctive and clear shapes. This makes it much easier to create a strong and tonal based drawing. Which is why I encourage exploring this subject matter! 🙂
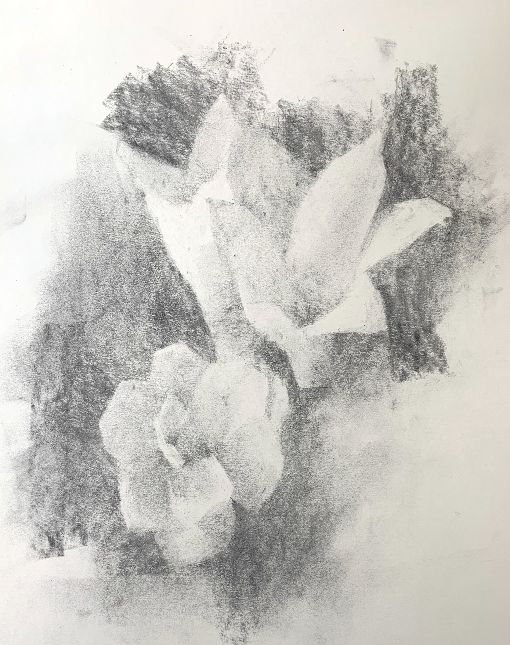
Notice in the image above how the background is a dark value while the petals are just the white of the page and therefore are the lightest part of the drawing. You can find the medium value at the center part of the lily flower as well as on the base portion of the flower.
You will see in the image that each value has a specific shape. It is finding these shapes that helps you to create tonal clarity in a drawing. It is very important to simplify your values and break them down into either light, medium or dark values. If you are having trouble simplifying while drawing your flowers there are some tools that can help you. Squinting is one of the best and easiest ways for you to see in a more simplified manner.
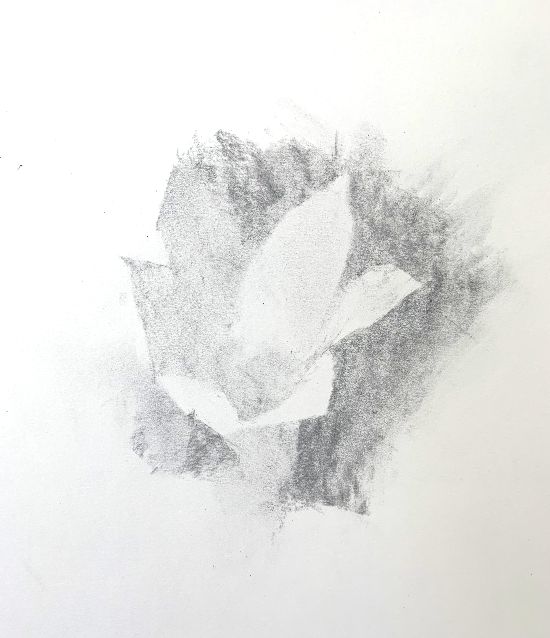
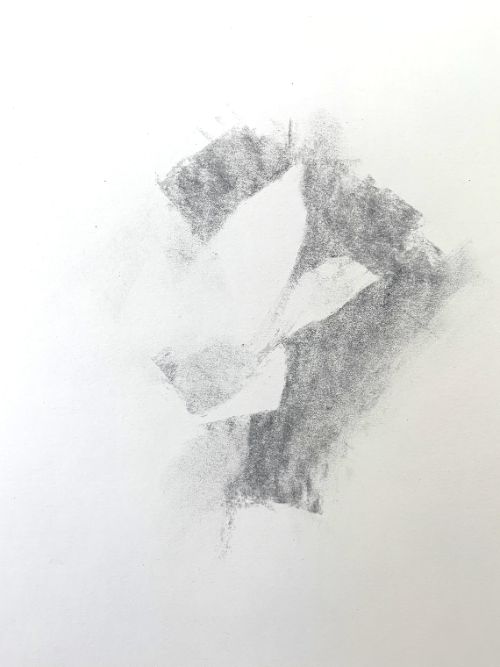
Here we have a nearly complete flower already! The petals all have distinct shapes and values and the drawing so far has a clear light and dark structure. It is important to develop a clear value structure right from the beginning. Doing this will make the rest of the drawing much easier for you!
Draw Flowers with Edges
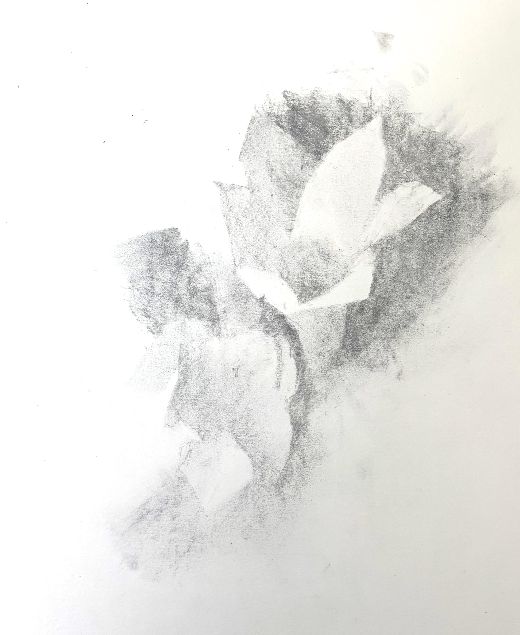
Edges are very important when it comes to learning how to draw flowers – especially realistic flowers. You need a variation of soft and hard edges because they help to create a sense of space and volume in your flower drawing.
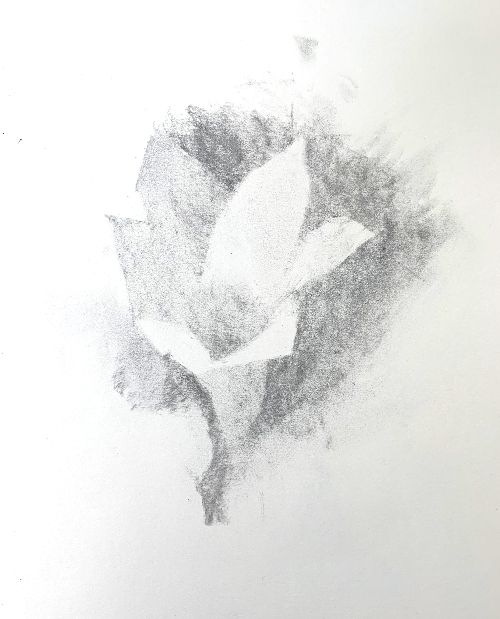
Notice in the image above that the front outer petals are made of hard edges which helps them to really feel like they are in front. The two front light value petals are contrasted against the darker background.
At the same time, the dark value area on the inside center portion of the flower has very soft edges. The soft edge at the center makes it look further away than the hard edges of the front petals. So, hard edges make objects come forward in space while soft edges make objects recede back in space.
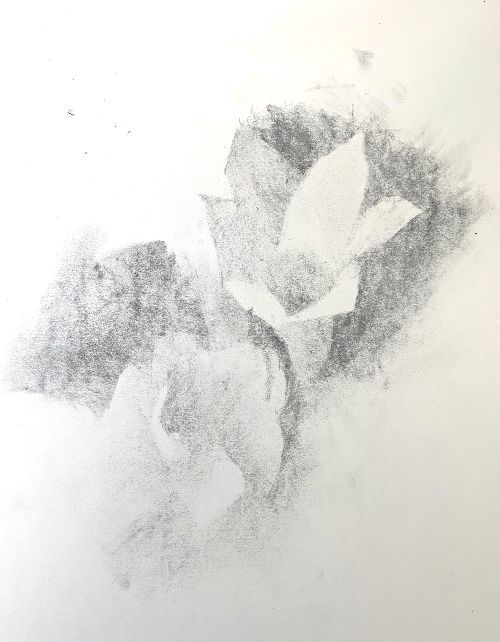
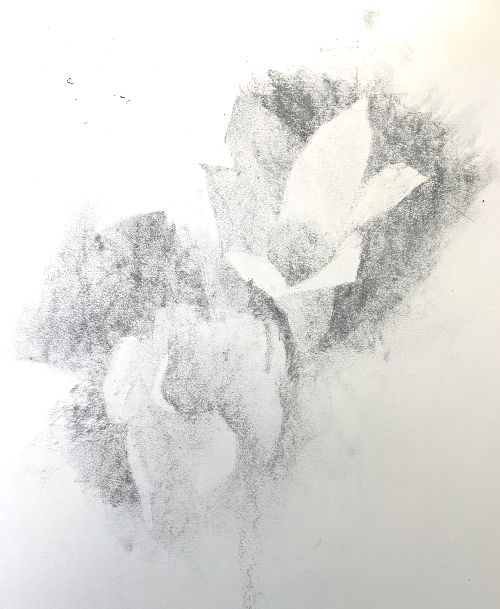
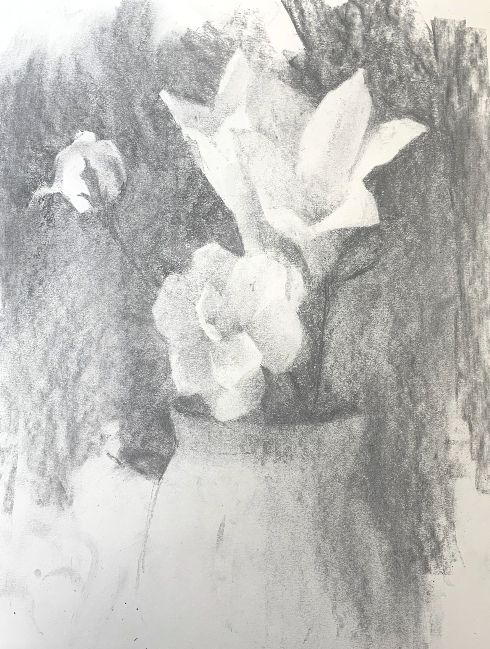
With the lily flower mostly complete I now move onto drawing other flowers that are included in my flower bouquet. Specifically, I start sketching in the flower that is in the lower left corner. Again, I outline part of the flower first by using the dark value of the background against the lighter value of the petals. Doing this helps me to create clear tonal shapes.
The flower on the lower left part of the drawing starts to become more clear and coherent now. As a result, I incorporate a medium value where the petals of my flower are. You can see how I am searching for clear values in this beginning stage process. I am NOT considering each petal on its own but rather looking at value shapes with no consideration to boundaries.
The stage from the above image to the image below shows a search for clarity and finding large value shapes.
Simplify when drawing flowers
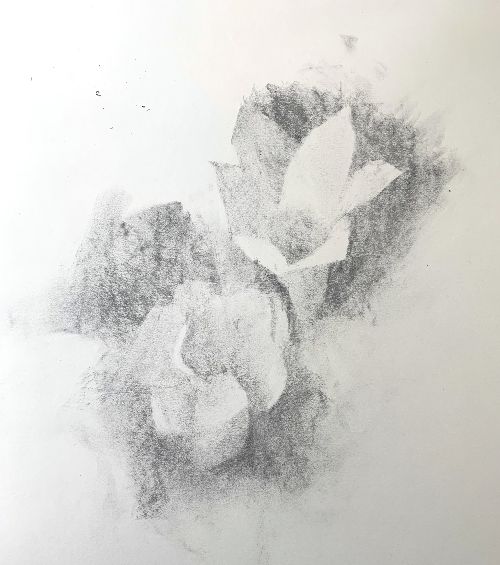
The process of simplifying and looking for large value shapes becomes more clear as the drawing progresses. Most of the flower on the lower left is made up of a medium value. Then with a light highlight area in the center part of the flower.
As mentioned before, squinting your eyes will really help you a lot to simplify your bouquet of flowers and find the big shapes of light and dark values. Simplifying in this manner truly is the key towards creating a clear and strong sense of light and dark.
In addition, if you teach your eyes to simplify it will help you to have clear light and dark values in your paintings as well! Drawing can help us become better painters! 😉
Create a Light Value Highlight in a Flower Drawing
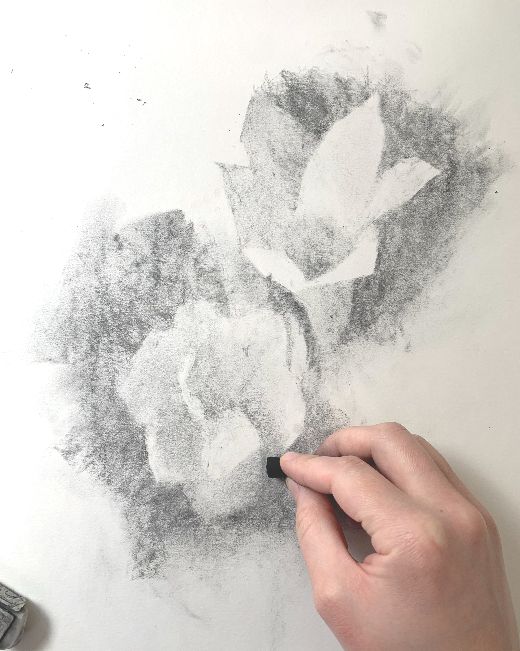
Very often a flower has a light value highlight. In my case the lower left flower has a light value highlight at the center. A light value highlight is an important distinction to point out in your flower drawing.
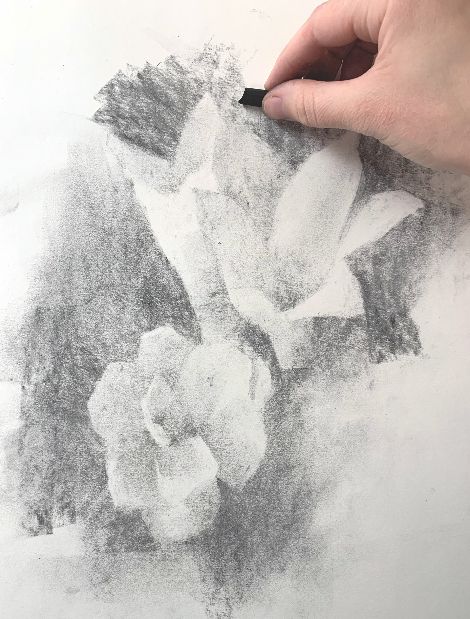
To make sure that the light highlight in my drawing is actually lighter in value I take an eraser to get rid of any charcoal markings that may make the area a little darker than it should be. Most of the rest of the flower is darker than my light highlight. So, the contrast between my light highlight and the darker value of the rest of the flower is what makes the highlight area actually stand out! When I do this I create a lot of clarity which helps to create a strong sense of light and dark at the same time.
I also make sure that the edges of my petals are very clear and distinct. The background behind the flowers is dark. While most of the petals on the lower left flower are medium in value. I make it clear where the light value areas are. However, I never get into any unnecessary details – it is important to simplify as much as you can!
How to Draw Flower Petals
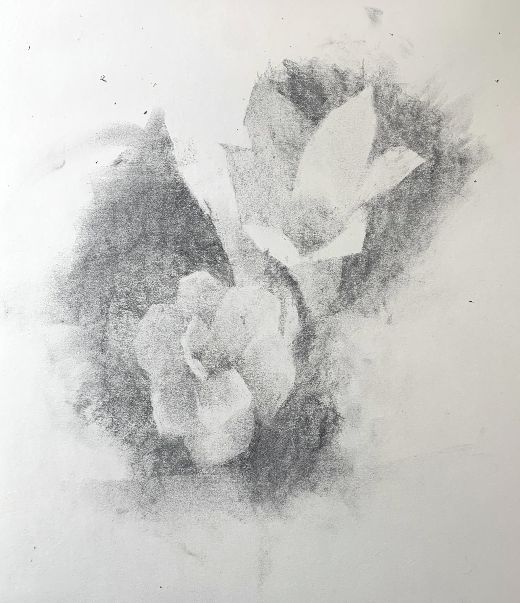
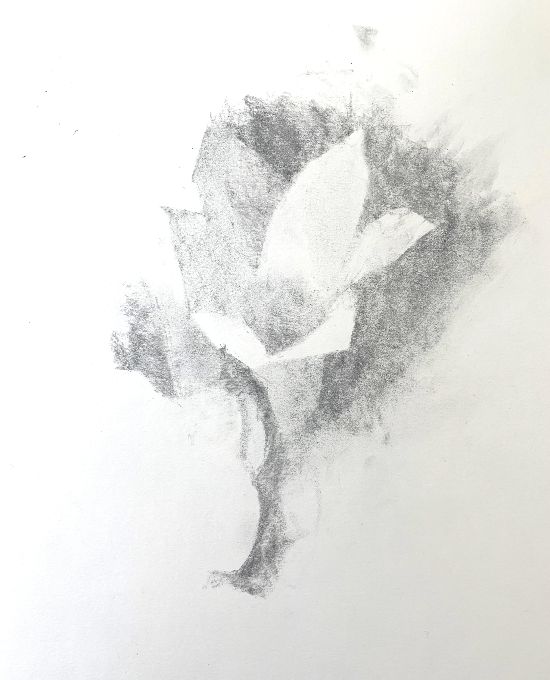
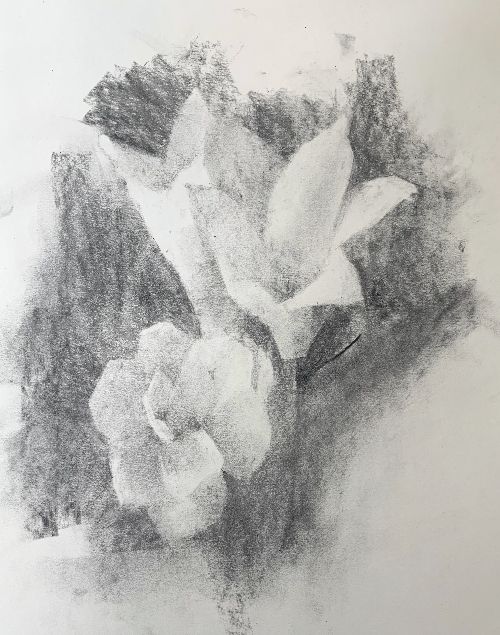
With the flower on the lower left mostly complete I move to draw the lily that is to the left of my other lily. Again, I use the dark value of the background to draw and form the outline of the lily flower petals.
Just as exhibited above with the other flowers, I use the silhouette of the flower to draw the flower petals of this new lily!
In the image above the rest of the upper portion of the lily is drawn in by using the profile/ silhouette of the petals. The entire flower on the upper left side of the drawing is just light in value.
I develop the flower petals of my lily further by drawing in the medium value area that is at the center part of the flower. I use this medium value to outline the petals that are at the front part of the flower.
Create Value Contrast between the Flowers and the Background
In order to create a flower drawing that has a realistic sense of light it is important to have a set up with clear values. It is more difficult to draw white flowers against an equally white background than it is to draw white flowers against a dark background.
The reason for this is because a darker background provides a strong contrast against the white flowers. So, right from the start you have clear light and dark values. You definitely can draw white flowers against a light background – it will just be more difficult to create a strong sense of light.
Drawing Flower Stems
When drawing flowers it is good to make sure that your flowers have flower stems otherwise they will look as if they are floating in the air! 😉 In my case the flower stems will not be very dark since they are a very similar value to the dark background.
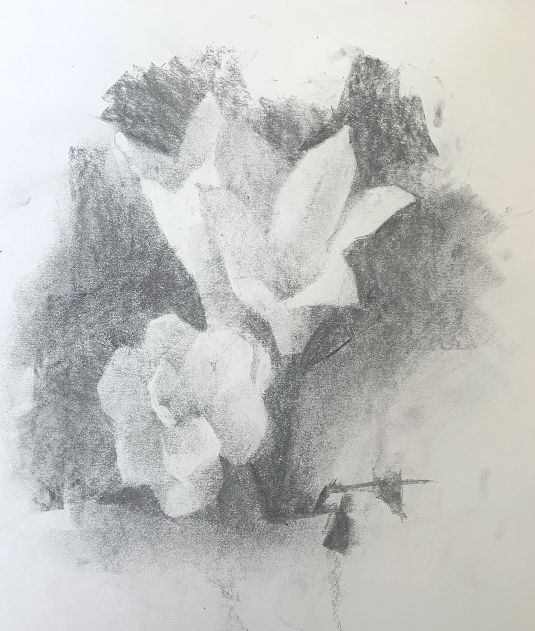
In the image above, you’ll see I made the stems just dark enough to be visible against the dark background. If you have a lighter background your stems will stand out much more than they do in this drawing.
At the same time as I draw the stems I also work on the upper rim of the flower vase.
How to Draw Flower Vases
You may or may not choose to draw your flowers in a flower vase but doing so can add more interest to your piece. To start drawing a vase you first want to draw out the distinctive edge of the upper rim. In the image above you can see the placement of the upper rim right beneath the lower flower on the left. In addition, the right side of the vase is partly drawn out.
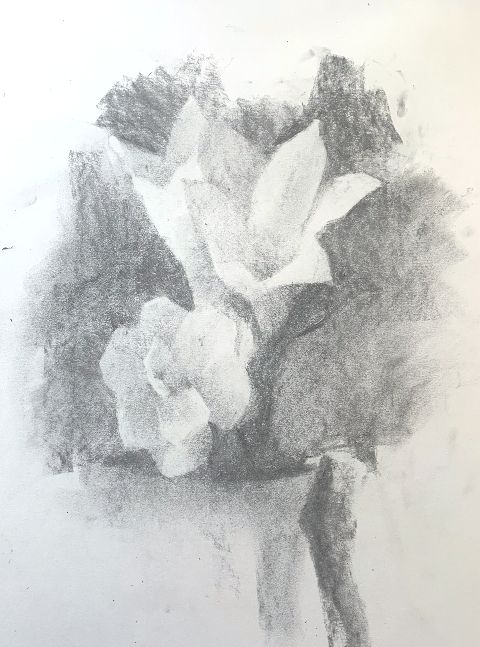
Continue to draw the rest of the upper rim of the vase, along with the side edges of the flower vase. Look for light and dark value shapes just like in the previous steps. For example, notice how I use the right side of the vase to create an outline of the side. I draw the dark background while the light value of the right edge of the vase stands out.
How to Draw a Rose Bud
You will not just learn how to draw flowers but also a rose bud! On the upper left side of the drawing, I outline the edge of the rosebud. Then continue by drawing the dark background but leaving the rose bud lighter in value. In addition, I shade some areas a slightly darker value inside the rose bud to highlight some of the petals.
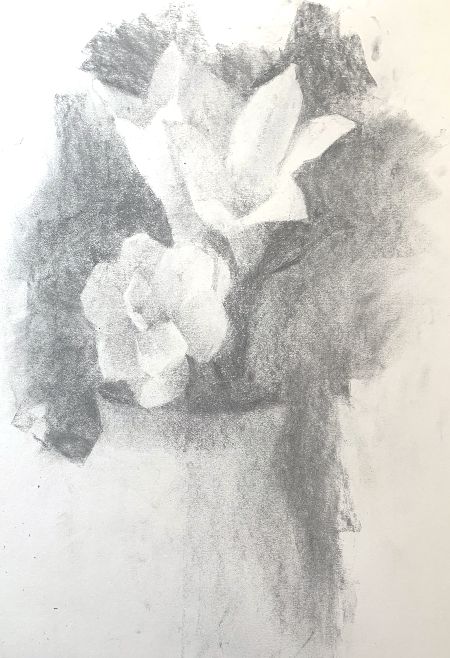
I also draw the thin petal that is to the left of the rose bud. The rose flower is complete by drawing the leaf along its side. Then finishing with the stem that extends down into the vase.
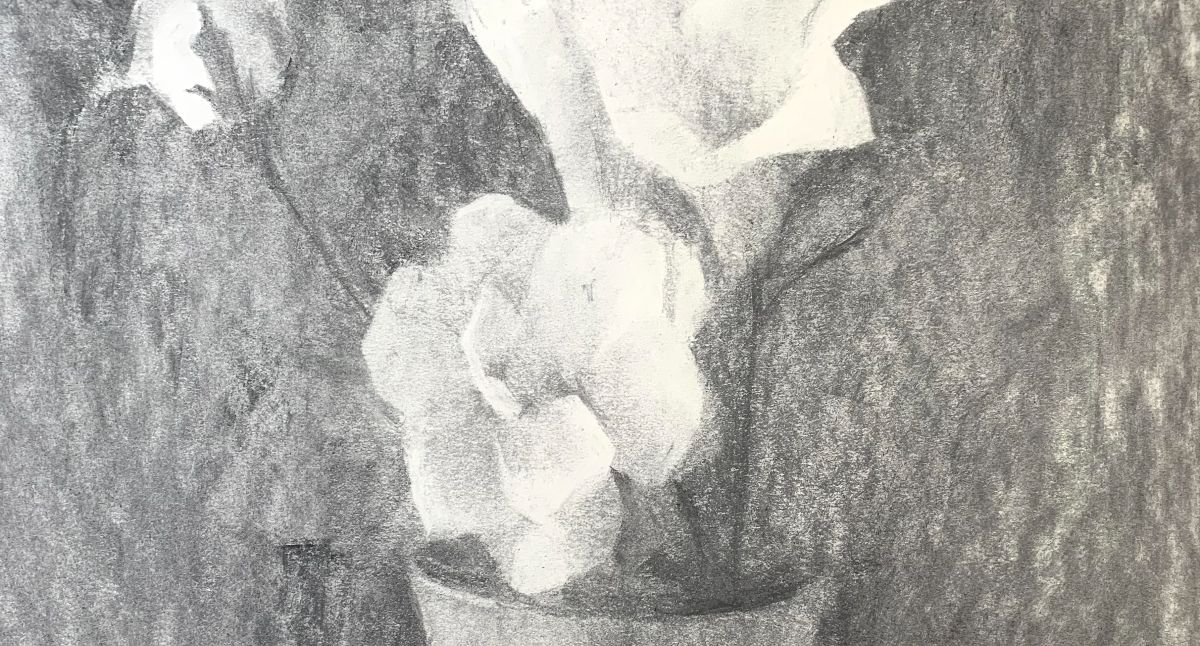
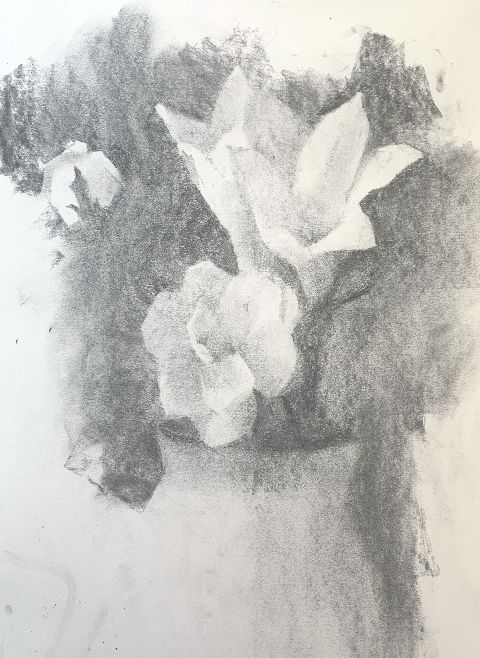
Completing this Step by Step Flower Drawing
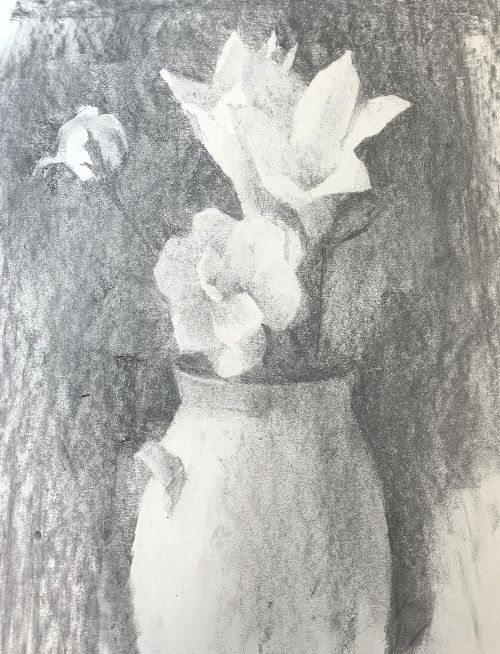
The drawing is complete by making more of the background darker in value. I also complete the vase further by drawing the handle that appears on the upper left side. I apply the same principles of light and dark values that I’ve used throughout the entire floral drawing. Which means that I continue to look for clear light and dark value shapes!
The lessons in this how to draw flowers tutorial extend beyond drawing flowers. As the principles learned here, apply to all subject matter. However, flowers provide a really great way to practice simplifying and creating clear light and dark value shapes. These are very important principles in learning how to create a realistic sense of light in your work.


10 thoughts on “How to Draw Flowers that Stand Out From the Crowd”
Thank you Elizabeth, using values to create shapes, depth and three dimensionality of the subject is very enlightening for me. And thanks for reminding me to squint!
Hi Billy, I am glad this was helpful, thank you for sharing 🙂 And squinting really does help so much!
Hello Elisabeth,
Thank you for all this beautiful tutorials!
Specialy how to paint tulps( my homeland flower, The Netherlands)
I have learned a lot from you.
Thank you so mutch for that.
Regards,
Frits Keulers
Hi Frits,
You are so welcome! Am very happy to hear that the tutorials are helpful and that you are especially enjoying the Tulip painting tutorial – one of my favorite flowers 🙂
thank you so much for this important lesson
Hello Rayah – you are so welcome!
שלום רב אליזבת
בהערכה רבה
רותי כהן
תודה רבה על ההדגמות המועילות
Many thanks, Elisabeth, for offering this wonderful tutorial, (as are the others), and creating your fabulous site!
Best wishes,
Gabriella
You are very welcome Gabriella! I am happy to hear that the tutorials are helpful! 🙂
תודה רבה אליזבת
על ההדרכה המפורטת בשלים
מועיל מאוד
בברכה
רותי כהן