
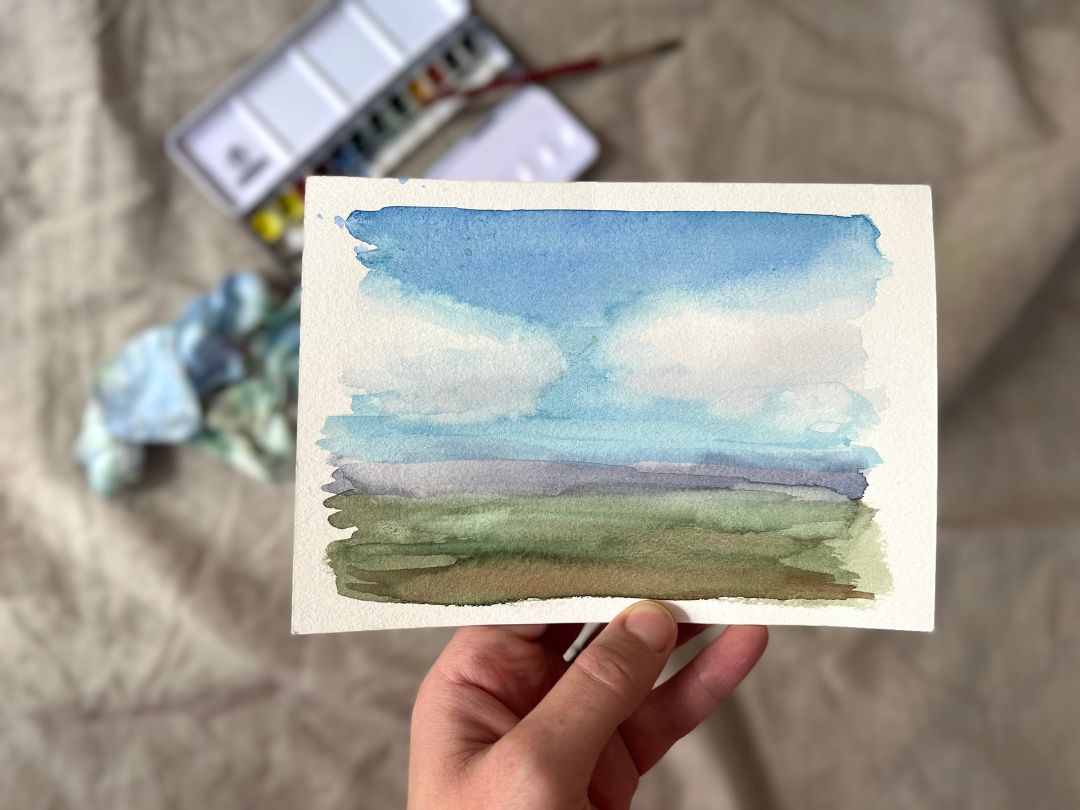

Creating a watercolor landscape painting can be both beautiful and very forgiving. If you make a mistake, you can usually just add more water to the area and it will blend in. This is a great medium for beginners because they can experiment without having to worry too much about ruining the painting.
More experienced painters can also use watercolors to great effect. Because it’s so easy to travel with and quick to setup, it is a wonderful medium to capture ideas (and moments) with.
This tutorial will focus on creating a simple landscape painting with watercolor, but also show you how to incorporate more advanced techniques easily. However By using different watercolor techniques in your landscape, such as wet-in-wet and dry brush, you can create some really beautiful effects in your paintings.
Watch the video!
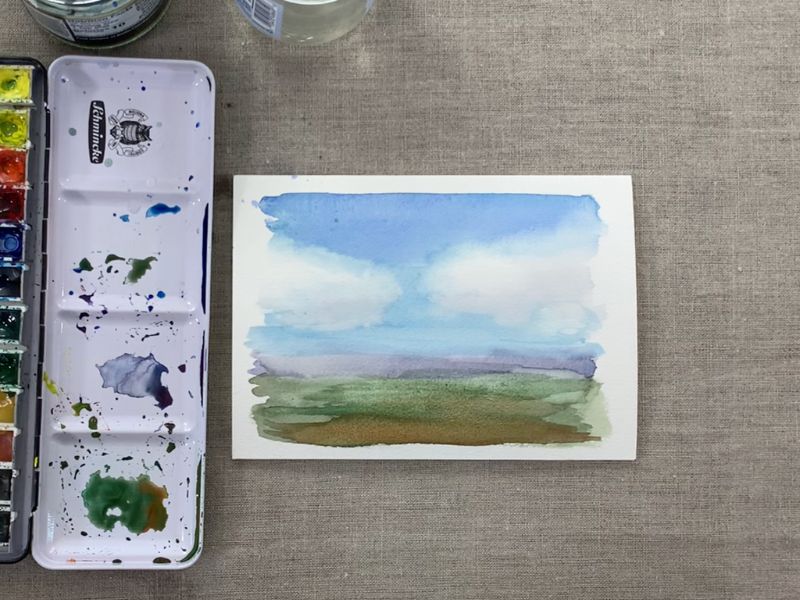
Watercolor landscape painting setup
So, here we have a full watercolor landscape painting tutorial – in both video and written format. I encourage you to grab the materials shown in the materials list below and paint along with me! You can play, stop and rewind the video as much as you need.
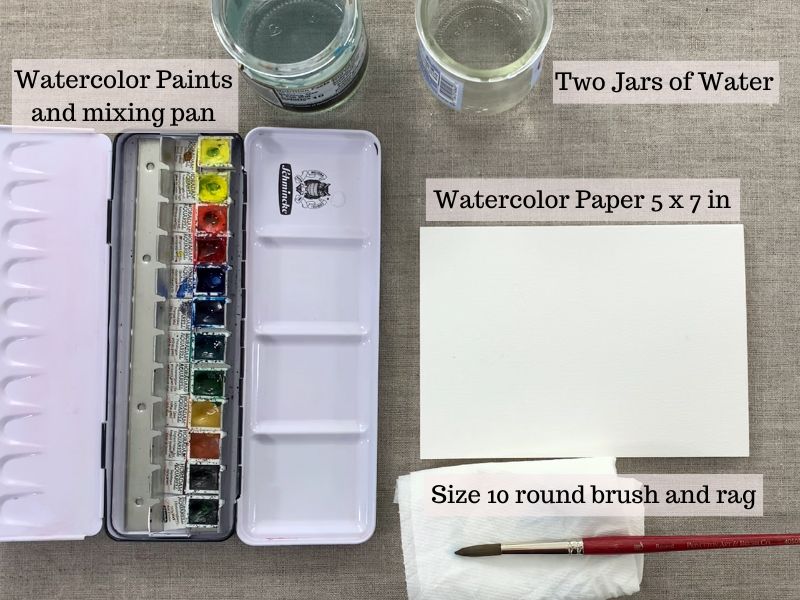
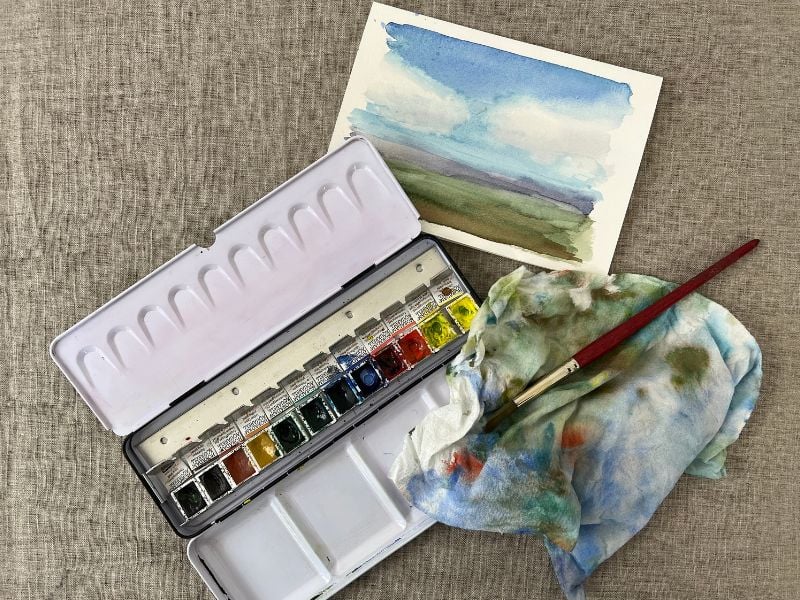
Materials list
- Watercolor pan set (recommended watercolor sets)
- Watercolor paper (I used 5 x 7 in)
- Size 10 watercolor brush
- 2 jars of water
- Rag (paper towel or cloth)
Tips for substituting watercolor supplies
If you don’t have all of the supplies listed in the above image – no problem! Just use what you have 🙂
Start watercolor landscape (painting the sky)
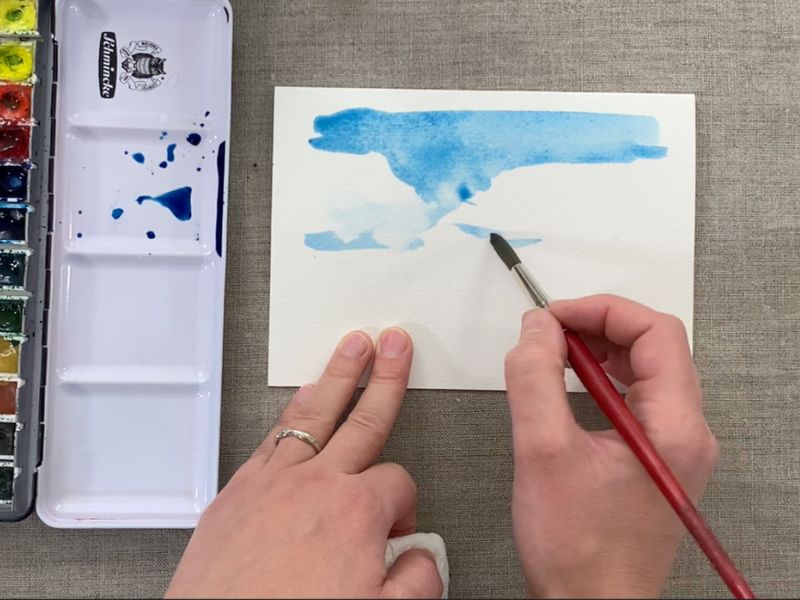
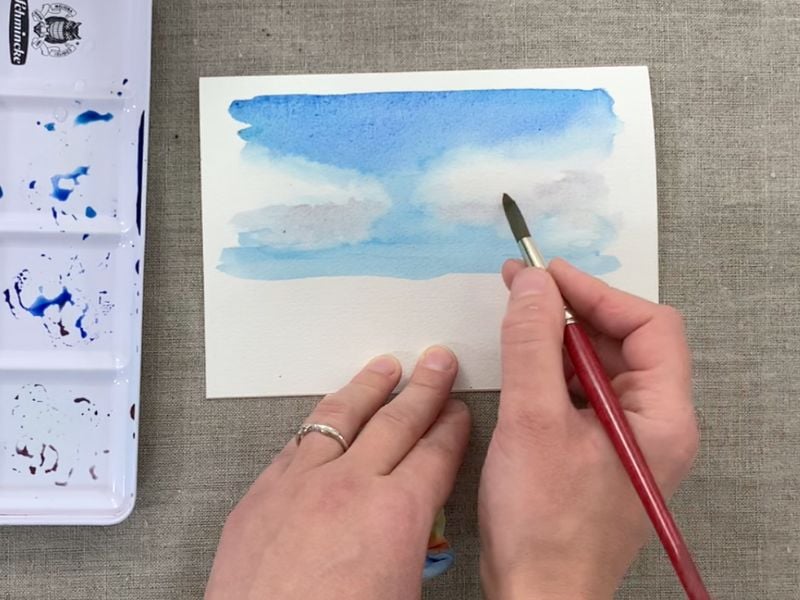
Typically, the best place to start in a watercolor landscape painting is in the sky. I started painting the sky by using pure pthalo blue. While working on the sky I also worked on capturing the outlines/ shapes of the clouds. It is important to leave these untouched and white as otherwise you will never be able to make them white again!
Choosing your watercolor cloud shapes
The brilliant thing about painting clouds is that they can be whatever shape you make them! As we know, clouds come in all sorts of different shapes and sizes. If you would like your clouds to look realistic though, focus on creating more irregular shapes.
How to soften edges in your watercolor landscape painting
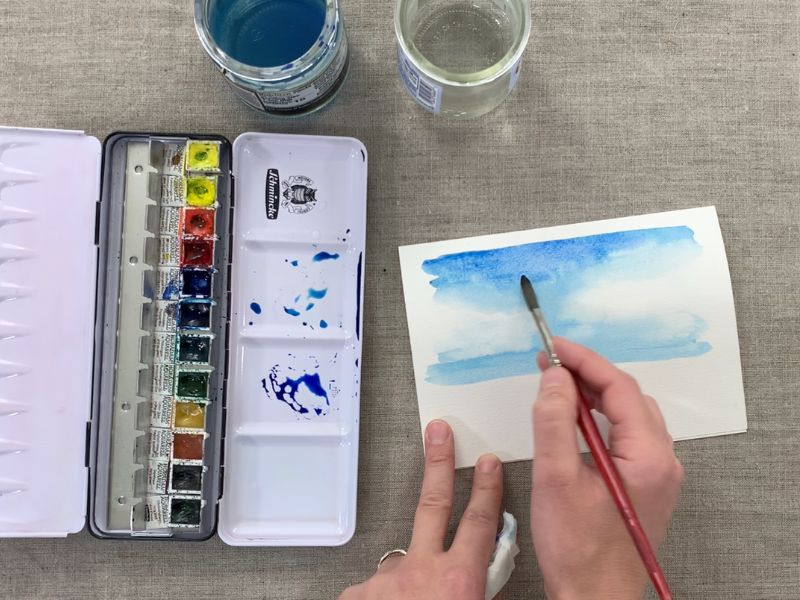
Right after you finish painting the sky and have your cloud shapes in place then work on softening the edges of the clouds. To do this, wet your brush and run it over the edge of the clouds. You can view the video of this process to get a more detailed look at how to create soft edges in your clouds with watercolor.
Working wet in wet with watercolors
In order to capture soft edges it is important to work quickly. The paint needs to still be wet for you to create a natural soft edge. This doesn’t mean that you need to rush, just be mindful of how much time you are spending each step of the way.
Creating shadows of clouds with watercolors
When painting clouds in watercolor, we cannot just leave our clouds as blank white blobs. Creating more realistic looking clouds, can make all the difference in the world in your (watercolor) landscape painting. So it is important to add some shadows, so as to create more dimension.
How to mix shadow colors for watercolor clouds
Mix a little bit of blue with some orange to create a good neutral darker color to add at the bottom portion of the clouds. Blue and orange are complementary colors and work well for creating a good neutral color. Also, soften the edges of the shadows to create natural and smoother transitions.
Adding hills to your watercolor landscape painting
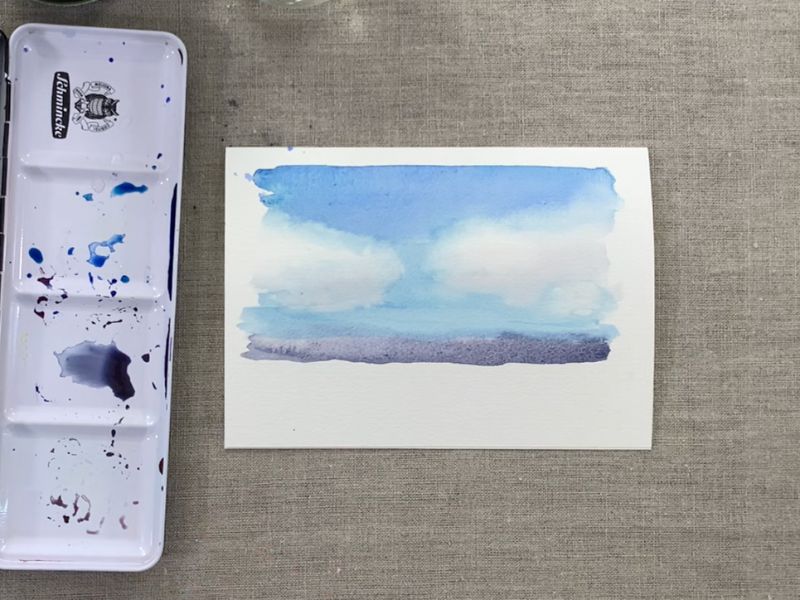
This watercolor landscape painting has hills at the horizon line. Mix blue with some alizarin crimson to create a purple color. Then mix a little bit of yellow into the purple to mute it a little bit. It is important to create muted colors for a watercolor landscape painting as it is much more realistic. Muted colors are much more commonplace than bright saturated ones.
Once you paint in the hills beneath the sky remember to soften the edge between the two areas by applying a little bit of water. Again, you can view the process on the video to get a clear view of how to do this.
Painting the foreground of the landscape
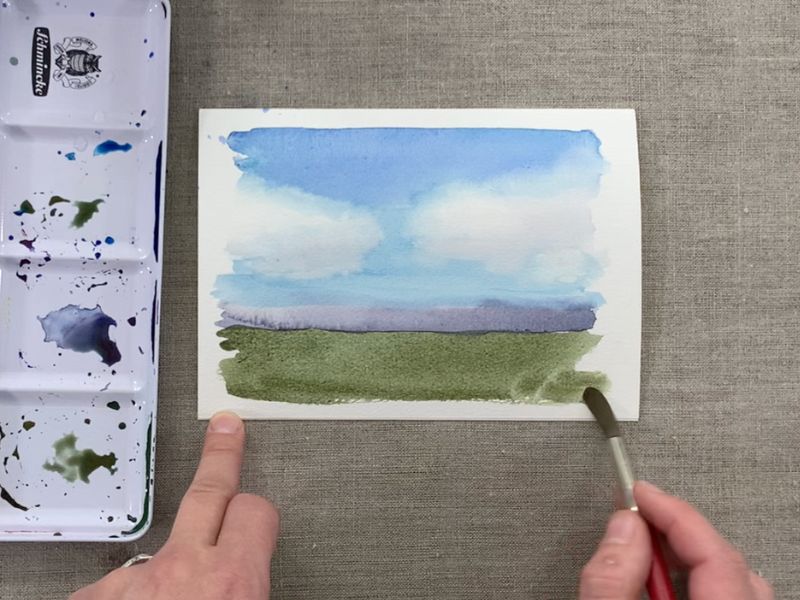
Next we paint the foreground area of the landscape by mixing up a shade of green that works well in the landscape. Here I mix together olive green and pthalo green. I also mute the green a little bit by adding a small amount of orange and red.
How to mix different shades of green with watercolors
Before mixing more greens use a slightly wet brush to soften the edges between the hill area and the flat green land. This will help that area to feel like it is further back in space.
Mixing cool and warm greens
In a watercolor landscape painting its best to mix up different shades of green. Otherwise the landscape will end up looking flat.
Warm colors come forward in space while cool colors recede back in space. We want the front section to feel like it is the closest area to the viewer. Mix up a warm green color by adding more orange and red into green mixture.
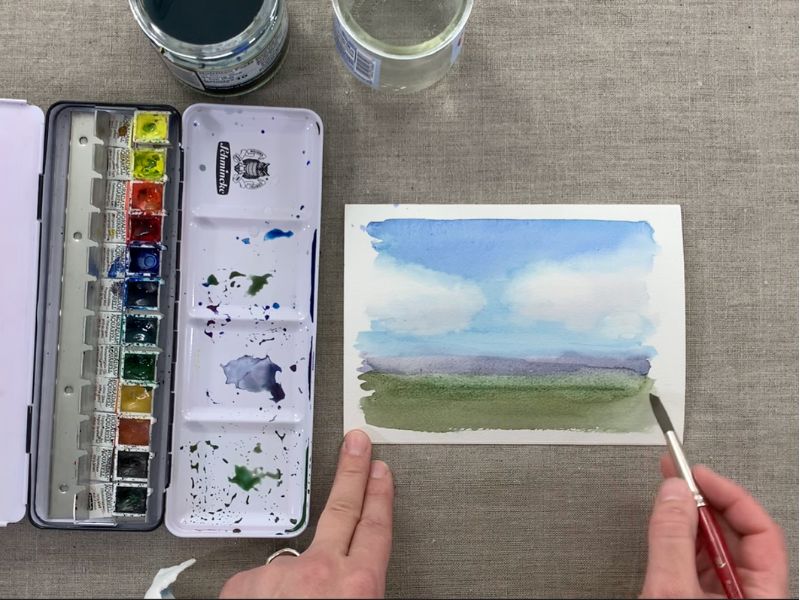
Finishing touches of the watercolor landscape painting
For the final changes to the painting I mix a stronger warm green color by mixing much more orange into my green color. This warm color creates an even stronger sense of space in the watercolor landscape.
In addition, I also create some lines on the filed in front of the hill area to reinforce the three dimensional sense of space.
How to know your watercolor landscape is done?
It is important to not overwork your watercolor painting. If you do too much then it will quickly lose its spontaneity. The more you work with watercolors the better you will get at gauging when a good stopping point is. There are a few questions you can ask yourself before finishing a painting.
However, a good rule of thumb is to stop when the painting looks and feels complete to you and has a strong sense of light.


6 thoughts on “Easy Watercolor Landscape Painting Tutorial for Beginners”
I have never painted a landscape because I didn’t know how to start, much less complete. Thank you for your help. I will start working on landscapes
Hi Doris, That is wonderful! Glad to hear that.
Hello Elisabeth.
Thank you so much for sharing this one with the easy to follow video tutorial. as I have only worked with watercolor for a short time and only watercolors this will be my first landscape painting; I think I could master this one!
Many thanks From Mike.
Hi Mike, You are very welcome! Glad that this is clear and easy to follow. Enjoy painting the landscape!
Hello Elisabeth,
I like to do watercolors. It’s relaxing and as you say it’s not as constraining on the details.
I also like to combine watercolors with Indian ink.
I would like to see you do two colors at the same time on the wet paper and see the diffusion of the two colors.
Have a good day
Hi Paul, Thats great that you enjoy watercolors! India ink and watercolors together can work quite well. Whenever creating soft edges between two colors in watercolors there is a diffusion of two colors – there are a few moments that I do this in the video tutorial.