

Painting a snowy winter landscape can be challenging for a number of reasons. Painting in the cold is hard… You may have experienced the difficulty that comes with trying to use your hands for intricate work – when they feel like they are about to freeze off! However more than anything, creating subtle shades of white, is a huge challenge unto itself.
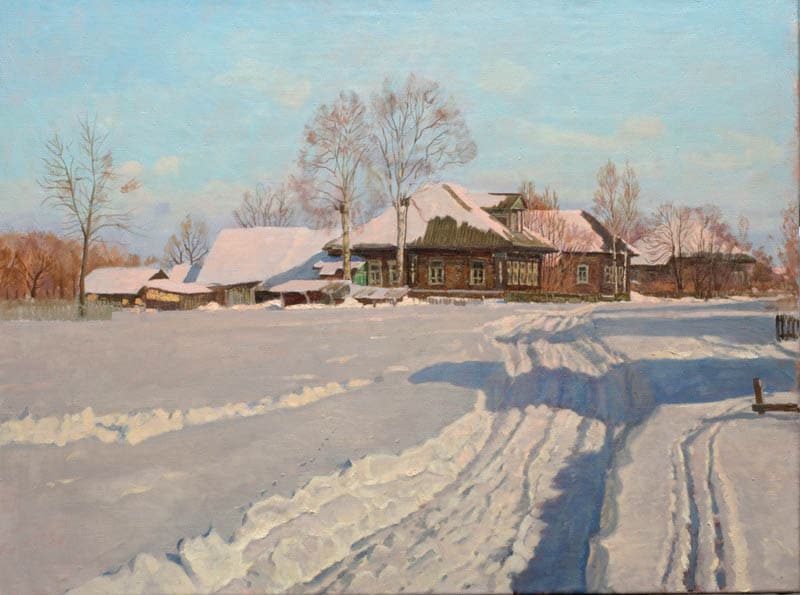
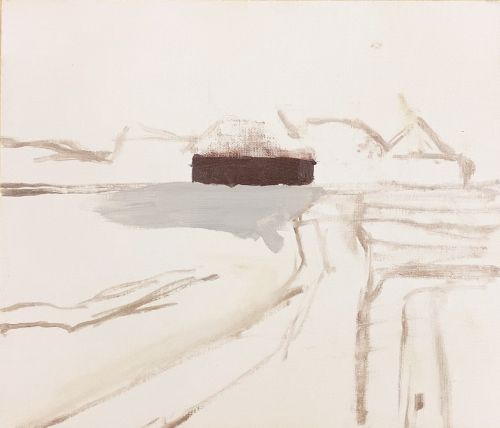
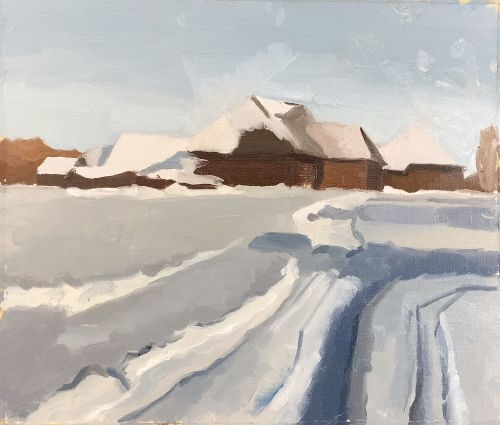
In this article you will find step by step instruction, as I show you how to break down a winter landscape painting by Nikolay Anokhin titled, The Village. This master copy tutorial of his painting, will allow you to see each step of the process of how to approach and paint a winter landscape painting for yourself.
Winter landscape painting first steps
Creating your imprimatura
Before getting started with a winter landscape painting you want prepare your painting surface with an imprimatura or underpainting. Doing this helps to get rid of the bright white surface and makes the process of creating strong light and dark values easier.
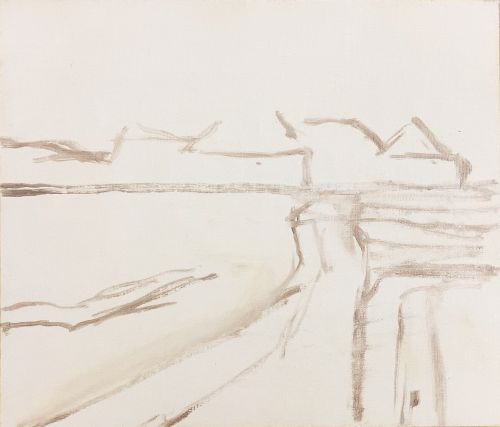
How to sketch out your winter landscape painting
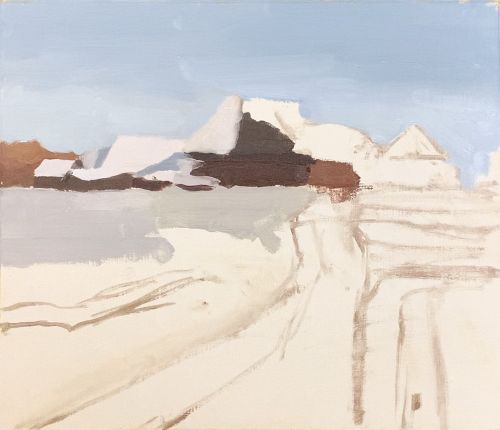
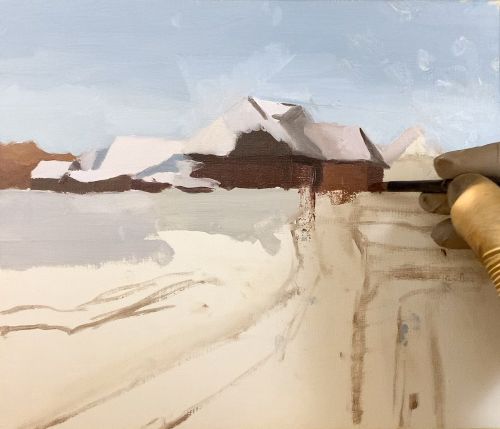
Next, you will sketch out your painting. This is just a brief sketch in which you will outline what you are going to paint. Mix together burnt umber and and ultramarine blue and thin the paint with some turpenoid before sketching out what you are going to paint.
Look at the image above for reference of how I sketched out my painting. It does not need to be exact, just enough for you to know where the basic parts of the painting are. You will be perfecting the drawing and placement of the different elements of your painting over the course of the painting process.
Mixing your first colors for the winter landscape
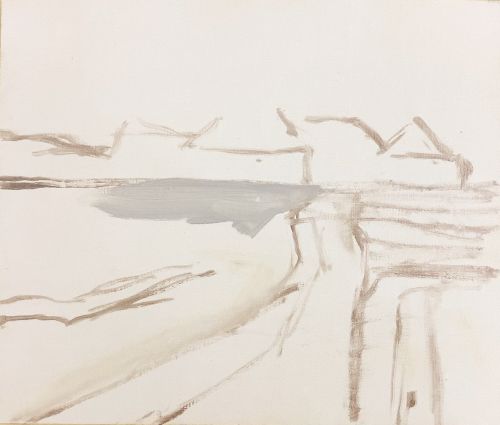
Mixing up a snow color
Once done sketching out the painting I move onto mixing up some ‘snow’ color! This is where painting a winter landscape can be tricky. When we think of snow we automatically think of the color white. However, painting snow is much more complex than taking the white from your palette and painting it directly onto your canvas.
You have to mix white with other colors to get darker shades of white. Pure white directly from the tube is used on very rare occasions only. Otherwise all of the whites seen in the winter landscape painting are mixed!
So, for the first white mixture that I applied to the canvas I took some lead white paint (you can also use titanium or zinc white) and mixed it with ultramarine blue and then mixed in some orange. The blue helps to darken and make the temperature cooler while the orange helps to mute the bluishness of the color.
Start to paint the center structure within the snowy landscape
Color mixing a darker color value
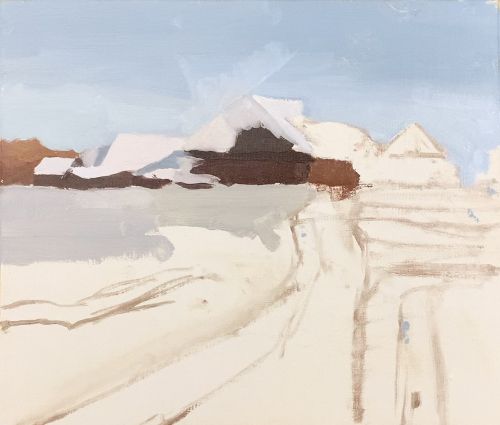
Since I laid down a light value color first I then proceed to mixing up a darker value color which will represent one of the houses. Having a darker value color next to my lighter white mixture helps me to know whether the white is too dark or too light.
To get the color of the house, I mixed together burnt umber with ultramarine blue, orange and white as well as some cadmium red and cadmium yellow.
Painting the roof of the first building structure
Mixing up a medium value color
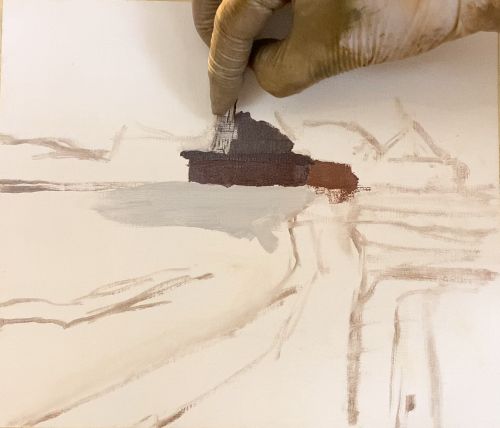
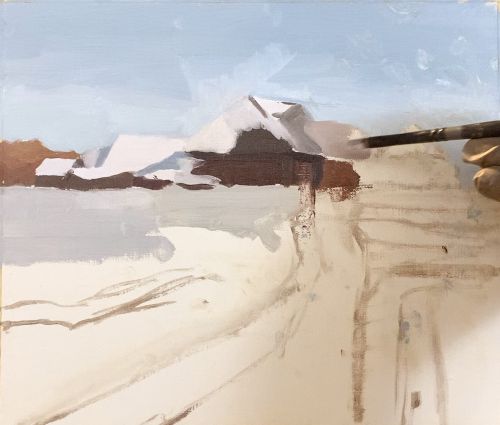
I proceed to add on to the structure in the center of our snowy landscape painting. First I add the dark line that is on the top part of the house, just before the roof starts. Then I mix up a lighter grey color to paint the roof with.
However, since part of the roof has snow on top of it I use my palette knife to scrape away the areas that have snow. I also grab my rag to wipe away any remaining paint. I do not want my white to get dirtied and mixed in with the darker colored paint.
How to paint snow on the roof
Mix up a lighter white color for the snowy roof
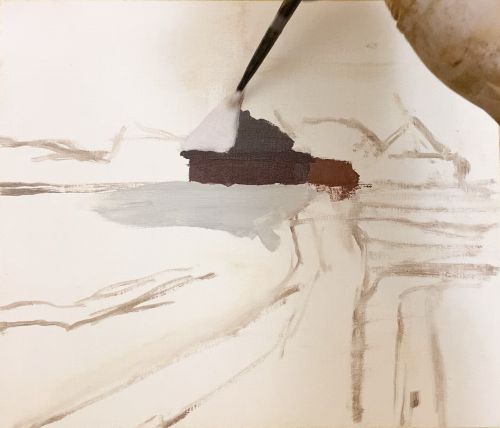
Now, I apply a mixed white color to the left side of the roof in the winter landscape painting. The white color represents snow covering part of the roof area. As you can see this white mixture is a little bit lighter than the previous white mixture I created.
To mix up this lighter white I simply mixed more white with my previous darker white mixture. I also mixed in a little bit of orange to warm up the white color a little bit.
Creating additional structures and snow covered roofs
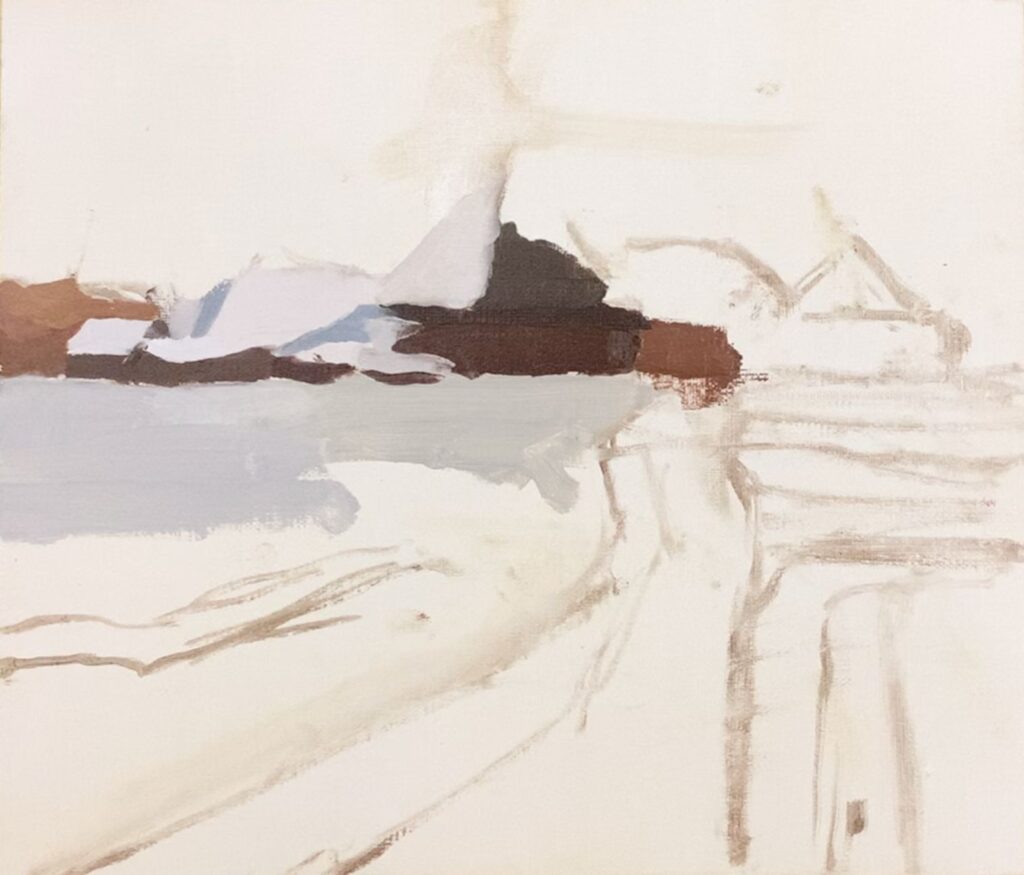
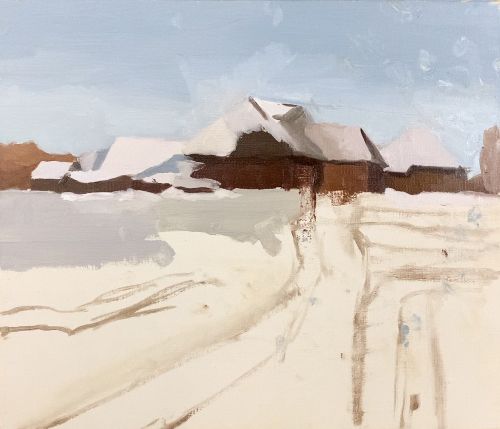
I proceed to paint the snow filled roofs of the rest of the buildings on the left side of the painting. The color of the roofs to the left is slightly lighter compared to the house in the center. So, I proceed to mix in just a little bit of white to my previously mixed white color.
In addition, I also paint the smaller buildings that are to the left part of the painting. I mixed burnt umber with ultramarine blue and white to lighten the color as well as make the color temperature cooler.
Also, I paint the two blue shadow areas on the roof on the far left and right. Shadow areas in snow are often bluish in color. We will get into this more later on in the article.
Painting the sky of the winter landscape painting
The scene here reflects a sunny winter landscape painting. Therefore, the sky is bright instead of a grey overcast sky that is often seen during winter time.
Focusing on tonal values in the sky
The part of the sky closest to the houses is lighter in value while the part of the sky further up to the top edge of the painting is darker in value. That is because the part of the sky closest to the horizon line is further away and therefore lighter in value. And the part of the sky closest to the viewer at the top part of the sky is darker in value.
To mix the color of the sky I mixed ultramarine blue with orange and white. In addition I also mixed cobalt blue and ultramarine blue with orange and white. The orange helps to mute the blue since the blue on its own mixed with white creates a color that is far too bright.
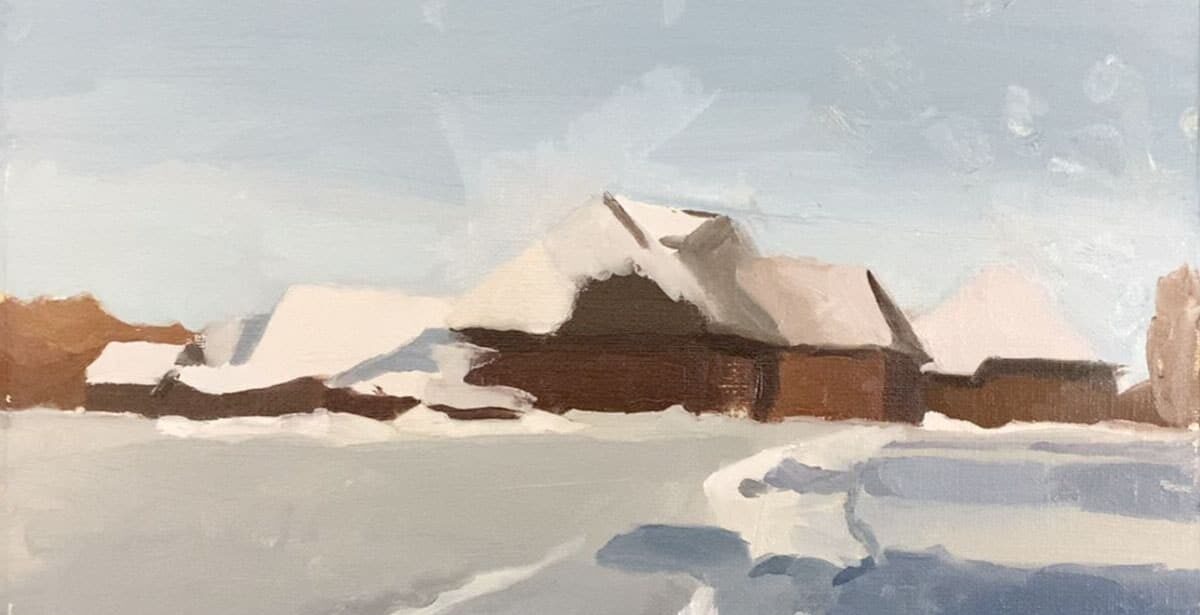
Return to painting roofs and additional building structures
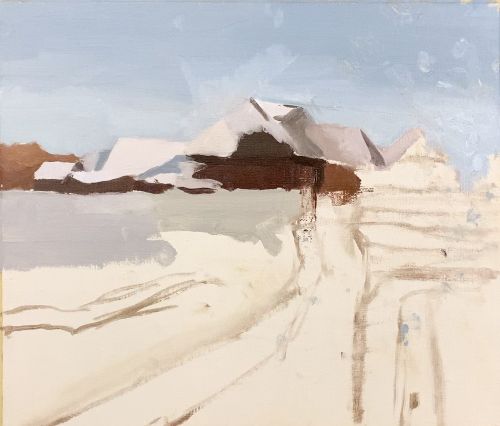
Next, I work on painting the roof of the large center building in the painting. I mix a slightly darker white for the area above the dark part of the roof that does not have snow on it. Then, I mix a shade of white that is lighter in value to lay down on the right side of the roof.
Notice the contrast between the darker shadow area of the roof to the left compared to the right lighter part of the roof. We can easily feel the dimension of the roof because of this contrast. The lighter roof area to the right is clearly a different plane than the roof area to the left. Mixing darker and lighter values helps to create that clarity.
Paint the shadow areas of the roof
I continue on to paint the shadow part of the roof that is on the right side. First I paint out the dormer that is on the roof by mixing up a light brown. A little bit of blue is mixed into my light brown to make it cooler in color temperature.
I also start painting the roof of the house that is directly to the right of the center house. The snow on the roof is a little darker and warmer in temperature. I mix in more orange to my white color to make it warmer as well as more blue to darken it. This roof is applied directly to the right of the center roof area.
Extending the roof line with additional shadows
I extend the roof area by painting the shadow area that is to the right and also starting a new roof area to the right as well. Notice that I made my white mixture slightly lighter for the right side of the roof and for the new roof area.
Of course I used a darker brown/ orange color for the thin shadow area that is on the roof. I took the same color I used for the shadow area on the main larger roof at the center of the painting but mixed a little more burnt umber and orange with it.
Finishing the smaller building of the winter landscape painting
Now that the roof is complete for the smaller building I now need to finish up the building part. I mix up a lighter brown color to complete painting the front part of the building. For this I mix up burnt umber, cadmium yellow, cadmium red, blue and white.
In addition, I mix up a bit of a darker color for the shadow area that forms the right side of the building. To get the slightly darker shadow color I mix burnt umber with my previous color mixture and also add in some ultramarine blue to the mixture.
Completing the buildings and painting clean, bright snow banks
The buildings in the landscape are now complete! I added in the building that is to the right of the last building I painted. The front part of the building is a very similar value to the shadow part of the building I just completed. So, I mixed in a little bit of cadmium red and yellow to get the color to be more accurate.
Next, I added in a shadow are that marks the beginning of the roof. The white I mixed up to represent the snow on the roof is lighter in value. So I mixed in more white and a little bit of orange (to make it warmer in temperature) to my previous white mixture.
Painting clean, bright snow
In addition to completing the buildings in the painting I also paint in some bright clean snow banks that are in front of the houses. To make sure that the snow appeared brighter than the snow surrounding it I mixed in more pure white than usual to my previous white mixture. I painted the snow banks on the left side of the painting as well as to the right. This is an example of an occasion where you can nearly use white straight from the tube!
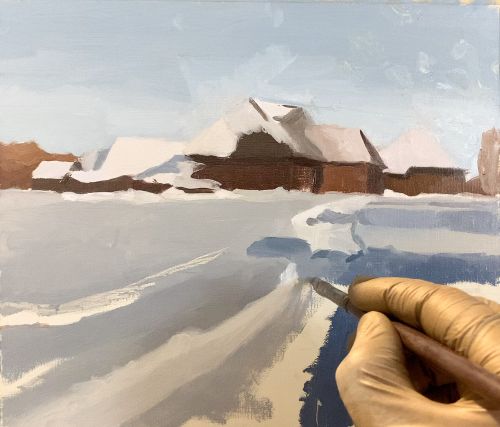
Painting a snowy pathway through the winter landscape

I work towards painting the pathway that starts towards the right side of the painting. To get the correct white color I mix some orange with blue and a little bit of yellow. I make sure that the color is lighter in value as well as warmer in temperature compared to the surrounding field of snow.
The snow area on the upper right side of the painting is also painted in. I leave open spaces between the two stripes of white for the shadow areas that will eventually be painted there.
Painting shadows in snow

Now we delve into painting shadows in snow! This might seem a little tricky as painting shadows with white is never very easy. But as you can see the shadows look very blue! This is because the shadow areas in snow are not lit by direct sunlight but by sunlight reflected off of the blue sky – hence the very blue shadow colors you see on a sunny snowy landscape.
So to mix the shadow areas I grab some ultramarine blue and (yes you guessed it) mix it with orange so I can mute the blue a little bit. The blue on its own would be far too bright and strong of a color as it would overpower the rest of the painting. For the areas of the shadow that need to be lighter in value I mix in a little bit of white – and the areas that need to be darker I mix in more of my darker value color.
Creating variations of different shades of snow colors
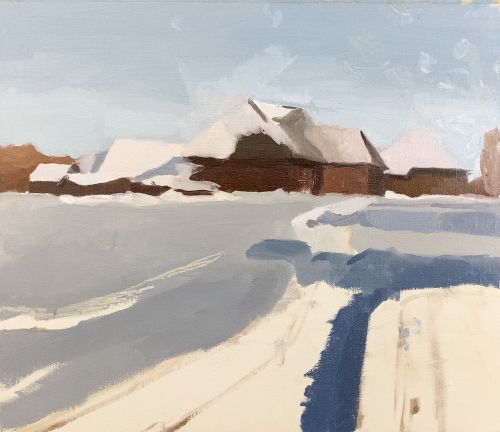
I mix up a darker snow color to paint the front section of the painting that is to the left of the pathway. In addition I also mix up a darker blue shadow color for the right center side of the painting. I mix in more blue with my previously mixed shadow color. However, I also mix in a good amount of orange to mute the blue color.
It is important to mute the blue as you do not want to have the blue be as bright as the blue that comes out of the tube. I also mix in a little bit of white to lighten up the color as it is too dark on its own otherwise.
Mixing lighter shades of snow color
Now I work on the inner edge of the pathway area. Since it is lighter in value I mix up a lighter snow color. I again mix white with blue and orange but also mix in a small amount of yellow for the lighter value color. Mixing in a little bit of yellow helps to make the white less of a purple-white. However as a contrast I leave the slightly darker white more purple that is also on the pathway edge.
Mixing a medium value snow color for the snowy landscape
I mix a medium value color that is in between the darker value snow color and the lighter value. This color will form the left side of the pathway leading up to the houses in the winter landscape.
Forming the snowy pathway in the winter landscape
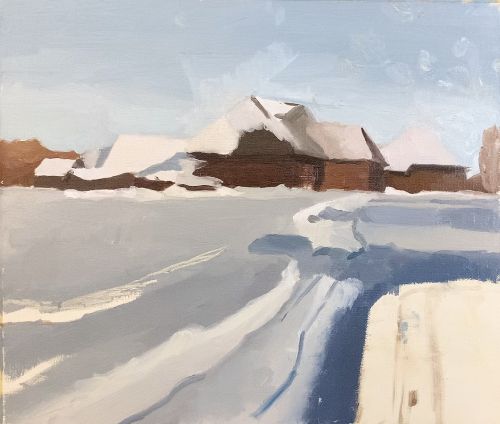
The pathway is now starting to take shape! I mixed up a cool light white color to paint next to the darker blue shadow area that is on the right side. In addition, I also created the track lines that are in the pathway. I painted in a long track line on the right side of the pathway and a short track line on the upper left side.
Adding edges and highlights to the winter landscape
Creating a small bank of snow

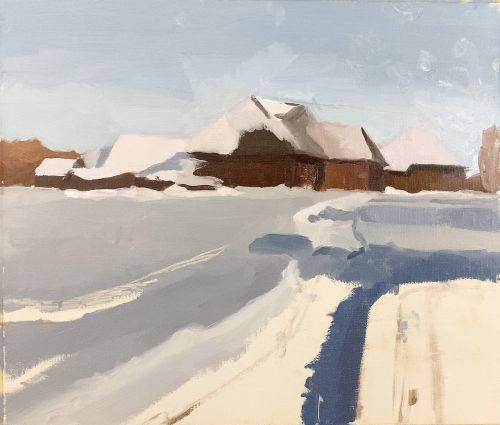
The left side of the painting above the pathway now has a bank of snow. I painted over the area with a lighter white mixture to create that lighter snow area that appears there.
I made sure though to use my palette knife and rag to scrape out any of the other more grayish white color that I would be painting over. It is better to wipe away the darker white than to try to paint over it with a lighter white. If you paint over a darker color with a lighter one it will darken and dilute the lighter color.
Painting edges in the landscape
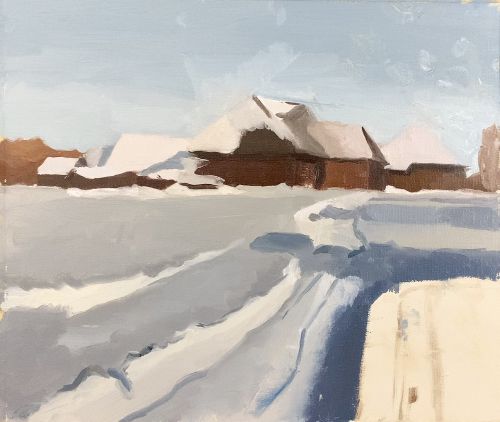
I add a few edges and highlights to both the upper edge of the pathway and also the top edge of the bank that is to the left. I mixed up a darker muted blue color to create the edges that are on the left side of the pathway. For the top part of the snowy bank I mixed a greyish color that is lighter.
The edge line/ highlight is not a thick dominant line but rather serves to simply make a distinction between one part of the painting and another.
Completing the winter landscape painting tutorial
Now, I get around to painting the right side of the foreground area. First I paint in the area with a light purplish white. Then I paint a slightly darker white mixture over it on the upper part where the dark shadow meets the right foreground area.
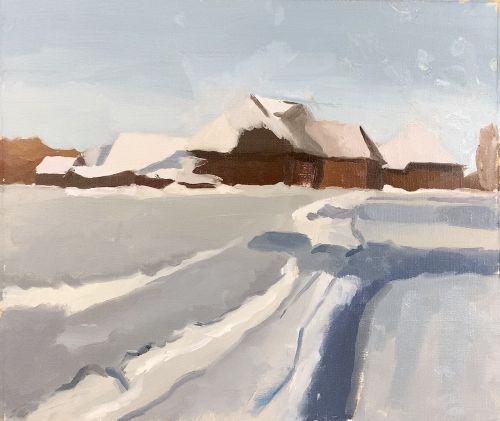
Painting in final elements of the snowy landscape
I add a few elements to finalize the winter landscape painting. First, I paint in tracks on the far right side of the painting. In addition, I also add some darker and lighter areas around those tracks to help give it dimension.
In addition, I darken the far right side of the road with a slightly darker purple color than before – this also helps to give the road more dimension.
How to mix shades of white used for this winter landscape painting tutorial
Painting a snowy winter landscape requires mixing a lot of subtle shades of white. You cannot just use the white that comes straight from the tube. A plain white is far too bright and you would never be able to create believable shadows and a sense of dimension in a snowy landscape without mixing it with other colors.
So, I will show you how to mix up different shades of white and create some variation and dimension in your winter landscape painting. However, this also applies to any painting that involves the color white!
Mixing a cool light white color
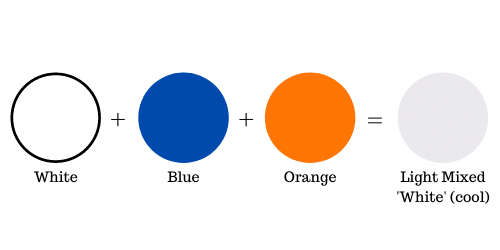
When mixing blue with white you get a light bright blue. However, when you then mix orange to the same color it mutes the blue to create a mixed white. Orange is the complementary color of blue (and vise versa) which is why mixing orange with blue will create a muted blue.
To create this mixed cool white you need to use very small amounts of blue and orange – if you use too much than the color will not be very white.
Mixing a darker cool white shade of color
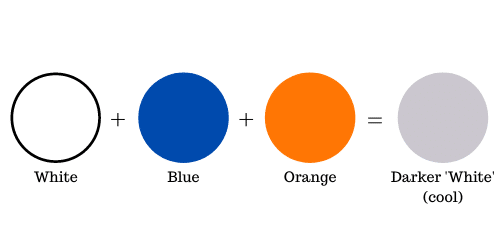
Here you can see a darker white mixture. It simply has more blue and orange mixed into it. You can always mix in more white to your white mixture if it becomes too dark. If your color is too light then you can mix in more blue and orange.
What to do if your white color turns purple?
Often when mixing a darker shade of white it can turn a little purple. When this happens simply mix in some yellow. Yellow is the complementary (opposite) color of purple and will help to mute the purple.
Mixing a warm light shade of white
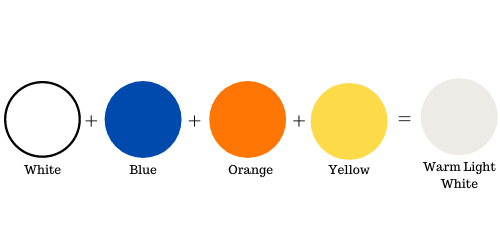
In the diagram above we can see a yellow mixed in with the orange and blue. When mixing just orange and blue with white the color often is cooler in temperature. When mixing yellow into the color as well it creates a warmer white.
Mixing a warm dark shade of white
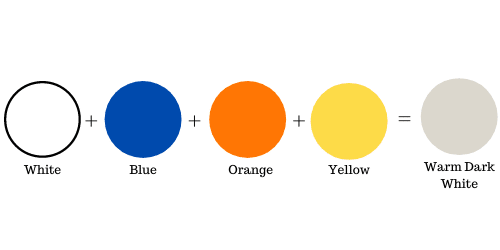
If you want a darker mixture simply mix in more blue and orange and a little more yellow. You can always mix in more white to lighten the color if it gets too dark.
Alternative colors to mix with white
You could also mix purple with white and then mute the purple/ white color with yellow to get a nice darker white. As already mentioned you can mix in more white to make the mixture lighter or make it darker by mixing in more purple/yellow.
If looking for a greenish white then mix green with white and mute the color with red. You can of course vary how much red to mix in to make it more or less muted.
Experimenting with different color mixtures
You can get a huge range of different types of whites by varying the amount of colors you mix into the white. Experiment with mixing and you will be surprised at the subtlety you can achieve in the different white mixtures. Above anything, it is important to have fun and enjoy the process!


8 thoughts on “Winter Landscape Painting Step by Step Tutorial”
Hi Elizabeth
Thank you for some invaluable tips . I studied art many years back and still battled with colour mixing . I think it stopped me Painting all these years .I’m dying to get going again and with the tips you have given . Do you do portrait classes at all ? Many thanks xx Alison
Hello Alison, Thank you for sharing! I am really glad to hear that the information was helpful. I do not do portrait classes specifically but I do some portrait painting lessons within a course that I open up at different times in the year.
Hi Elizabeth
Thank you so much for sharing landscape painting. i am practicing all your tutorials
they are so awesome. God Bless!
Hi Malini, You are welcome! Very happy to hear that you are enjoying my tutorials! Thank you 🙂
You have done it again another beautiful tutorial with many new insights, Thanks heaps. Ps just starting our hot weather in the last 2 weeks, painting snow might make me feel cooler.
Regards Warren.
You are so welcome Warren! I am glad that the tutorial is helpful. I can only imagine how warm it must be right now in Australia! haha I agree!- Painting snow probably would help.
Thanks a lot, dear Elizabeth. It’s a grate help for me:) Best regards from Slovakia.
You are very welcome! I am glad that it is helpful!