


How to paint the human eye, with its intricate design and layers of color and light, can be a challenge for any artist. However, with the right techniques and understanding of painting fundamentals, painting eyes can become much more manageable and rewarding as well.
This article will guide you through the process of how to paint an eye and reveal to you how painting eyes can be broken down into simple shapes and colors. We will also delve into the core principles of painting, revealing how these can be applied to create a captivating representation of the human eye. Whether you’re a beginner or experienced artist, get ready to discover new insights and techniques to enhance your artistry.
Setting up how to paint an eye
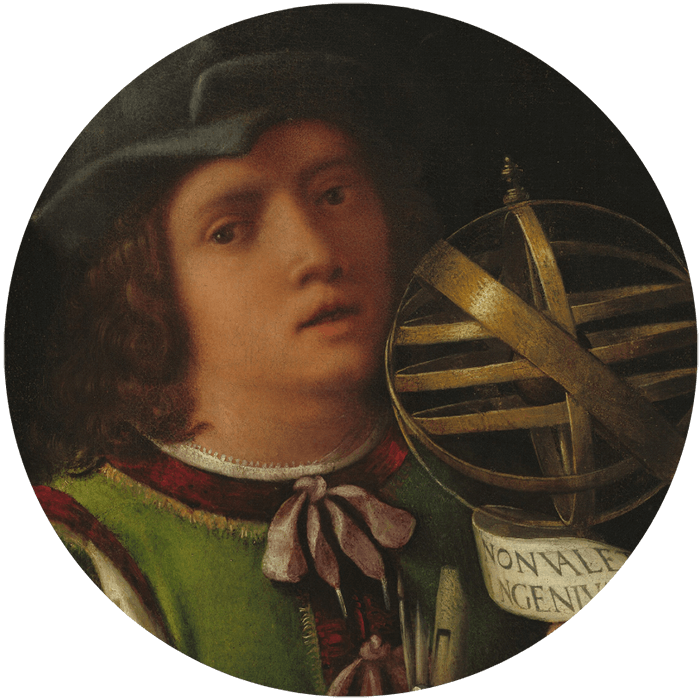
In order to demonstrate how to paint eyes effectively, I created a painting study off of Giorgione’s painting Giovanni Borgherini and His Tutor. However, for our purpose we will be narrowing our focus to capturing a single eye in the greater work.
So, let’s get started on the painting with the first step to setting up our composition—creating a painting sketch!
Sketch out the basic shape of your eye painting
Next, lightly sketch out your painting and map out the basic shape of the eye you are painting. Don’t just capture the eyeball, but also some of the immediate surrounding areas such as the eyebrow and part of the nose bridge.
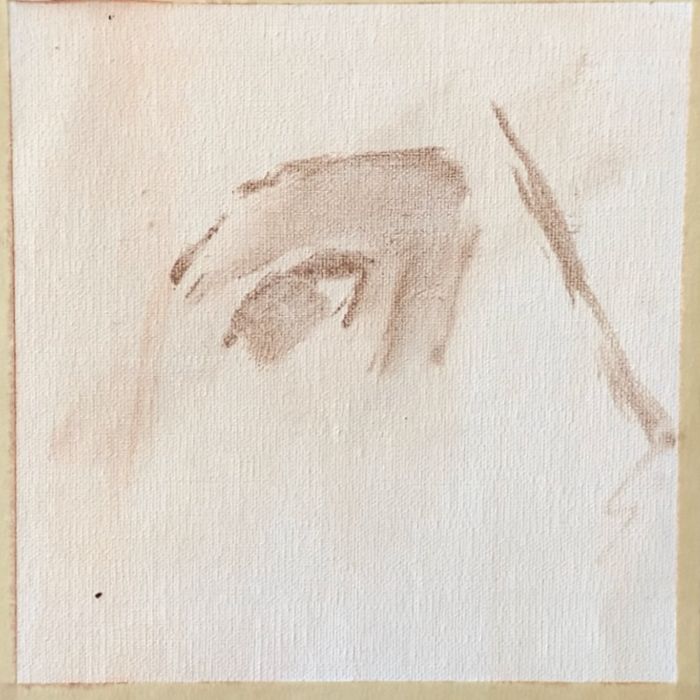
In the image above you can see that the sketch just captures the very basic elements of the eye. It is meant to help you determine where to place the eye on your painting surface.
Paint the eye’s first three color spots
As you get started with color, first ask yourself what value range is the eye your painting in – is it darker or lighter? What are the colors like–are they warmer or cooler in temperature? The answers to these questions will inform you of the colors you need to mix as you apply your first three colors and beyond!
So, after completing the painting sketch, I move forward with mixing my first spots of color.
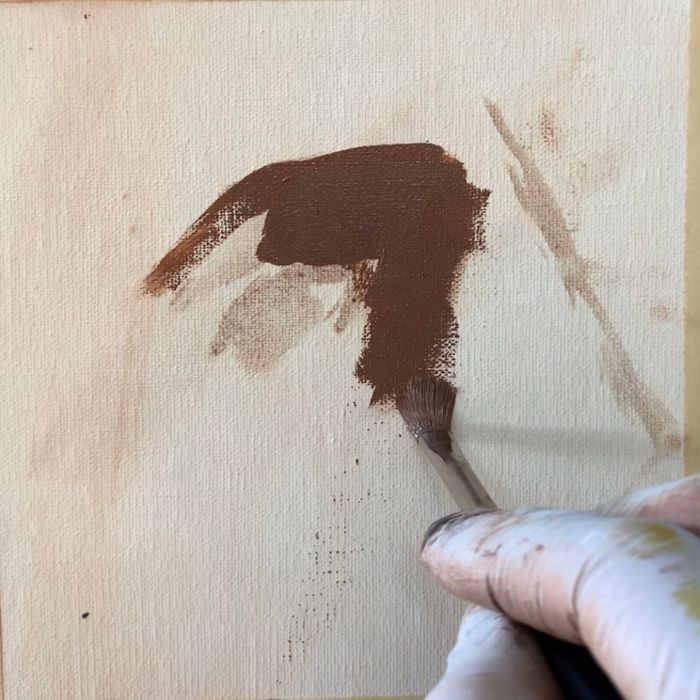
Now, there is not a “correct” area to apply your first spot of color. However, it is important to find an area that has an intersection of a light, medium and dark values. This will become more clear as you follow the tutorial. In the image above, you can see I first paint a dark value color spot to the right of the eye.
Focus-in on the surrounding values
When you paint an eye it is important to paint the colors and values that surround the actual eye. This helps for it to look and feel more natural and fit into the context and environment. If you don’t paint them together then they won’t look like they belong together. You want to avoid making it look like you pasted an eyeball on your painting.
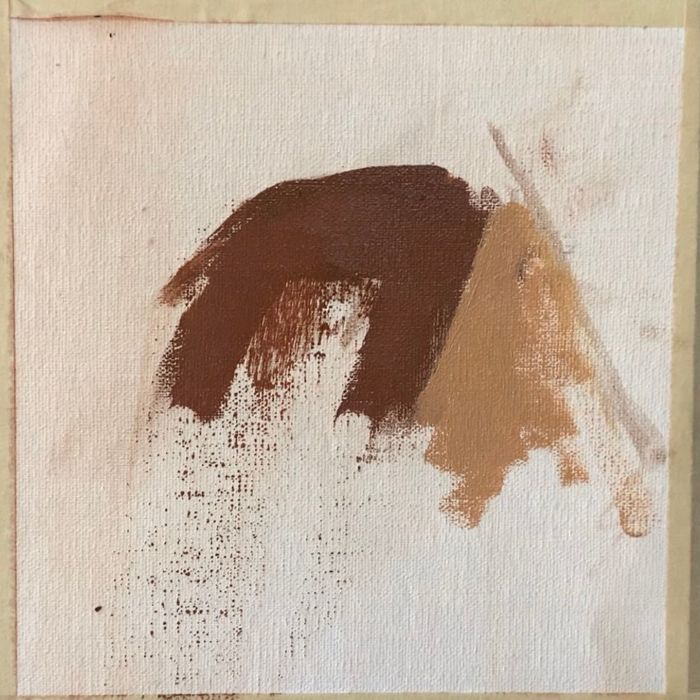
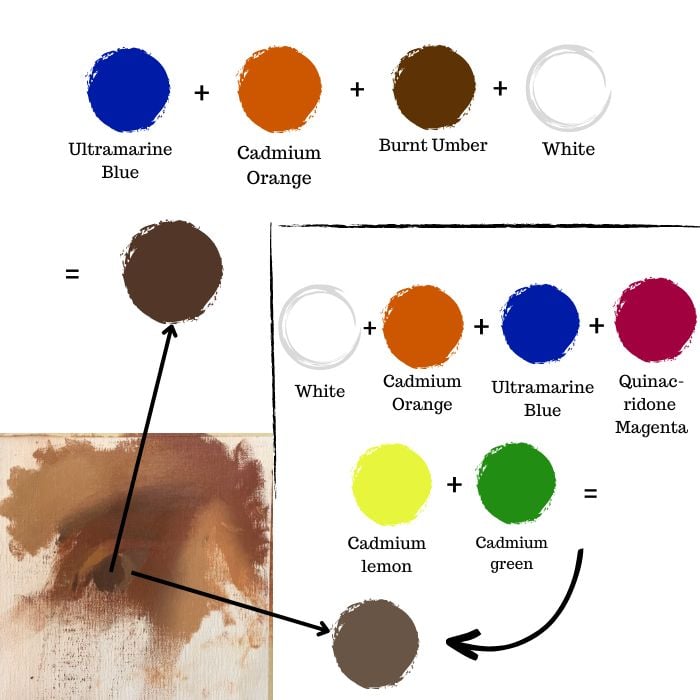
In the image below you can see that I paint a light value color right next to my first color spot. Right now, the painting looks just looks like shapes of brown and beige colors. Don’t worry about whether your painting looks like anything in the beginning. This is not what is important. It is most important to put all your effort and energy into the values and colors you mix up. This is what will make your painting work and come together.
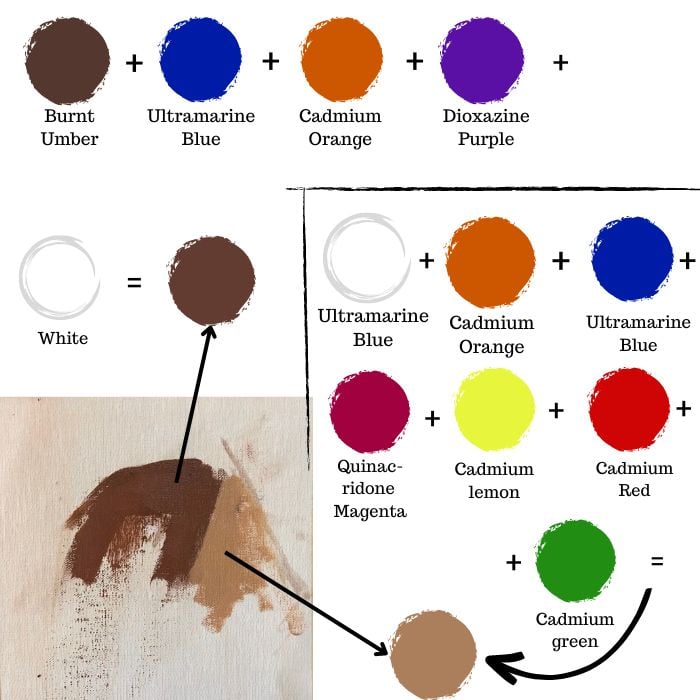
In the diagram below you can see how I mixed up the colors for both the lighter value as well as the darker value color. Mixing skin tone colors can involve mixing in quite a few different colors. Especially as you are often dealing with subtle shifts in color temperature.
How to use light and edges in your painting of an eye
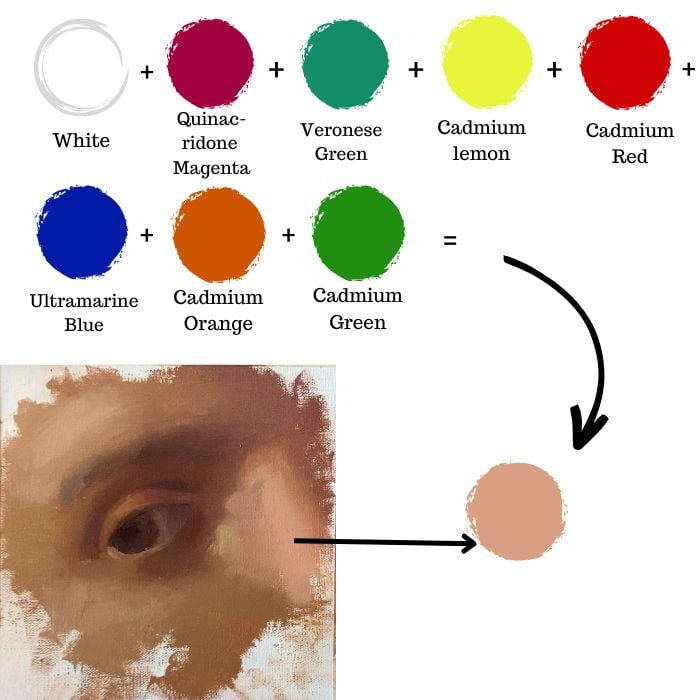
In the image below we have our first three value color spots together – light medium and dark. The painting now has a sense of light! It doesn’t look like an eye yet, but this is not important in the beginning stage of a painting. What is crucial is to achieve good color relationships and a strong sense of light. This serves as a solid foundation to build upon.
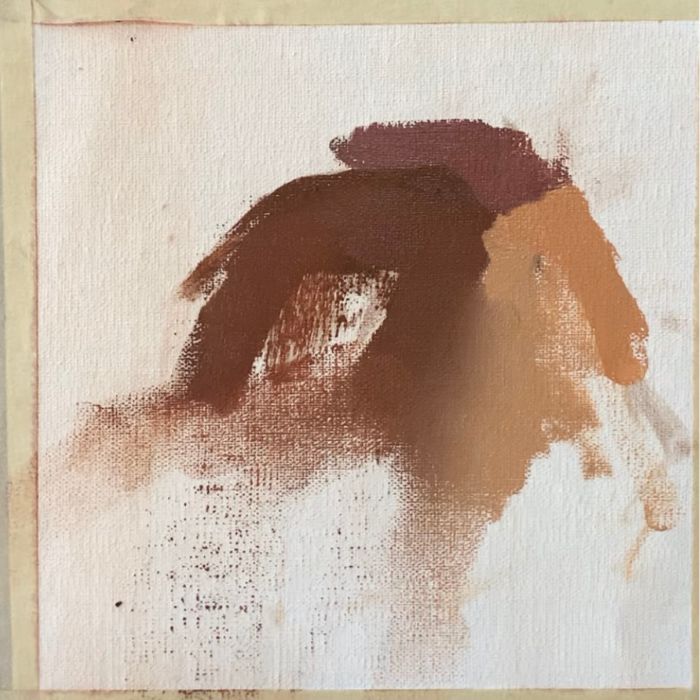
It is also important to start to pay attention to soft (and hard) edges that are around the eye. In the image above you can see how there are soft edges in between the dark and light value color. You can use your finger or palette knife to reinforce soft edges. Most effectively though, you want soft edges to develop from two similar value colors placed next to one another.
Painting the eye’s eyelid, iris and lower eyelid
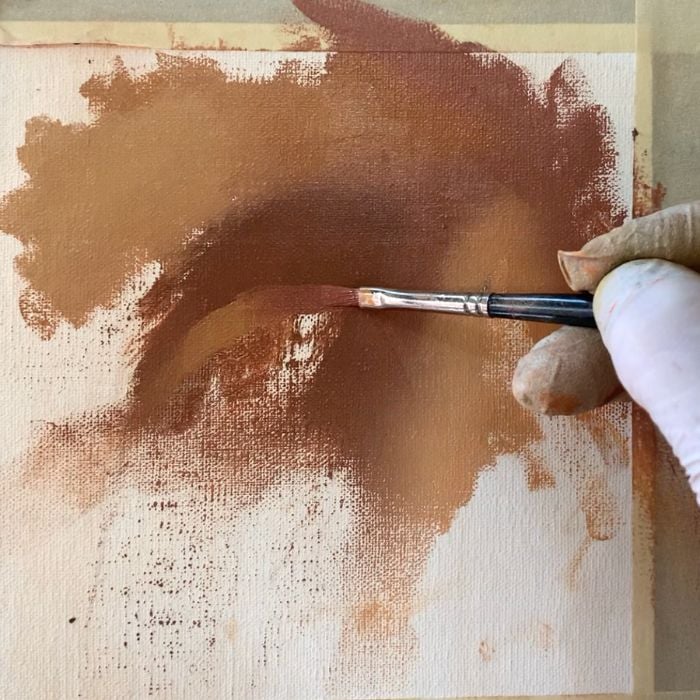
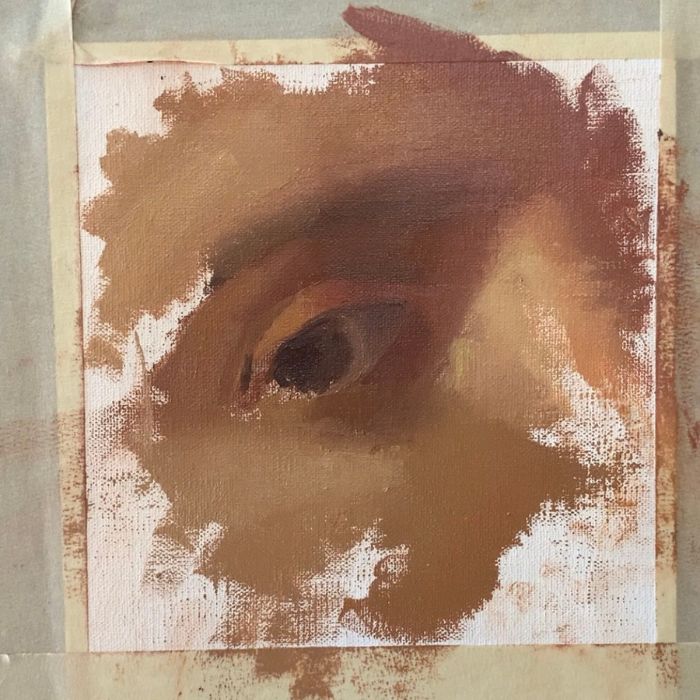
By this point we have laid a solid foundation to start painting an eye. Here I paint part of the upper eyelid. You can see how I pay attention to the lighter and darker color spots on the eyelid.
Breaking down the spots of color further
When painting an eye, always work on breaking it down into spots of color. This simplifies the process enormously, and you end up with a much more convincing painting as a result. In the image below you can see the initial stage of the iris and whites of the eye (sclera).
At this stage, the iris is just one single spot of color. It is important to keep it simple! The sclera is broken down into two spots of color.
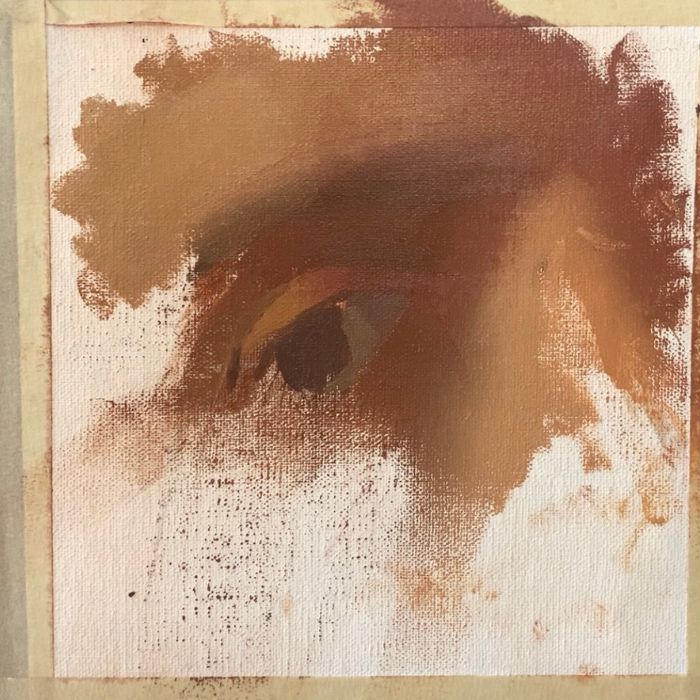
Though we usually think of the white part of the eye as rather light in value, you can see here that it is actually quite dark! This is because it is in a darker shadow area and isn’t that much different in value than the shadows that are next to it. Because we painted the surrounding environment, we are able to to make the eye and area around the eye fit together.
In the image above you can see just how close together in both color and value the iris and white of the eye (sclera) are. The colors may look very similar when seeing them separate from the painting. However, when you see them together in the context of the painting – their subtlety makes a world of difference.
Pay attention to the highlights while painting eyes
As you near the end of a painting, you can start to pay more attention to the highlight areas. This means to pull out the lighter value sections that are present in your subject. In the image below you can see the bright yellow color spot to the right of the eye close to the nose area.
Whether your highlight is on the eye itself or surrounding the eye, it is still important to make sure that it fits into the context of the painting. In other words, restrain yourself from making it look too bright as otherwise it will look like a pasted bright color and not something that belongs in the painting.
Completing your painting of an eye (checklist ✔)
When completing an eye painting it is important to continue to focus on the fundamentals. It is most helpful is to ask yourself questions to know whether your work is complete or not;
- Does the eye feel like it is sitting behind the eyebrow? It is important for there to be a believable sense of space. The degree of difference in depth between where an eyebrow is and an eye might seem trivial, but it makes a big difference in a painting. The devil is in the details.
- Does your eye painting have a clear sense of light? You want to keep your work simple and be able to discern a clear sense of light right from the beginning. Simplifying values is key.
- Is there good color harmony? Do the colors in the eye painting flow well together? Or do some colors stand out too much and distract from the rest of the painting?
- Do the color temperatures work? Color temperature plays an important role in portrait painting and when painting eyes. Depending on what type of light you are painting with, it is important for your specular highlights to be extremely cool while your warm core shadows are warm.

With practice, you’ll be creating realistic eyes in no time. But remember, don’t focus on the eye itself. Focus on seeing the eyes as abstract shapes, forms and colors. If you can capture the subtle shifts in values and intricate details, you’ll be able to paint any eye that you see. Keep at it, and have fun experimenting with different techniques. You’ll be amazed at how much you can improve your eye painting skills with practice!


2 thoughts on “How to Paint an Eye: Fundamentals for Painting Realistic Eyes”
thank you so much for all the details of how to paint you share with us : they are very clear and stimulating whatever the difficulty of the goal;
You are so welcome! I am glad this is helpful – thank you so much for sharing.