Learning how to paint light reflections in glass, water or shiny objects can be a little scary! Mostly, because it looks complicated and confusing… Especially when you have no idea how to make what you are painting, look just as shiny and reflective as how you are seeing it in real life.
However, it doesn’t need to be that way!
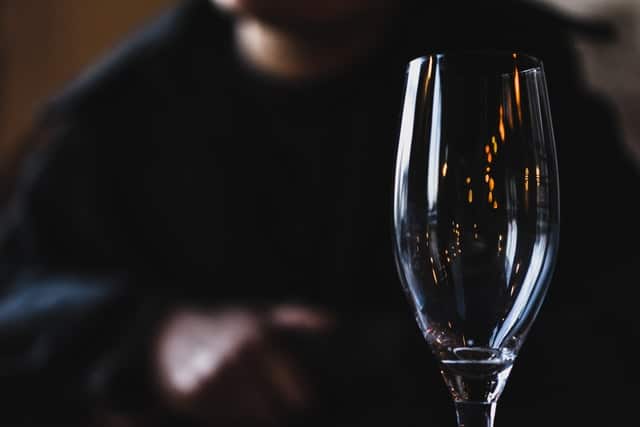
Creating reflected light in art, is all about learning to see the shapes of light and dark and then painting them. So let’s get started!
Reflection painting reference (and composition breakdown)
In this reflection painting tutorial, I will show you how to paint light reflections, via a painting demonstration I created from a study off a painting by Vermeer.
Composition for reflection painting
For the composition of my painting I chose to focus specifically on how to paint the light reflected off of the glass (found within the painting).
Vermeer’s painting is a perfect example of how simple light reflections and shiny objects can appear in real life.
How to start your (glass reflection) painting
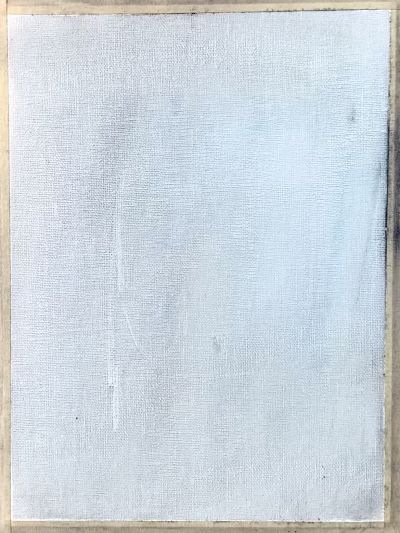
For this light reflection painting study, I start with a toned 5 x 7 in. blank canvas. If you’re not sure what this is, you can take a look at how to create your own toned painting surface (aka imprimatura) before starting.
Sketch out your glass painting composition
Next I create a painting sketch of the basic composition of my light reflection painting study. This is not meant to be an exact drawing. Rather just a general idea for me to know where things are placed.

I can fix and adjust the placement of things during the process of creating this sketch for my painting.
Creating the first values for your glass painting
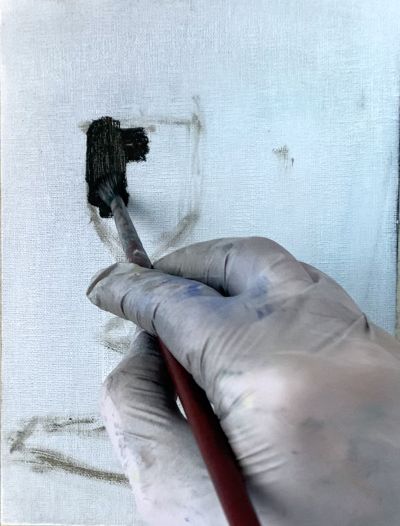
With my painting sketch in place, I am ready to mix together my first color! I decide to start with the upper left side of the cup. So I mix together ultramarine blue with cadmium orange and some burnt umber to get a dark, warm color.

Then, I proceed to mix the even darker background color that the cup is directly next to. For this dark cool color I mix up ultramarine blue and orange as well as pthalo green and alizarin crimson. These colors together help to create a cool and dark color.
Since this is a semi transparent glass cup the colors and values will be very similar to the background since the background is showing through the glass.
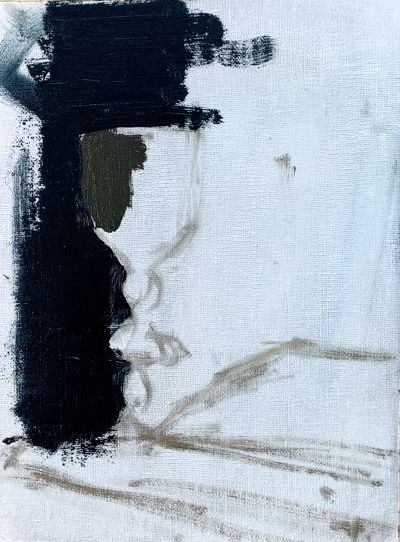
I continue to extend this same color towards the bottom of the base of the cup. All the while I’m careful to not paint over the stem of the glass. However, even if you did paint over any lines you could just as easily wipe away the paint with a palette knife or rag! 🙂
How to paint light using empty space
Now, I mix up a third color that is on the middle part of the cup! Notice how I leave a blank space between the far left color of the cup and the new color on the middle part of the cup. This blank space is where the light reflection on the cup will be!

For the color on the middle part of the cup I take the same color I mixed up for the far left part of the cup and mix in some more ultramarine blue, cadmium orange, and a small amount of cadmium yellow and cadmium red.
Mixing colors for the reflections in the glass painting

Now I paint in the highlight reflection that is on the middle left part of the cup! It is a much lighter value color than the other colors and therefore stands out much more as a result.
To get the light value yellowish color I mix cadmium yellow with provence violet bluish (you could just use a purple! 🙂 and some white. There is also a thin strip of a darker color that is directly to the left of the light highlight. To mix up that color I also use cadmium yellow, purple but also mixed in some ultramarine blue and orange to darken the color.

I move towards the bottom of the glass cup where I mix up a slightly lighter value color, but the change is subtle! Due to the minute change I am able to use my previously mixed colors and just mix in small amounts of cadmium yellow, alizarin crimson and a small bit of white.
Use subtle variations to create reflected light in art
I paint a slightly lighter value color that is on the far right of the cup. If you look closely you will see it! It is also a little color than the color that is next to.

The base part of the cup is a similar value to the top part of the cup just a little bit more red. Therefore, I use the same color I mix up for the top part of the cup but add a small amount of red to it since the color is a little reddish.
When painting reflections, the subtle variations in the color help to make the glass look more realistic and transparent. Again, since the glass is semi transparent the colors of the glass are very similar to the background – which is why there are just subtle variations and color changes.
How to paint light in the stem of the glass
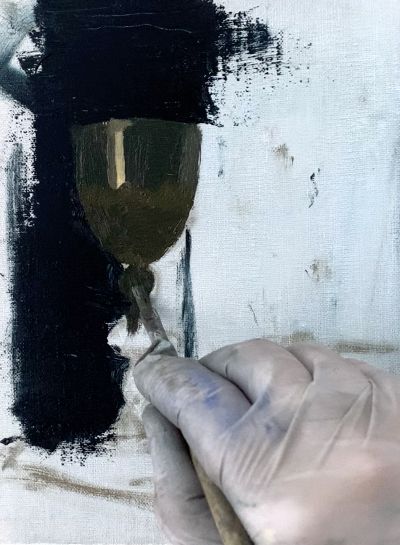
Next, I work on painting the stem of the glass by using a similar color to the base of the cup.

Once the stem of the glass cup is complete I proceed to paint the background. I am careful to not paint over the stem part of the cup by applying the dark background color right up to the edge.
Filling in the background for the glass painting

Next I paint the dark background color on the right side of the painting. The color is a similar value to the dark color on the left but it is warmer in temperature.
Therefore to mixup the color I use ultramarine blue, orange, alizarin crimson, pthalo green and burnt umber. I apply this color mixture for most of the right side of the painting.
How to paint shine on the glass with highlights
Now is the moment we have all been waiting for!! Learning how to paint light highlights on the cup! The light highlights are what give us the light reflections we perceive and make the glass look shiny.

To create the shiny painting reflections, I mix together a very light value using cadmium yellow, white, alizarin crimson and white. Then I apply this light value with thick amounts of paint since I want it to be very visible. The paint is applied cleanly so that it will show up clearly and not get smudged.
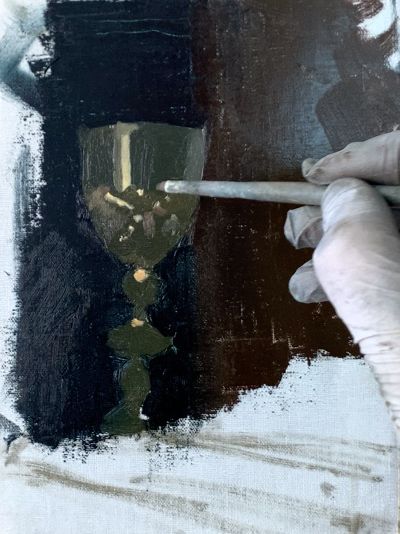
I continue to add more light highlights to the cup – though they vary in brightness and temperature – some are a little lighter and brighter than other areas. It is good to have this variation when studying how to paint light, as your painting will look flat otherwise.

How to paint the other elements in the reflection painting

Painting the book at the base of the glass
Now we will work on painting the book that is at the base of the painting. For that we mix up a dark grey color by mixing ultramarine blue, orange and white together.

Here I use my palette knife to scrape away some of the brown paint on the lower right side to clean up the area. As I don’t want any of the brown color to mix with the new paint I will apply to that area.

Working in muted colors
With the brown paint wiped away I can now apply a muted white color. To get a muted white color I mix orange and ultramarine blue with white. If I were to just apply plain white it would be far too bright in value! So, that is why I need to mute my white paint a little bit.

I then proceed to apply a light grey color to the middle of the newly painted white page. This light grey color signifies the column of writing that is on the page.

There are some subtle changes in value on the book page and therefore mix up some lighter grey colors to paint over the area. To get the lighter grey colors I worked with ultramarine blue, orange and white a lot. the blue mutes the orange and helps to create a darker greyish white color.
How to finish the glass reflection painting study

One of the last things I add to the painting is a dark color beneath the book. This dark color signifies the surface that the book is laying on top of. For this color I mix pthalo green and Alizarin crimson together – along with a small amount of white and some ultramarine blue.
To finish up the study I paint in a dark grey color for the cover of the book. I also paint in the edges that still had some white from the canvas peeking through.

The painting techniques Vermeer uses here are strikingly simple! Now your job is to apply these lessons to your own work. So, when you see a reflection on a glass just think of it as a simple shape of light value. You can even refer to Vermeer’s painting (or any other artist for that matter) for guidance!
What’s next? Learn how to make better use of colors by learning how to mix oil paint! Or dive deeper into how to create clear tonal values in your artwork.


4 thoughts on “How to Paint Light and Reflection in Glass Painting Tutorial”
Thank you for another excellent teaching lesson. I have never used some of the
color combinations you used so that will be exciting. A goal of mine
is to paint the zillions of light reflections that are present in the sea and
sun reflectons . How to get such small light impressions is a mystery and
I will try to see what I can do.
You are really so outstanding a artist
You are very welcome! Thank you for your kind words. Glad that it is helpful. A painting capturing all of the light reflections in the sea would be spectacular! I am sure you can do it!
Excellent demonstration and most painters love to paint shines on armour or glass using a very dark background, it’s the contrast that makes the shine lift. It’s much harder to paint a shiny pot or glass on a sunlit tablecloth without the aid of a dark contrasting colour. Have you any guidance here?
Glad you enjoyed the demonstration! Yes I agree it is much easier to make something look shiny when you have that strong contrast of something very dark against something very light. When it comes to making something look shiny on sunlit tablecloth it is trickier! But definitely possible. One would apply the same methods, they would just be more subtle. So, if you had a shiny metal pot sitting on a sunny tablecloth you would make sure that the shiny light reflection on the pot is the lightest part of the painting – make certain that everything else is darker than it even if it is just a little bit darker. This will really help for it to stand out and for that light reflection to look real. Hope that helps!